Where Did The Japanese Computers Go?

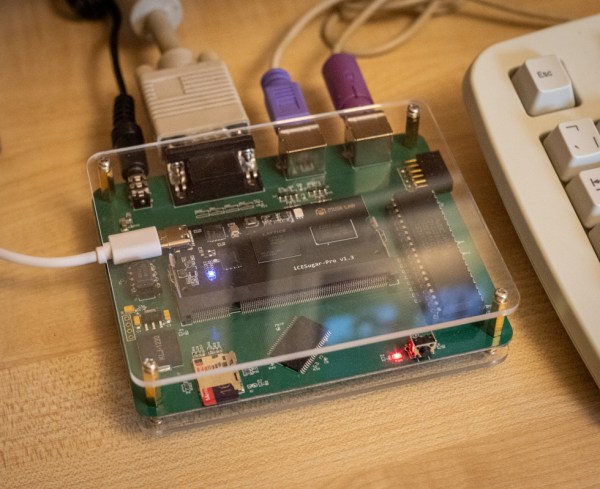
If you are a retrocomputer person, at least in North America and Europe, you probably only have a hazy idea of what computers were in the Japanese market at the time we were all buying MSDOS-based computers. You may have heard of PC-98, but there were many Japanese-only computers out there, and a recent post by [Misty De Meo] asks the question: What happened to the Japanese computers?

To answer that question, you need a history lesson on PC-98 (NEC), FM Towns (Fujitsu), and the X68000 (Sharp). The PC-98 was originally a text-only MSDOS-based computer. But eventually, Microsoft and NEC ported Windows to the machine.

The FM Towns had its own GUI operating system. However, it too had a Windows port and the machine became just another Windows platform. The X68000, as you may well have guessed, used a 68000 CPU. Arguably, this was a great choice at the time. However, history shows that it didn’t work out, and when Sharp began making x86-based Windows machines — and, of course, they did — there was no migration path.

[Misty] makes an interesting point. While we often think of software like Microsoft Office as driving Windows adoption, that wasn’t the case in Japan. It turns out that multitasking was the key feature since Office, at the time, wasn’t very friendly to the native language.

So where did the Japanese computers go? The answer for two of them is: nowhere. They just morphed into commodity Windows computers. The 68000 was the exception — it just withered away.

Japanese pocket computers were common at one time and have an interesting backstory. Japanese can be a challenge for input but, of course, hackers are up to the challenge.

There’s No Lower Spec Linux Machine Than This One

It’s not uncommon for a new distro version to come out, and a grudging admission that maybe a faster laptop is on the cards. Perhaps after seeing this project though, you’ll never again complain about that two-generations-ago 64-bit multi-core behemoth, because [Dimitri Grinberg] — who else! — has succeeded in booting an up-to-date Linux on the real most basic of processors. We’re not talking about 386s, ATmegas, or 6502s, instead he’s gone right back to the beginning. The Intel 4004 was the first commercially available microprocessor back in 1971, and now it can run Linux.

So, given the 4004’s very limited architecture and 4-bit bus, how can it perform this impossible feat? As you might expect, the kernel isn’t being compiled to run natively on such ancient hardware. Instead he’s achieved the equally impossible-sounding task of writing a MIPS emulator for the venerable silicon, and paring back the emulated hardware to the extent that it remains capable given the limitations of the 1970s support chips in interfacing to the more recent parts such as RAM for the MIPS, an SD card, and a VFD display. The result is shown in the video below the break, and even though it’s sped up it’s clear that this is not a quick machine by any means.

We’d recommend the article as a good read even if you’ll never put Linux on a 4004, because of its detailed description of the architecture. Meanwhile we’ve had a few 4004 stories over the years, and this one’s not even the first time we’ve seen it emulate something else.

Continue reading “There’s No Lower Spec Linux Machine Than This One”

Design And The Golden Rule

You often learn the golden rule or some variation of it as early as kindergarten. There are several ways to phrase it, but you most often hear: “Do unto others as you would have them do unto you.” While that’s catchy, it is really an aphorism that encourages us to consider the viewpoints of others. As people who design things, this can be tricky. Sometimes, what you want isn’t necessarily what most people want, and — conversely — you might not appreciate what most people want or need.

EDIT/1000

HP/1000 CC-BY-SA-3.0 by [Autopilot]
I learned this lesson many years ago when I used to babysit a few HP/1000 minicomputers. Minicomputer sounds grand, but, honestly, a Raspberry Pi of any sort would put the old HP to shame. Like a lot of computers in those days, it had a text editor that was arcane even by the standards of vi or emacs. EDIT/1000 couldn’t be sure you weren’t using a printing terminal, and the commands reflect that.

For example, printing a few lines around the current line requires the command: “/-2,L,5” which isn’t that hard, I suppose. To delete all lines that contain a percent sign, “1$ D/%/A/” assuming you don’t want to be asked about each deletion.

Sure, sure. As a Hackaday reader, you don’t find this hard to puzzle out or remember. But back in the 1980s, a bunch of physicists and chemical engineers had little patience for stuff like that. However, the editor had a trick up its sleeve.

Continue reading “Design And The Golden Rule”

PC Floppy Copy Protection: Electronic Arts Interlock

Continuing the series on floppy copy protection, [GloriousCow] examines Electronic Arts’ Interlock system. This was used from 1984 to 1987 for at least fourteen titles released on both 5.25″ and 3.5″ floppies. Although not officially advertised, in the duplication mark sector the string ELECTRONIC ARTS IBM INTERLOCK. appears, hence the name. Compared to other copy protection systems like Softguard Superlok this Interlock protection poses a number of somewhat extreme measures to enforce the copy protection.

The disk surface of Side #0 of the 1984 mystery-adventure title, Murder on the Zinderneuf (Credit: GloriousCow)

Other than the typical issues that come with copying so-called ‘booter’ floppies that do not use DOS but boot directly into the game, the protection track with Interlock is rather easy to spot, as seen on the right. It’s the track that lights up like a Christmas tree with meta data, consisting out of non-consecutive sector IDs. Of note is the use of ‘deleted’ sector data marks (DDAM), which is a rarity in normal usage. Along with the other peculiarities of this track it requires an exact query-response from the disk to be accepted as genuine, including timings. This meant that trying to boot a straight dump of the magnetic surface and trying to run it in an emulated system failed to work.

Reverse-engineering Interlock starts with the stage 0 bootloader from the first sector, which actually patches the End-of-Track (EOT) table parameter to make the ridiculous number of sectors on the special track work. The bootloader then loads a logo, which is the last thing you’ll see if your copy is imperfect.

Decrypting the second stage bootloader required a bit of disassembly and reverse-engineering, which uncovered some measures against crackers. While the actual process of reverse-engineering and the uncovered details of Interlock are far too complex to summarize here, after many hours and the final victory over the handling of an intentional bad CRC the target game (Murder on the Zinderneuf from 1984) finally loaded in the emulator.

After confirming the process with a few other titles, it seems that Interlock is mostly broken, with the DOS-based title ArcticFox (1987) the last hurdle to clear. We just hope that [GloriousCow] is safe at this point from EA’s tame lawyers.

Interested in more copy protection deep dives? Check out the work [GloriousCow] has already done on investigating Softguard’s Superlok and Formaster’s Copy-Lock.

No Z80? No Problem!

Earlier this year Zilog stopped production of the classic 40-pin DIP Z80 microprocessor, a move that brought a tear to the eye of retro computing enthusiasts everywhere. This chip had a huge influence on both desktop and embedded computing that lingers to this day, but it’s fair to say that the market for it has dwindled. If you have a retrocomputer then, what’s to be done? If you’re [Dean Netherton], you create a processor card for the popular RC2014 retrocomputer backplane, carrying the eZ80, a successor chip that’s still in production.

The eZ80 can be thought of as a Z80 system-on-chip, with microcontroller-style peripherals, RAM, and Flash memory on board. It’s much faster than the original and can address a relatively huge 16MB of memory. For this board, he’s put the chip on a processor daughterboard that plugs into a CPU card with a set of latches to drive the slower RC2014 bus. We can’t help drawing analogies with some of the 16-bit upgrades to 8-bit platforms back in the day, which used similar tactics.

So this won’t save the Z80, but it might well give a new dimension to Z80 hacking. Meanwhile, we’re sure there remain enough of the 40-pin chips out there to keep hackers going for many years to come if you prefer the original. Meanwhile, read our coverage of the end-of-life announcement, even roll your own silicon if you want., or learn about the man who started it all, Federico Faggin.

Usagi Electric’s Paper Tape Reader Is Ready To Hop With The Tube Computer

After previously working out a suitable approach to create a period-correct paper tape reader for his tube-based, MC14500B processor-inspired computer, [David Lovett] over at the Usagi Electric farm is back with a video on how he made a working tape reader.

The assembled paper tape reader as seen from the front with tape inserted. (Credit: David Lovett, Usage Electric, YouTube)

The tape reader’s purpose is to feed data into the tube-based computer, which for this computer system with its lack of storage memory means that the instructions are fed into the system directly, with the tape also providing the clock signal with a constant row of holes in the tape.

Starting the tape reader build, [David] opted to mill the structural part out of aluminum, which is where a lot of machining relearning takes place. Ultimately he got the parts machined to the paper design specs, with v-grooves for the photodiodes to fit into and a piece to clamp them down. On top of this is placed a part with holes that line up with the photodiodes.

Another alignment piece is added to hold the tape down on the reader while letting light through onto the tape via a slot. After a test assembly [David] was dismayed that due to tolerance issues he cracked two photodiodes within the v-groove clamp, which was a hard lesson with these expensive (and rare) photodiodes.

Although tolerances were somewhat off, [David] is confident that this aluminum machined reader will work once he has it mounted up. Feeding the tape is a problem that is still to be solved.  [David] is looking for ideas and suggestions for a good approach within the limitations that he’s working with. At the video’s end, he mentions learning FreeCAD and 3D printing parts in the future.  That would probably not be period-correct in this situation, but might be something he could get away with for some applications within the retrocomputing space.

We covered the first video and the thought process behind picking small (1.8 mm diameter) photodiodes as a period-correct tape hole sensor for a 1950s-era computing system, like the 1950s Bendix G-15 that [David] is currently restoring.

Continue reading “Usagi Electric’s Paper Tape Reader Is Ready To Hop With The Tube Computer”

Exploring TapTo NFC Integration On The MiSTer

[Ken] from the YouTube channel What’s Ken Making is back with another MiSTer video detailing the TapTo project and its integration into MiSTer. MiSTer, as some may recall, is a set of FPGA images and a supporting ecosystem for the Terasic DE10-Nano FPGA board, which hosts the very capable Altera Cyclone V FPGA.

The TeensyROM C64 cart supports TapTo

The concept behind TapTo is to use NFC cards, stickers, and other such objects to launch games and particular key sequences. This allows an NFC card to be programmed with the required FPGA core and game image. The TapTo service runs on the MiSTer, waiting for NFC events and launching the appropriate actions when it reads a card. [Ken] demonstrates many such usage scenarios, from launching games quickly and easily with a physical ‘game card’ to adding arcade credits and even activating cheat codes.

As [Ken] points out, this opens some exciting possibilities concerning physical interactivity and would be a real bonus for people less able-bodied to access these gaming systems. It was fun to see how the Nintendo Amiibo figures and some neat integration projects like the dummy floppy disk drive could be used.

TapTo is a software project primarily for the MiSTer system, but ports are underway for Windows, the MiSTex, and there’s a working Commodore 64 game loader using the TeensyROM, which supports TapTo. For more information, check out the TapTo project GitHub page.

We’ve covered the MiSTer a few times before, but boy, do we have a lot of NFC hacks. Here’s an NFC ring and a DIY NFC tag, just for starters.

Continue reading “Exploring TapTo NFC Integration On The MiSTer”