Reverse Engineering The IBM PC110, One PCB At A Time

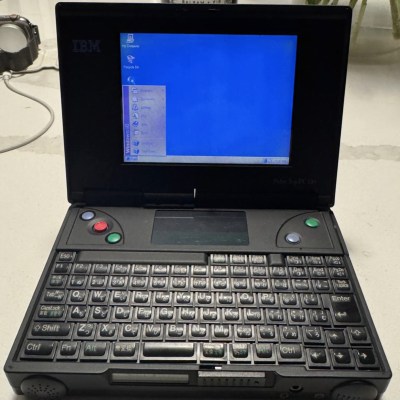
There’s a dedicated group of users out there that aren’t ready to let their beloved IBM PC110 go to that Great Big Data Center in the Sky. Unfortunately, between the limited available technical information and rarity of replacement parts, repairing the diminutive palmtops can be tricky.

Which is why [Ahmad Byagowi] has started a project that aims to not only collect all the available schematics and datasheets that pertain to the machine, but to reverse engineer all of the computer’s original circuit boards. Working from optical and x-ray scans, the project has already recreated the motherboard, power supply, modem, keyboard, and RAM module PCBs in KiCad.

Just last week the project released production-ready Gerbers for all the boards, but considering there have been 45+ commits to the repository since then, we’re going to assume they weren’t quite finalized. Of course, with a project of this magnitude, you’d expect it to take a few revisions to get everything right. (Hell, we’ve managed to screw up board layouts that had fewer than a dozen components on them.)

If you’d like to lend a hand, [Ahmad] says he could use the help. Beyond checking the boards for problems and reporting issues, he’s also on the hunt for any datasheets or other documentation that can be found for the PC110 or its components. It looks like there’s still schematic work that needs to be done as well, so if your idea of zen is figuring out how ~30 year old computers were wired up internally, this might be the perfect summer project for you.

Interestingly, our very own [Arya Voronova] has been working on creating a drop-in replacement motherboard for the Sony Vaio P using KiCad and imported board images. That hobbyists are now able to do this kind of work using free and open source tools is a reminder of just how far things have come in the last few years.

Thanks to [adistuder] for the tip.

Microsoft Sculpt Keyboard Lives Again With RP2040

Hackaday readers are likely the kind of folks that have a favorite keyboard, so you can probably imagine how devastating it would be to find out that the board you’ve sworn by for years is going out of production. Even worse, the board has some internal gremlins that show up after a few years of use, so functional ones in the second-hand market are becoming increasingly rare. So what do you do?

This is the position [TechBeret] recently found himself in with his beloved Sculpt keyboard. When Microsoft decided to step back from the peripheral market last year, he started looking at alternatives. Finding none of them appealing, he decided instead to breathe new life into the ergonomic keyboard with the RP2040. Every aspect of the resurrection is covered in a phenomenally detailed write-up on his blog, making this a valuable case study in modernizing peripherals with the popular microcontroller.

Continue reading “Microsoft Sculpt Keyboard Lives Again With RP2040”

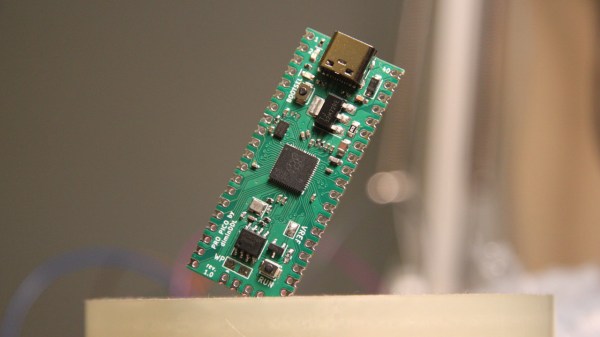
The Pi Pico replacement board in question, assembled, held diagonally in some type of holder

ProPico For Your Pro Pico Needs

Ever feel like the Pi Pico board could be doing way more given its footprint? Does it bother you that the RP2040’s ADC quality is even further decreased because of the noisy onboard switching regulator? Miffed about decisions like the MicroUSB socket, the 2MB flash, or lack of the reset button? [Dmytro] brings us an open-source Pi Pico design, sporting the same RP2040 and a fully compatible footprint, but adding a number of improvements to its surroundings.

There’s a good few additions, all of them hacker-friendly – [Dmytro] adds comfortably-spaced reset and boot buttons, a USB-C socket, a dedicated low-noise voltage reference for the ADC, one more LED, and an I2C EEPROM footprint socket that is compatible with FRAM chips. Everything worth preserving is preserved – the pinout stays the same, including the SWD connector, which now sports an extra RESET pin. The bottom side USB testpoints remain, with only the four testpoints changed for more useful signals. Last but not least, the switching regulator is replaced by the venerable 1117 – you lose the ability to power your Pico from two AAs, and the capacitor series resistor requirement isn’t great, but you can easily put one of the drop-in 1117 replacement regulators on there.

What’s great is that the design is fully open-source, with KiCad files available. Want to design your own Pi Pico footprint board, improve upon this one even further, or maybe make a more tailored one? Treat yourself to the GitHub repository! There’s also a pinout diagram and a KiCanvas schematic for all your tinkering needs. We’ve covered drop-in replacements for classic drawer-inhabiting parts like the Pi Zero, for the 7805 (twice!), the 6502 CPU, and even for the DE9 serial port connector. No matter the purpose, they’re always a joy to see.