Hydraulic artificial muscles

Soft Hydraulic Muscles Lift Weights As A Team

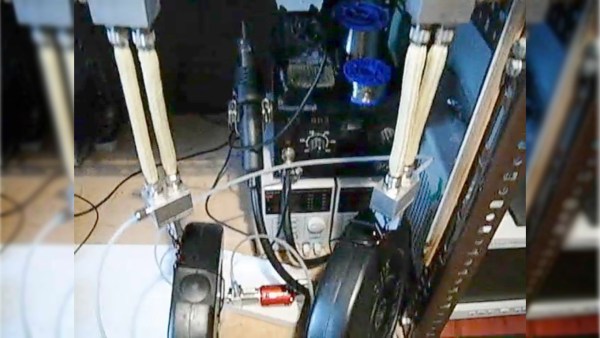
Working with hydraulics usually means having a fluid tank and valves. [consciousflesh] does away with both those for his DIY hydraulic artificial muscles. Instead, he uses a pair of muscles, both preloaded with fluid. To contract one, he pumps the fluid into the other, expanding that one, and vice versa. A bidirectional gear pump moves the fluid while also acting as a valve. And flexible materials replace heavy metal cylinders.

As we said, this is a DIY project. He made the muscles by surrounding silicone tubes with aramid fiber sleeves, giving added strength. The blocks at either end are also custom-made. The gear pump is one he purchased and made substantial modifications to, including removing the tank and fixing a brushless DC motor to one end. The final custom piece was a controller board for the motor. A Gerber file, schematic, and technical drawings, along with further details are all on his Hackaday.io page. Meanwhile, check out the load test in the video below as the muscles lift and lower 5 kg (11 lbs) each.

A search of Hackaday shows hydraulic artificial muscles may be rare, so perhaps this will be the first of many. For example, how about replicating how human arm muscles work together, one contracting while the other expands? We’ve seen that done already using pneumatics with [James Hobson’s] exoskeleton arms. Perhaps someone should do it with these pairs of flexible hydraulic muscles?

Continue reading “Soft Hydraulic Muscles Lift Weights As A Team”

Better Motion Through Electrostatic Actuators

If you want something to move with electricity, odds are you’ll be using magnets. Deep inside every servo, every motor, and every linear actuator is a magnet and some coils of wire. There is another way of making things move, though: electrostatics. These are usually seen in tiny MEMS devices, and now we have tiny little electrostatic speakers making their way into phones and other miniature devices.

For [Nathann]’s Hackaday Prize entry, he’s building electrostatic actuators on the cheap, and not just tiny ones, either. He’s building ‘human’ scale electrostatic devices.

The reason electrostatic devices are usually very small is simple: the force of any actuator is dependent on the distance between the plates and the voltage. Moving the plates closer together is right out, or else they would be touching, so the solution to building bigger electrostatic actuators is increasing the voltage. [Nathann] is doing this with a cheap boost converter that’s actually sold as a taser module. These modules are small, output about 800kV, and cost around five bucks.

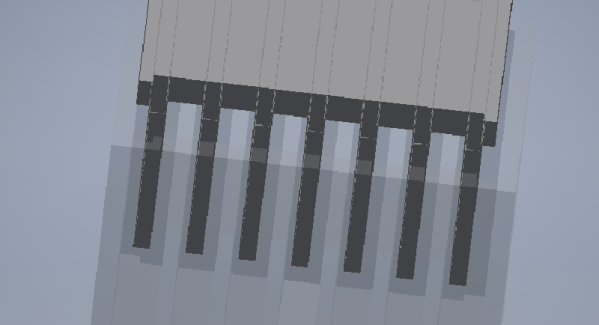
The prototype for this project is basically a 3D printed box with intersecting fins. These fins are covered in aluminum foil, and the box is filled with oil to prevent arcing. Will it work? That remains to be seen, but this project is a great example of what can be done with some creative part sourcing, a 3D printer, and a tiny bit of know-how. It’s some of the best work the Hackaday Prize has to offer, and we’re amazed that [Nathann] put in the work to make this happen.

This Is Your Last Chance To Design The Greatest Human Computer Interface

This is your last chance to get your project together for the Human Computer Interface Challenge in this year’s Hackaday Prize. We’re looking for innovative interfaces for humans to talk to machines or machines to talk to humans. These are projects that make technology more intuitive, more fun, and a more natural activity. This is your time to shine, and we’re accepting entries in the Human Computer Interface Challenge in this year’s Hackaday Prize until August 27th. This is your last weekend to work on your project, folks.

This is one of the best years of the Hackaday Prize yet, with almost one thousand projects vying for the top prize of $50,000 USD. That doesn’t mean everyone else is going home empty handed; we’ve already awarded $1000 prizes to twenty projects in each of the first three challenges, and this coming Monday, we’ll be figuring out the winners to the Human Computer Interface challenge. Twenty of those finalists will be awarded $1000 USD, and move onto the final round where they’re up for the Grand Prize.

Don’t miss your last chance to get in on the Human Computer Interface Challenge in this year’s Hackaday Prize. We’re looking for an interface that could be visual, auditory, haptic, olfactory, or something never before imagined. We’re sure we’re going to see an Alexa duct taped to a drone, and that’s awesome. We’re taking all comers. Don’t wait — start your entry now.

Continue reading “This Is Your Last Chance To Design The Greatest Human Computer Interface”

Listening To Mains Power

There’s a lot you can tell by looking at the waveform of your mains power. There are harmonics, transient changes, and periodic fluctuations that are correlated to the demand on the grid itself. Frequency shifts will tell you how fast or slow your clocks are running, and someone probably has a poorly isolated power line communication thing somewhere in your neighborhood. There’s a lot you can learn by looking at the waveform coming out of your outlets, but how do you tap into that? [David] is doing it with a PC sound card and some really interesting hardware.

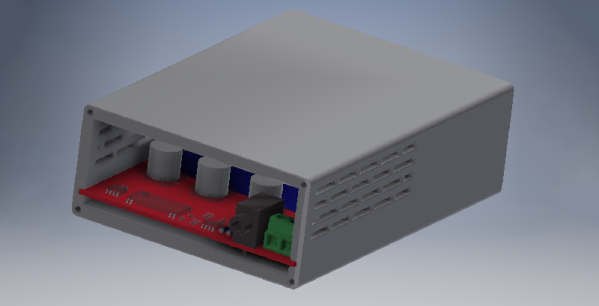
The Grid 2 Audio module is [David]’s entry to this year’s Hackaday Prize, and it consists of three main parts. The first is the mechanical part of the design. This comes in the form of an IEC power socket with a built-in switch, fuse, and illumination. Of course, you could simply buy one of these, but [David] is teaching himself Autodesk Inventor, and you have to start somewhere. The second part of this build is the PCB power supply and mains input. This is basically a pair of transformers, a PCB, and a whole lot of isolation to make this a safe board. The third part is a signal conditioning board that sends the waveform to a 3.5mm jack, for easy processing with any audio capture hardware.

The hardest part of this board is, by far, the PCB design, and for that [David] went all out. There are some big, meaty traces on this thing and real separation between the high voltage and low voltage portions of the board. The end result is something that sends the mains waveform to an audio card for easy processing with MATLAB, and all the goodies that come from that.

Better Ways To Drive Nixie Tubes

Ah, Nixie tubes. You’re not cool unless you have a few Nixie tubes sitting around, and you’re not awesome unless you’ve built your own Nixie tube clock. That’s what [Thomas] is doing for his entry into the Hackaday Prize, and he’s come up with a very low-cost way of doing it.

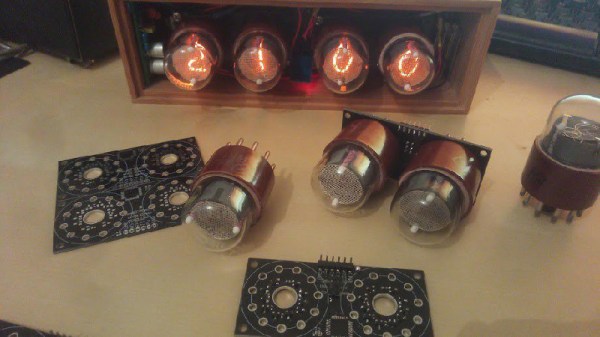
For the high voltage supply of this build, [Thomas] is turning to one of the standard circuits based on the MC34063 that’s simple enough and good enough to make everything work. There are really no surprises with the power supply here. This is all a project about turning on different digits inside the Nixie, though, and for that [Thomas] spun his own board capable of driving a pair of IN-1 Nixies with a single ATMega8.

These two-Nixie boards are daisy chained together through a UART connection, where each board passes digits down the line. For example, the first board receives, 12, 30, and 59, displays 59, and passes 12 and 30 down to the next boards. The second board then displays 30 and passes 12 to the last board.

Of course, if you’ve designed a Nixie driver, the next thing to do is to build a clock. [Thomas] had the rather clever idea of making an enclosure for this clock out of concrete, using a 3D printed interior mold. Everything seemed to be going well until it was time to pull the interior mold out, and a few light taps resulted in some fairly large cracks. That’s disappointing, but with a slight redesign and some more fibers in the concrete mix, this is going to turn out to be a weighty win.

Turning Everything Into A Tap Controller

Our entire life is staring at glowing rectangles, and all our surroundings are hard, flat surfaces. [Ben] had the idea to turn those flat surfaces into a generic tap interface controller, and his project for the Hackaday Prize might just do that.

Some of the prior art that went into this project includes Ping Pong Plus Plus, an augmented-reality-ish implementation of ping pong that puts projected light wherever a ping pong ball hits the table. The game does this by mounting piezos to the bottom of a table and just a slight bit of math to determine where on the table the ball hit. There’s also MicLoc, a door lock that responds to knocking.

With this prior art, it’s all about microcontrollers and peripherals, and for that, [Ben] turned to the STM32F303RE, which sports four very fast ADCs and op-amps. There’s a lot of DMA usage on there, and the code is using a ton of signal processing. The important bit here is finding the difference between whatever the tabletop equivalent to an earthquake’s P-waves and S-waves are — [Ben] only wants the first bit of a waveform that travels through the table longitudinally, not the much louder vibrations of the entire table.

If [Ben] manages to put this together, an entire wall could be a light switch or a dimmer. You could add a secret knock to your door, and your desk could control your computer. It’s a promising idea, and the engineering that’s going into this project is just fantastic.

Rewinding Live Radio

Even though it’s now a forgotten afterthought in the history of broadcasting technology, we often forget how innovative the TiVo was. All this set-top box did was connect a hard drive to a cable box, but the power was incredible: you could pause live TV. You could record shows. You could rewind TV. It was an incredible capability, that no one had ever seen before. Of course, between Amazon and Netflix and YouTube, no one watches TV anymore, and all those platforms have a pause button, but the TiVO was awesome.

There is one bit of broadcasting that still exists. Radio. For his Hackaday Prize entry, [MagicWolfi] is bringing the set-top box to radio. He’s invented the Radio Rewind Button, and it does exactly what you would expect: it rewinds live radio a few minutes.

To have a pause or rewind button on a TV or radio, the only real requirement is a bunch of memory. The TiVO did this with a hard drive, and [MagicWolfi] is doing this with 256 MB of SDRAM. That means he needs to access a ton of RAM, and for that he’s turning to the Digilent ARTY S7 board. Yes, it’s an FPGA, but actually a fairly simple solution to the problem.

The rest of the circuit is an FM receiver chip and an I2S audio codec on an Arduino-shaped daughterboard. The main controller for this project is a big red button that will simply rewind the audio stream a few minutes. There’s no telling exactly how long [MagicWolfi] will be able to rewind the audio stream, but 256 MB is a ton in the audio world.