MIDI Association Releases Spec For TRS Jacks

The MIDI spec was released in 1983, and for more than thirty years every synthesizer, drum machine, and piece of computer hardware with MIDI has sported an enormous DIN-5 jack on the back. Why did they choose such a large connector? Well, MiniDIN connectors hadn’t even been invented yet, and today even MiniDIN connectors are rarely-seen, obsolete connectors.

In the last decade, MIDI has found its way into some very small machines. Those Pocket Operators have MIDI sync, you can control a Game Boy with MIDI using the right hardware, and the cute little Korg synths also have MIDI tucked away in there somewhere. You can’t put a DIN-5 jack on those things, leading to some weird implementations of MIDI over non-standard connectors.

Now the MIDI Association has weighed in on the situation. There’s now a spec for MIDI over 2.5mm and 3.5mm TRS jacks. In just a few short decades, you’ll be able to connect MIDI gear with an audio aux cable.

Although there are five connectors in a DIN-5 jack, most implementations use only two connectors to send and receive data. Synth manufacturers have capitalized on this fact and cheap TRS connectors to build their own implementation of MIDI using smaller connectors, sometimes with incompatable pinouts.

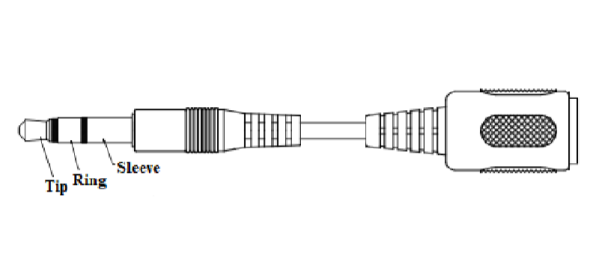
Now, though, there’s a standard. For TRS connectors, the tip is pin 5 on the DIN-5, the ring is pin 4, and the sleeve is pin 2. It sends and receives data to synths and drum machines from 1983, and it doesn’t use gigantic connectors.

The only caveats to the new MIDI standard is that 2.5mm TRS connectors are recommended, and that protection circuitry is strongly recommended in the case a headphone driver is inevitably connected to a MIDI device. Other than that, everything’s coming up roses, and this opens up the door to MIDI jacks that are much, much easier to source.

Retro-uC, Your Favorite Instruction Sets On Custom Silicon

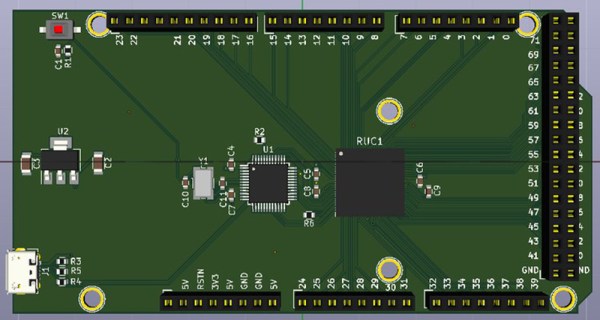
A few months ago, we caught wind of an interesting project in Big-O Open silicon. It’s a chip, loaded up with the great CPU cores of yore. Now, it’s finally a project on Crowd Supply. The Retro-uC project is an Open Source microcontroller for the retro geek, with a Zilog Z80, MOS 6502, and Motorola 68000 buried in the epoxy of a single QFP package. Oh yes, custom silicon and retro goodness, what more could you want?

The Retro-uC project is part of the Chips4Makers project to develop an Open Source chip for the community. Of course, this has been done before with projects like the HiFive1 and other RISC-V implementations, but really — this is a Z80, 6502 and 68k on a single chip. Let’s not bury the lede here.

As far as the architecture and implementation of these cores go, the ‘active’ core is externally selected on reset, or can be changed through the JTAG interface. There are 72 GPIO pins that can handle 5V, with each pin mapped to the address space of the cores. So far, so good. We can make this work for some really cool stuff.

The JTAG interface is used for testing and programming, although programs can be stored on an external I2C Flash chip and booted from there. There is 4kB of on-chip RAM, and while the peripheral configuration is still being determined, there will at least be UART, I2C, and PWM peripherals. How many of each is anyone’s guess.

The Retro-uC is now a Crowd Supply project, with rewards/orders/whatever ranging from a bare Retro-uC chip for $42 USD to an Arduino Mega-ish development platform for $89, a breadboard version of the chip for $59, and a chip mounted to a Perf2+ prototyping board for $65.

While this chip hasn’t even gotten to tape-out, all the cores work on an FPGA, and there is precedent for doing Open Source, crowdfunded silicon. We’re looking at this one closely and are excited to see what everyone is going to make.

This project has been a long time in the making, with the project lead giving a talk at FOSDEM earlier this year. Now it’s finally time for the hard part of any silicon project — getting the money — and we’re looking forward to see what comes of it.

Low-Quality Capacitors Turned Into High-Quality Temperature Sensors

When life hands you a bunch of crummy capacitors, what do you do? Make a whole bunch of temperature sensors, apparently.

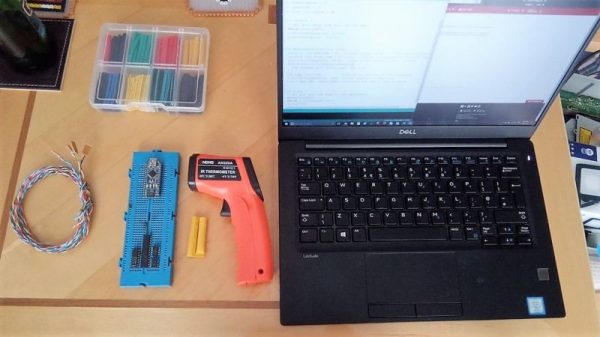
The less-than-stellar caps in question came to [pyromaniac303] by way of one of those all-in-one assortment kits we so love to buy. Stocked with capacitors of many values, kits like these are great to have around, especially when they’ve got high-quality components in them. But not all ceramic caps are created equal, and [pyromaniac303] was determined not to let the lesser-quality units go to waste. A quick look at the data sheets revealed that the caps with the Y5V dielectric had a suitably egregious temperature coefficient to serve as a useful sensor. A fleck of perf-board holds a cap and a series resistor; the capacitor is charged by an Arduino output pin through the resistor, and the time it takes for the input pin connected to the other side of the cap to go high is measured. Charge time is proportional to temperature, and a few calibration runs showed that the response is pretty linear. Unfortunately the temperature coefficient peaks at 10°C and drops sharply below that point, making the sensor useful only on one side of the peak. Still, it’s an interesting way to put otherwise unloved parts to use, and a handy tip to keep in mind.

Temperature sensing isn’t the only trick capacitors can do. We’ve seen them turned into touch sensors before, and used to turn a 3D-printer into a 3D-scanner.

Using Modern Nintendo Controllers On The C64

There are plenty of people out there who still enjoy playing games on vintage computers like the Commodore 64. But while they likely return to these classic games themselves out of a sense of nostalgia, the feeling doesn’t always extend to the hardware itself. For example, one can enjoy playing Impossible Mission without having to use a contemporary C64 joystick.

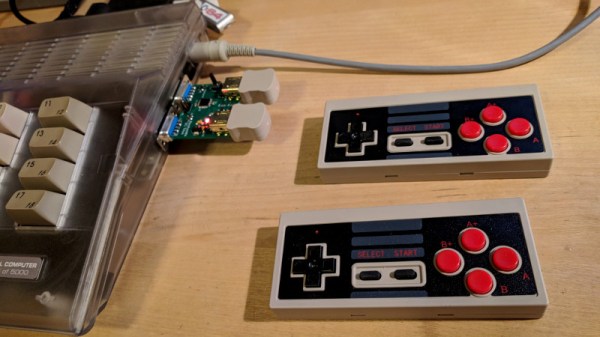
Thanks to an open source project developed by [Robert Grasböck], C64 owners who want to take advantage of the improvements made to gaming controllers in the nearly 40 years since the system’s release now have another option. Called Nunchuk64, it allows you to use various Nintendo controllers which make use of the Wii “Nunchuk” interface on original C64 hardware. This includes the controllers from the recent “Classic Edition” NES and SNES systems, which offer a decidedly retro feel with all the benefits of modern technology and construction techniques.

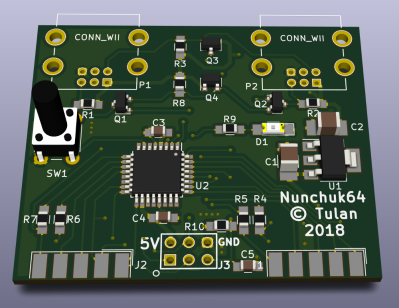
Both the hardware and software for Nunchuck64 are open source, and everything you need to build your own version is in the project’s repository. [Robert] even has assembly instructions, complete with images, which walk you through building your own copy of the hardware and flashing the firmware onto it. This is a nice touch that we very rarely see even in open source projects. The board is populated with a ATmega328P microcontroller and a handful of passive components, making assembly fairly straightforward assuming you are comfortable with SMD work.

Bringing more modern controllers to classic systems seems to be gaining popularity recently, within the last few months we’ve seen Xbox 360 controllers on the Nintendo 64, and newly manufactured pads for the Atari 5200.

Continue reading “Using Modern Nintendo Controllers On The C64”

Listening To Mains Power

There’s a lot you can tell by looking at the waveform of your mains power. There are harmonics, transient changes, and periodic fluctuations that are correlated to the demand on the grid itself. Frequency shifts will tell you how fast or slow your clocks are running, and someone probably has a poorly isolated power line communication thing somewhere in your neighborhood. There’s a lot you can learn by looking at the waveform coming out of your outlets, but how do you tap into that? [David] is doing it with a PC sound card and some really interesting hardware.

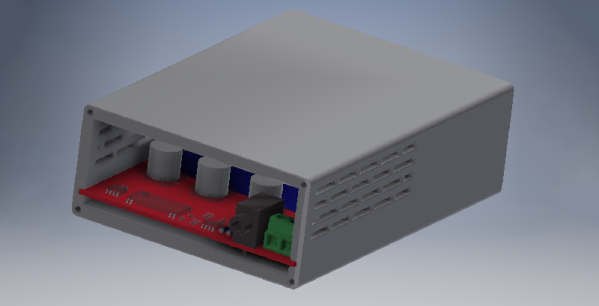
The Grid 2 Audio module is [David]’s entry to this year’s Hackaday Prize, and it consists of three main parts. The first is the mechanical part of the design. This comes in the form of an IEC power socket with a built-in switch, fuse, and illumination. Of course, you could simply buy one of these, but [David] is teaching himself Autodesk Inventor, and you have to start somewhere. The second part of this build is the PCB power supply and mains input. This is basically a pair of transformers, a PCB, and a whole lot of isolation to make this a safe board. The third part is a signal conditioning board that sends the waveform to a 3.5mm jack, for easy processing with any audio capture hardware.

The hardest part of this board is, by far, the PCB design, and for that [David] went all out. There are some big, meaty traces on this thing and real separation between the high voltage and low voltage portions of the board. The end result is something that sends the mains waveform to an audio card for easy processing with MATLAB, and all the goodies that come from that.

Circuit VR: Measuring With LTSpice

Usually, with Circuit VR we look at some circuit in detail with simulation — usually LTSpice. This one will be a little meta because I wanted to look at a capability in LTSpice which ironically is very useful, but not often used. Along the way, though, we’ll look at why you get maximum power transfer when your source impedance matches your load impedance. This is something you probably already know about, but it is interesting to look at in simulation if you know how to coax LTSpice — no pun intended — into showing you a meaningful graph.

The circuit is super simple. An AC source and a 50-ohm resistor stand-in for a 40-meter ham transmitter. With 100 volts into a 50-ohm load. So far, so good.

Continue reading “Circuit VR: Measuring With LTSpice”

Call For Proposals: Hackaday Superconference

It’s time to submit your proposal for a talk or workshop at the 2018 Hackaday Superconference!

Yep, it’s easy to procrastinate with the late days of summer upon us, but don’t miss out on your chance to present at the Ultimate Hardware Conference. We’re hungry for great stories about hardware creation. Before you have the chance to ask “should I submit a proposal?” — YES! We’re talking to you!

Some of the general topics that have been really popular in the past include:

  • Hardware custom built for research labs
  • Clever methods for prototyping
  • Engineering heroics that met a deadline, kept on budget, or just made the thing work
  • Ins and outs of product development
  • Stories of elite hacks that deserve to be shared and preserved

This is your time. Send in your proposal now and get ready to have an incredible weekend at the Hackaday Superconference!