We like to pop into electronics flea markets and swap meets at every chance we get. Last month [Brian] made it to the ham swap meet at Northrup Grumman held in Redondo Beach. I had a great time a couple of years back at the Electronics Flea Market held at De Anza College. Physical proximity to one of these nearly-mythical events is, unfortunately, required. If only the Internet offered a solution to this problem…
The fact that you’re reading Hackaday puts you into one of three categories: you wish you had a lot more tools, you’re on the way to a well-stocked workshop, or you’re trying to pass on your shop surplus to someone who will love it like you do. There’s now a perfect solution for the buy-upgrade-horde cycle we all inevitably fall into: the Tindie Flea Market. If you use something to make hardware, this is going to be the place to buy or sell it.
 Has that starter scope been collecting dust since you picked up not one, but two better models? We know you can’t part with it unless you know it’s not going to be thrown out, and this is the chance to find not just a good home, but an owner that will use and cherish it. This goes for all kinds of great tools. After all, how do you find someone to take that pick and place off of your hands?
At launch, the Tindie Flea Market categories will include Adapters and Cables, Audio and Video, Batteries and Power, Bulk Components, Equipment, Fasteners, RC, and Small Tools. Maybe I’ll finally be able to find a home for that tube of power transistors I ordered years ago in the wrong package — and maybe even that long tape of EEPROM that I ordered in 1.8v instead of 3.3v. Time to start my listings and keep good stuff out of the landfill. Yet another great reason we were so happy to welcome Tindie to the Hackaday family.

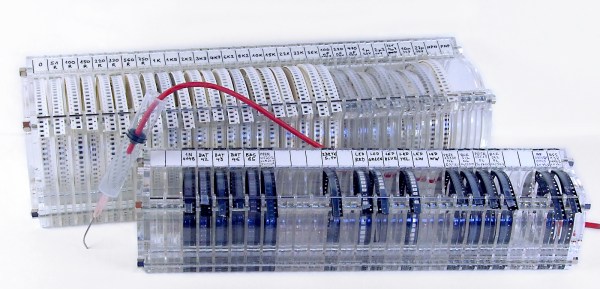
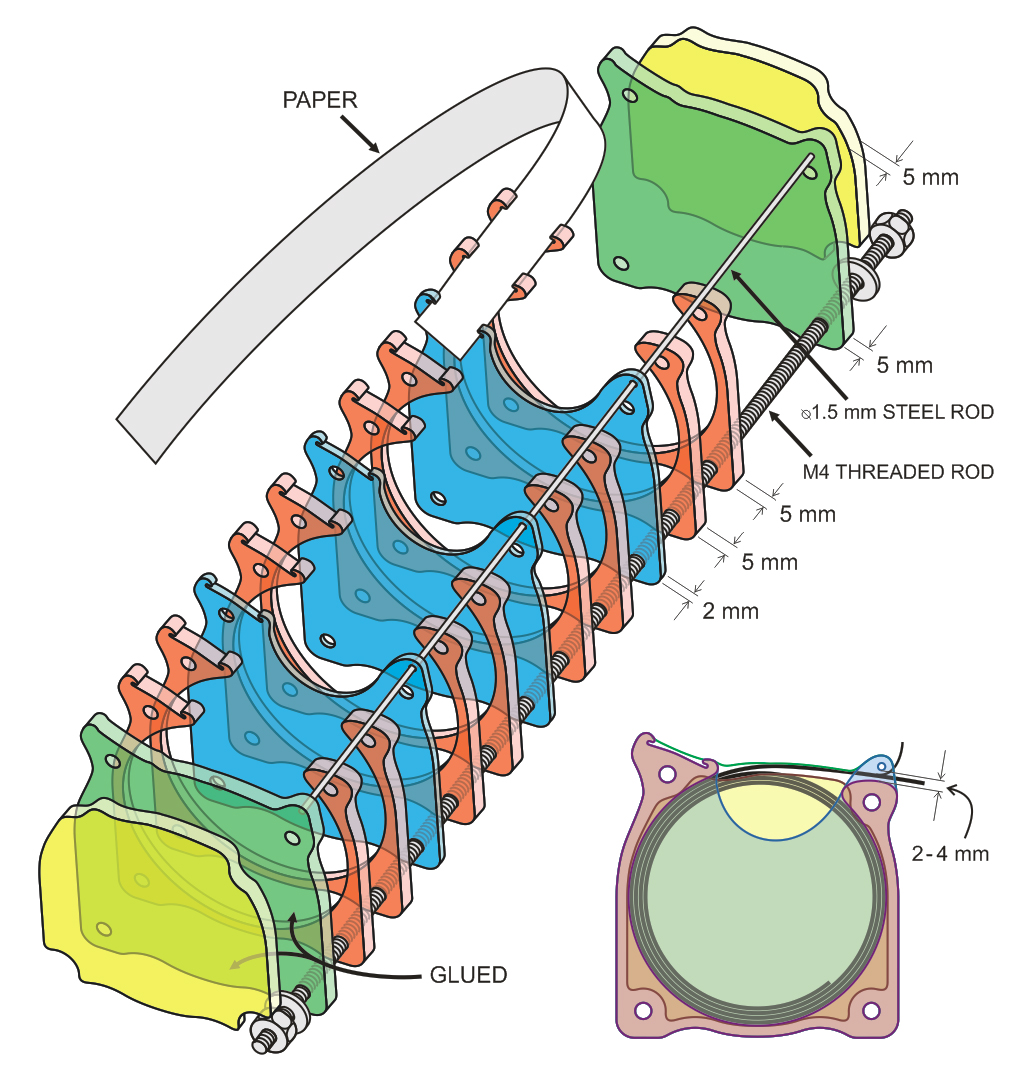
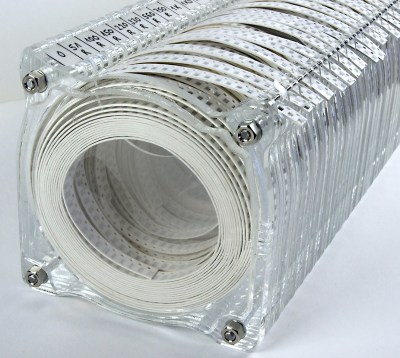 SMD resistors are packed in thick paper tapes that don’t bend easily, and thus need larger containers than other components, which are packed mainly in flexible PE tapes. The first version of this organizer was built with a 96mm diameter space for resistors and 63mm diameter for other components, but it seems that there is no need for such large compartments. If I were to make it again, I would probably scale everything down to about 80% of it’s current size.