Home Made Segway Makes use of Balanduino

Impressive Homemade Segway Is The Real Deal

[Kristian] just put the finishing touches on his full size Segway built from scratch.

Back in 2012, he made a small balancing robot using a gyroscopic sensor and a PID controller — you can see the original post here. The cool thing is, he’s basically just scaled up his original project to create this full-size Segway!

It uses two 500W 24V DC motors (MY1929Z2) on an aluminum check plate frame, with the rest of the structure made from steel plumbing and fittings. What we really like is the steering linkage; similar to a real Segway, you pull the handle in the direction you want to turn. He’s accomplished this by putting another length of pipe parallel to the wheels which is connected by an elbow fitting to the handle bar. It’s supported by two pillow block bearings, and in the back is a fixed potentiometer — when you lean the handle bars one way, the pipe rotates, spinning the potentiometer. To make it return to neutral, he’s added springs on either side.

There’s an impressive build log to go along with it, and a great demonstration video after the break.

Continue reading “Impressive Homemade Segway Is The Real Deal”

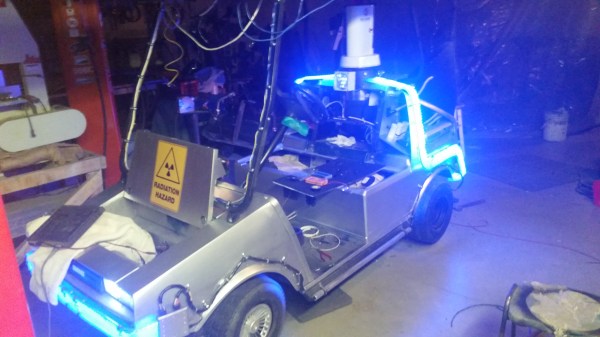
A Geiger Counter For An Off-Road Apocalypse Vehicle

prog2

If the world comes to an end, it’s good to be prepared. And let’s say that the apocalypse is triggered by a series of nuclear explosions. If that is the case, then having a Geiger counter is a must, plus having a nice transport vehicle would be helpful too. So [Kristian] combined the two ideas and created his own Geiger counter for automotive use just on the off chance that he might need it one day.

It all started with a homemade counter that was fashioned together. Then a display module with a built-in graphics controller that was implemented to show all kinds of information in the vehicle. This was done using a couple of optocouplers as inputs. In addition, a CAN bus interface was put in place. As an earlier post suggests, the display circuit was based on a Microchip 18F4680 microcontroller. After that, things kind of got a little out of control and the counter evolved into more of a mobile communications center; mostly just because [Kristian] wanted to learn how those systems worked. Sounds like a fun learning experience! Later the CPU and gauge was redesigned to use low-quiescent regulators. A filtering board was also made that could kill transients and noise if needed.

The full project can be seen on [Kristian]’s blog.

Biometric Secured Golfcart Allows For Keyless Start

Fingerprint Secured Golf Cart

Who uses keys these days, really? Introducing the world’s first(?) biometric secured golf cart. Gives “push to start” a whole new meaning!

[Ramicaza] lives in a small community where many families (including his!) use golf carts to commute short distances, like to the grocery store, or school. Tired of sharing a key between his parents and siblings, [Ramicaza] decided to soup up his ride with a fingerprint sensor allowing for key less start.

He’s using an ATtiny85 and a GT511-C1 finger print sensor from SparkFun. After throwing together a circuit on a breadboard and testing the concept he went straight to a PCB prototype for install in the cart. What we really like is the case he integrated into the golf cart’s dash. It features a flip-up lid which turns the circuit on when it is opened, and off when it is closed to save battery. Scan your finger and a relay triggers the ignition allowing you to drive away.

Continue reading “Biometric Secured Golfcart Allows For Keyless Start”

An Auto-Leveling Gyro Camera For Motorcycle Enthusiasts

FB2XXIQHF23RIUW.LARGE

[Saftari] was inspired by the technology used to capture video in the MotoGP World Championship races to create these instructables on how to build an auto-leveling Gyro camera. The setup he developed maintains the camera at a consistent level perpendicular to the earth no matter how much the motorcycle angles against the ground when turning.

The components involved include an Arduino Uno, a Triple Axis Accelerometer, a digital servo, and a Gyro breakout board. A bracket was built to house and secure the camera to the side of the vehicle. 2mm acrylic was used for this and was bent by heating up the material. Once complete, test runs were completed showcasing the capabilities of this type of Do-It-Yourself rig.

The quality of the video after the break is a little bit blurry, but it proves the point that a Gyro camera setup can be built at home:

Continue reading “An Auto-Leveling Gyro Camera For Motorcycle Enthusiasts”

Real Life GTA? Driving A Car In Third Person Is Hard!

Can you drive a car in third person?

Do you fancy yourself an excellent driver in video games featuring a third person view for the driving experience? Ever wonder what it’d be like in real life? [Tom] and [Oli] wanted to find out so they decided to setup this awesome experiment.

They’re using the Bovingdon airfield, which was a Royal Air Force station during WWII — today it stands empty and is a beloved testing ground for many custom vehicles in the UK, like [Colin Furze’s] world record-setting baby carriage. The car chosen for the challenge is a Mazda MX-5 Miata, which we don’t think they care too much about considering the potential obstacles they’ll be hitting!

The driver wears a set of video goggles, and a co-pilot comes along for the ride to help prevent any major collisions. A hexrotor drone is flown by another person who attempts to keep it mostly behind the car in the stereotypical third person view. The video signal is then transmitted down to the driver in real time.

Continue reading “Real Life GTA? Driving A Car In Third Person Is Hard!”

Electric Longboard Roundup

ev longboards everywhere!

Everybody and their grandmother is longboarding electric-style these days: here are some of the most recent developments in the world of kickless cruising.

First up, [comsa42] has punched up an excellent step-by-step visual guide for first-time EV hopefuls, detailing the basics of a battery-powered longboard setup and thoroughly explaining the particulars behind component choices. His build is relatively straightforward: combine a board with a low(ish) kV outrunner motor, some LiPo batteries, an ESC (Electronic Speed Controller), a transmitter/receiver, and a few custom parts for gearing and mounting. This build should be commended not only for its simplicity but also for its frugality: [comsa42] estimates a final cost of around only $300, which is a staggering difference from commercial alternatives such as the Boosted Board and newcomer Marbel.

[comsa42’s] other significant contribution is a low-key and low-cost cover to house the electronics. He simply fiberglassed a small enclosure to protect the expensive internals, then mounted and painted it to blend seamlessly with the rest of the deck. You can find loads of other useful goodies in his guide, including CAD files for the motor mounts and for the wheel assembly.

But wait, there’s more! Stick around after the jump for a few other builds that ditch traditional wheels in favor of a smoother alternative. There’s also a smattering of videos, including comsa42’s] guide overview and some excellent cruising footage of the other board builds doing what they do best.

Continue reading “Electric Longboard Roundup”

Electric Go-Cart Has Arduino Brains

arduino powered go cart

Oh how times have changed. Back in the 30’s the VW Beetle was designed to be cheap, simple and easy for the typical owner to maintain themselves. Nowadays, every aspect of modern cars are controlled by some sort of computer. At least our go-carts are spared from this non-tinkerable electronic nightmare…. well, that’s not completely true anymore. History is repeating itself as [InverseCube] has built an electronic go-cart fully controlled by an Arduino. Did I forget to mention that [InverseCube] is only 15 years old?

The project starts of with an old gas-powered go-cart frame. Once the gas engine was removed and the frame cleaned up and painted, a Hobbywing Xerun 150A brushless electronic speed controller (ESC) and a Savox BSM5065 450Kv motor were mounted in the frame which are responsible for moving the ‘cart down the road. A quantity of three 5-cell lithium polymer batteries wired in parallel provide about 20 volts to the motor which results in a top speed around 30mph. Zipping around at a moderate 15mph will yield about 30 minutes of driving before needing to be recharged. There is a potentiometer mounted to the steering wheel for controlling the go-cart’s speed. The value of the potentiometer is read by an Arduino which in turn sends the appropriate PWM signal to the ESC.

Continue reading “Electric Go-Cart Has Arduino Brains”