The CC3200 dev board with Energia

Energia On The CC3200

If you’re looking to connect things to the internet, with the goal of building some sort of “Internet of Things,” the new CC3200 chip from TI is an interesting option. Now you can get started quickly with the Energia development environment for the CC3200.

We discussed the CC3200 previously on Hackaday. The chip gives you an ARM Cortex M4 processor with a built-in WiFi stack and radio. It supports things like web servers and SSL out of the box.

Energia is an Arduino-like development environment for TI chips. It makes writing firmware for these devices easier, since a lot of the work is already done. The collection of libraries aids in getting prototypes running quickly. You can even debug Energia sketches using TI’s fully featured IDE.

With this new release of Energia, the existing Energia WiFi library supports the built-in WiFi radio on the CC3200. This should make prototyping of WiFi devices easier, and cheaper since the CC3200 Launchpad retails for $30.

THP Hacker Bio: AKA

Thermal imaging cameras are the new hotness when it comes building DIY tools that are much less expensive than their commercial counterparts. [Mike Harrison] built a very high-resolution version from Flir’s Lepton module, but an IR temperature sensor and a servo can also create a decent image. [AKA] played around with some of these thermal imaging modules, but found them a little hard to interface. Panasonic’s Grid-EYE module, however is reasonably cheap as far as thermal imaging devices go, and can be read over an I2C bus.

[AKA]’s entry for the Hackaday Prize, the GRID-EYE Thermal Camera is one of two Prize entries that survived the great culling and made it into the quarterfinalist round. [AKA] was kind enough to sit down and do a short little interview/bio with us, available below.

Continue reading “THP Hacker Bio: AKA”

Tesla Model S Battery Teardown

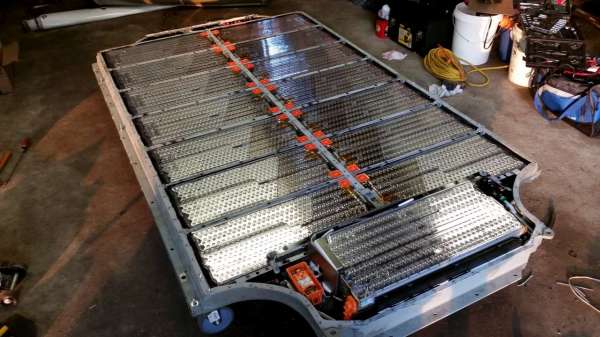
Tesla Motors club user [wk057], a Tesla model S owner himself, wants to build an awesome solar storage system. He’s purchased a battery pack from a salvaged Tesla Model S, and is tearing it down. Thankfully he’s posting pictures for everyone to follow along at home. The closest thing we’ve seen to this was [Charles] tearing into a Ford Fusion battery. While the Ford battery is NiMH, the Tesla is a completely different animal. Comprised of over 7000 individual lithium-ion cells in 16 modules, the Tesla battery pack packs a punch. It’s rated capacity is 85kWh at 400VDC.

[wk057] found each cell connected by a thin wire to the module buses. These wires act as cell level fuses, contributing to the overall safety of the pack. He also found the water cooling loops were still charged with coolant, under a bit of pressure. [wk057] scanned and uploaded high res images of the Tesla battery management system PCBs (large image link). It is a bit difficult to read the individual part numbers due the conformal coating on the boards.

A second forum link shows images of [wk057] pulling the modules out of the pack. To do this he had to chip away the pack’s spine, which consisted of a 2/0 gauge wire potted in some sort of RTV rubber compound.

We’re sure Tesla doesn’t support hackers using their packs to power houses. Ironically this is exactly the sort of thing Elon Musk is working on over at Solar City.

Artistic Guitar Practice Amp

Sweet Guitar Practice Amp Is A Literal Work Of Art

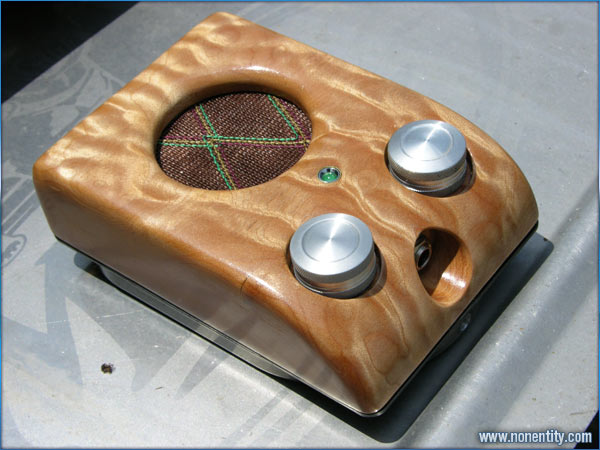
Check out this odd different looking guitar practice amp. It looks like a professionally manufactured product but it certainly is not. [Bradley] made it himself, not just a little bit of it either, all of it.

One of the first things you notice is the quilted maple wood grain of the case. There is no veneer here, this started out as a solid maple block. The front radius was shaped and the recesses for the control knobs and input jack were bored out using a forstner bit. The case was sanded smooth and several coats of high gloss tung oil was rubbed on to give the wood a perfect finish. A small piece of grill cloth protects the speaker while adding a little more class to the amp. The bottom of the case is actually a cover for a computer hard drive. A rectangular hole cut in the hard drive cover makes way for a 9 volt battery compartment.

Artistic Guitar Practice Amp

There are two control potentiometers, one for volume and one for gain. Any old knobs wouldn’t do for this project. [Bradley] knurled and turned his own aluminum knobs and they look awesome! The units power is turned on when the guitar cord is plugged in. An LED not only indicates that the power is on but it also gets brighter with the volume input from the guitar. The LED also pulses if two strings are out of tune with each other giving the guitarist an opportunity to tune one of the strings until the LED stops pulsing. When it is time for some private jamming headphones can be plugged into the amp and doing so cuts power to the speaker.

The electronic circuitry is [Bradley’s] design also, but unfortunately he doesn’t share the schematic. I suppose he wants to keep his amp one-of-a-kind.

Volumetric Circuits

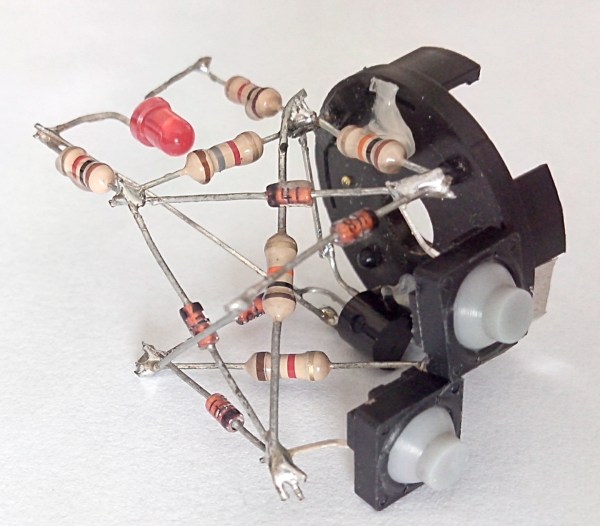
Building a circuit Manhattan style with small bits of copper and solder is a skill all its own, and building a prototype dead bug style is close to a black art. [Anderson] is taking it to the next level with his volumetric circuits. Not only is he building a free-form circuit that’s also a one-bit ALU, he’s also designing software to make these sort of circuits easy to design and build.

[Anderson] is calling his 3D circuit design software Pyrite, and it does exactly what it says on the tin: creates three-dimensional, grid-aligned physical circuits. Automating the construction of a circuit  is not a trivial task, and soldering all these components together even more so.

With the first prototype of his software, [Anderson] entered the schematic of a simple one bit ALU. The resulting layout was then carefully pieced together with solder and hot glue. It didn’t work, but that’s only because the schematic was wrong. Designing the software is still an incredible accomplishment, and now that [Anderson] has a rudimentary system of automatically designing free form and dead bug circuits, there are a lot of interesting possibilities. Ever wonder if the point to point wiring found in old radios was the most efficient layout? [Anderson] could probably tell you.

You can check out a few videos of [Anderson]’s work below.

Continue reading “Volumetric Circuits”

Homemade E-Cigarette Vaporizer

Extensive research shows that tobacco kills. This is common knowledge as of late, which has prompted a flurry of anti-smoking ads to flood in. Regular smokers are now reconsidering their smoking patterns and are looking at healthier alternatives. Among those options are electronic cigarettes that vaporize flavorful liquid into smooth drags of smoke.

Prices for these devices can range anywhere from $40 to $240, which can be quite expensive for those on a budget. So instead of buying one, [MrRedBeard] decided to create his own DIY electronic cigarette contraption out of an Altoids can.

The approximate cost (not including batteries) is about $12. This covers the 5 Amp adjustable voltage regulator and the 500 ohm potentiometer that is best used for a rig like this. The wattage is what drives the heat giving it a more consistent vapor stream of cloud smoke.

For more e-cigarette hacks, check out these ones powered by an NES controller and this vaporizer that can send smells…in space!

Continue reading “Homemade E-Cigarette Vaporizer”

A Breakout Board For A Flir Lepton

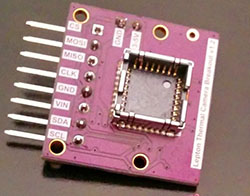
Thermal imaging cameras are all the rage now, and one of the best IR cameras out there is Flir’s Lepton module. It’s the sensor in the FLIR ONE, a thermal imaging camera add-on for an iPhone. Somewhat surprisingly, Flir is allowing anyone to purchase this module, and that means a whole bunch of robotics and other various electronics projects. Here’s a breakout board for Flir’s Lepton.

Electron artisan [Mike] recently got his hands on a FLIR ONE, and doing what he does best, ripped the thing apart and built the world’s smallest thermal imaging camera. Compared to professional models, the resolution isn’t that great, but this module only costs about $250. Just try to find a higher resolution thermal imager that’s cheaper.

With this breakout board, you’ll obviously need a Lepton module. There’s a group buy going on right now, with each module costing just under $260.

The Lepton module is controlled over I2C, but the process of actually grabbing images happens over SPI. The images are a bit too large to be processed with all but the beefiest Arduinos, but if you’re thinking of making Predator vision with a Raspi, BeagleBone, or a larger ARM board, this is just the ticket.

You can check out some video made with the Lepton module below.

This is also project number 3000 on hackaday.io. That’s pretty cool and worthy of mention.

Continue reading “A Breakout Board For A Flir Lepton”