[Tony Swatton], blacksmith, armorer, and prop maker, has built hundreds of custom swords for hundreds of movies and TV shows. He’s also the maker behind Man at Arms, the YouTube series where weapons from your favorite shows and movies are recreated, be they improbable weapons from a James Bond movie or a sword from a cartoon. This time, he recreated the Sword of Omens from Thundercats. It’s a work of art in its own right, and amazingly practical for a cartoon sword.
The Sword of Omens is one of [Tony]’s more complex sword making endeavors he’s done. The grip is made of seven different pieces cast in bronze, while the hilt of the sword is over a dozen of different pieces of steel welded together. The jewel in the sword was cut from a piece of glass, carefully ground on a lapidary wheel to a perfect dome.
[Gabe’s] been wanting to do some embedded development for years, and his other hobby of playing paintball recently provided him with a test project. He’s been working on a custom driver board for his paintball gun. Don’t be confused by the name, GCode is a mash-up of his name and the fact that he wrote the code for the project. It has nothing to do with the G Code CNC language.
At first this might seem like a trivial hack, but this Viking paintball gun has some serious velocity and throughput so he needs a reliable control that won’t just start shooting randomly. Another thing that [Gabe] took into consideration was monitoring the loading process to make sure the paintball is full seated before firing. All of this is handled by that tiny little Femtoduino board. it interfaces with the guns hardware using the connector board mounted above it.
There are several videos sprinkled throughout the build log. But we found the officially sanctioned 12.5 balls per second mode and the ridiculously fast auto-fire clips the most interesting. It should come in handy when on the run from paintball shotgun wielding opponents.
Even though the handmade portion of Hackaday is still in its infancy, we expected to put up a post on traditional japanese sword making by now. What [Kelvin] sent in to the tip line far surpases the artistry of forging a katana by hand. It’s a tsuba, the hand guard for a katana, and over the course of two videos (one and two), you can see this masterpiece of traditional metalworking techniques take shape.
Tsubas usually come in a matched set, one for the katana, or long sword, and another for the wakizashi, a slightly shorter sword. [Ford Hallam] was asked to construct the tsuba for a katana that had been lost to the sands of time. Fortunately, a black and white photograph of the original as well as the matching wakizashi tsuba were available for reference, making the design of this tsuba an exercise in replication.
The piece of metal this tsuba was constructed from is made out of a slightly modified traditional alloy of 75% copper and 25% silver. After the blank was cast, many, many hours of scraping, filing and hammering began before the design was laid out.
The craftsmanship in this tsuba is, quite simply, insane. There are about 100 different pieces of metal inlaid into the tsuba to emulate the tiger’s stripes, and hundreds of hours of work in hand carving every leaf and every bit of fur.
Even more, no power tools were used in the creation of this hand guard; everything was crafted using the same methods, tools, and materials as the original tsuba. A masterful piece of craftsmanship, indeed.
With Hackaday’s new handmade category we have the option of covering a wide range of builds – everything from jet engines designed on paper and built on manual machines, to old-world crafts made with the most primitive tools. This time, we’ll be looking at making a longbow from scratch, the work of [Billy Berger], a project that covers everything from selecting a tree to tillering a bow to make the best possible weapon.
European-inspired longbows are usually constructed out of yew, but in [Billy]’s native east Texas yew is a little hard to come by. He eventually selected a small Osage orange tree for his bow, stripped the bark, split the log, and started crafting his handmade bow.
The most important part of making a bow is ensuring the back of the bow consists of only one growth ring. With a drawknife, [Billy] carefully planed down the back of the bow so only one of the tree’s growth rings was visible, then began shaping the belly and sides of the bow.
Wood is a natural material, and when freshly cut contains a lot of moisture. As [Billy] was working on his bow, some of the moisture left his piece of Osage, leading to some twists and turns in the lumber. There’s a solution to this that mankind has been doing for millennia – fire bending the wood. By covering the wood in some sort of animal fat ([Billy] used olive oil), you can hold a piece of wood over a small frame without scorching. Using the crook of a tree as a vice, [Billy] twisted the wood, giving him a perfectly straight bow.
There’s an amazing amount of work that went into this bow, not surprising given that [Billy] is only using hand tools and primitive woodworking methods. Still, the completed bow is a work of art and a masterpiece of craftsmanship. You can check out all four parts of [Billy]’s demo below.
I’m not above admitting that it is childish of me. I was told I couldn’t have this thing and suddenly I knew I had to make it. I see it with my kids all the time. Toys can sit in a corner collecting dust for ages, but the second it is in threat of being removed, they have renewed interest, at least for a few minutes.
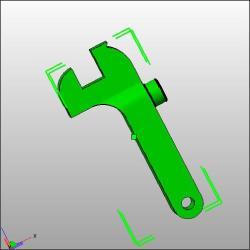
I figured, if I’m going to be childish about it and print a gun that a) won’t work because I don’t have the right printer, and b) I won’t use anyway because I don’t generally play with guns, I might as well make a fun timelapse video of the more recognizable parts being made.
It initially seemed like it was going to be quick and easy. However, I quickly found that just printing this thing was going to be a time consuming and frustrating task.
1. the scale on the individual files was way off.
I suspect this has something to do with the printer it was designed for. It seemed very close to being 1 inch = 1 mm. Not a completely uncommon problem. Manually resizing got some files to look right, but I found many simply wouldn’t resize.
2. Almost every single item had errors.
If you’ve done 3d printing, you’ve found that a model can have all kinds of issues that will stop it from printing correctly. I found every single item for the gun had errors. I actually learned a lot about how to repair non-manifold items from this exercise, so it was good in the end.
Some items, like the hammer and the hammer springs simply would not print. I ran them through systems to repair them and fix errors. It would say that everything was fixed, but when I tried to “slice” them for printing, the software would crash. This means that my gun is incomplete. It has no hammer. Not really that big of a deal to me.
the whole gunNote that it is missing the hammer mechanism. More on that later.disassembled
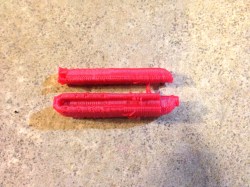
trigger spring. Cool design, I might use this idea for something else later
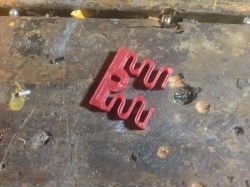
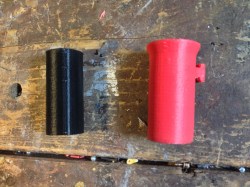
black: initial print with errors. Red: fixed print.
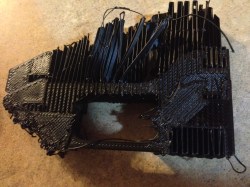
the gopro fell into the printer stopping it from moving the bed correctly. You can see the top two layers are shifted about an inch. The rest of that mess is just support material I was ripping out.
The hammer that refused to print correctly despite repeated repairs.
what the hammer was supposed to look like.
the spring that crashed my slicing program every time I tried to prepare it for a print.
Do I care now?
Nope. I climbed to the top of the fridge and got my cookies. I’m a happy child. The reality is that a zip gun is still cheaper, easier, safer, and more reliable. Here’s an example.
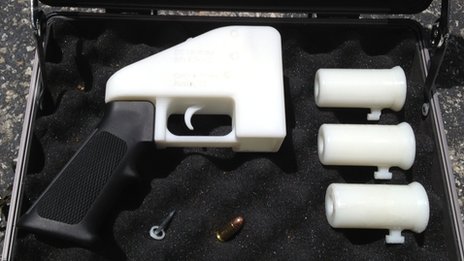
Several people have sent us this story. I’ve seen it everywhere. A lot of people are upset, on several sides. A gun has been 3d printed that can actually fire a round.
First, we have people scared that this will bring undetectable guns to people who wouldn’t have had access before. Then we have the gun fans that are reacting to the others with shouts of freedom and liberty and stuff. The 3d printing community has had mixed reactions, but many are concerned that this will harm 3d printing in general.
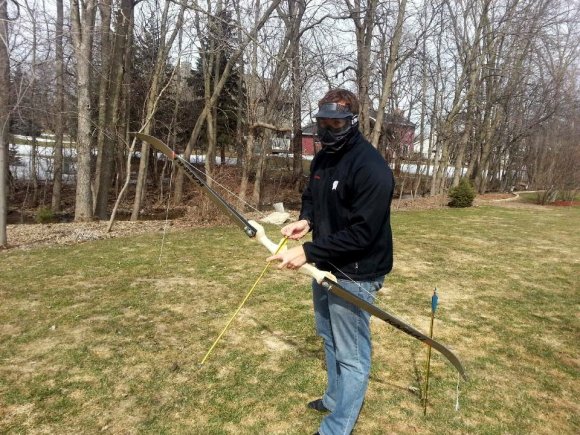
A little face protection is a great idea when first testing out your homemade bow. [Austin Karls] made this recurve bow during what he calls an engineer’s Spring break.
He settled on the idea after seeing a few other projects like it on Reddit. After first drawing up a plan he headed down to the shop to cut out the wooden riser (the middle part of a bow). Unlike traditional recurve bows this is made up of three parts. Traditionally you would laminate different types of wood to achieve the flexibility and tension levels desired. But [Austin] went with a synthetic material: the tips of two skis. Each were cut to the final length and affixed to the riser with a pair of bolts.
After a few test shots he gained confidence in the design and did away with the face mask. Now if you’re in the market to take your existing bow and add some firepower to it you’ll want to look in on this shotgun enhanced compound bow.