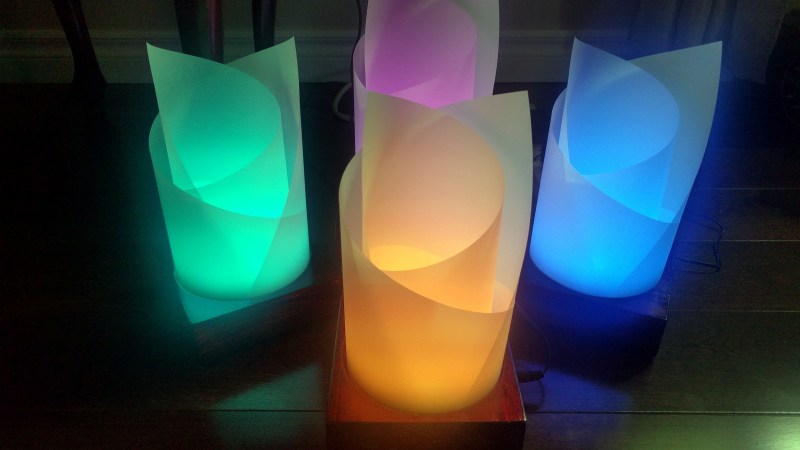

[Alex Lao] was recently in such a situation. His sister was getting married and he designed, built, and delivered twenty RGB LED table centerpieces in a rush. There were no prototypes made, and when the parts arrived all twenty were built all at once over a single weekend. These table centerpieces are illuminated by RGB LEDs and battery-powered, but have an option to be powered by a wall adapter.
[Alex] helpfully shared some tips on reducing the production risks and helping ensure results in such a limited time frame. His advice boils down to this: reduce the unknowns. For Alex this meant re-using code and components from a previous project — even if they were not optimal — so that known-good schematic and footprint libraries could be used for the design.
From one perspective, the PIC32 microcontroller inside each lamp is overkill for an LED centerpiece. From another perspective, it was in fact the perfect part to use because it was the fastest way for [Alex] to get the devices working with no surprises.
For an added perspective on needing to get production right the first time on a much larger scale, be sure to check out getting an installation made up of 25,000 PCBs right the first time.


Nice, will use this design for my wedding :)
But maybe with radio communication… This could be used very creatively.
Glad you like it, that was actually an idea we had to sync all the lights. We decided at the end that we wanted something a bit simpler. If you can find an RF module that can do SPI out this might not even need a separate microcontroller.
I’ve recently made 40 channel BCM/BAM module for LEDs, so will probably reuse this. It’s based on atmega328 and shift registers, has rs232 communication, adding rf module would be simple. I’ll try to add it as a project on weekend.
Hey Alex! Weird question: I notice that you have a “Serial Number” field on your silkscreen layer. What did you use to fill that in, and how well did it work? I tried this on a previous board, but every permanent marker I tried would wipe right off, even if I let it dry.
I user permanent marker. You are right, lots of solvents dissolve permanent marker. Some stuff I’ve seen used at work are lab markers that are not dissolved by sopvents., look at the datasheets for those carefully, some are corrosive. Of course the other alternative for hobbiests is to just clean the board and then mark it.
RGB LED it`s really helpful, especially for design.