A 3D Printed Cryptex

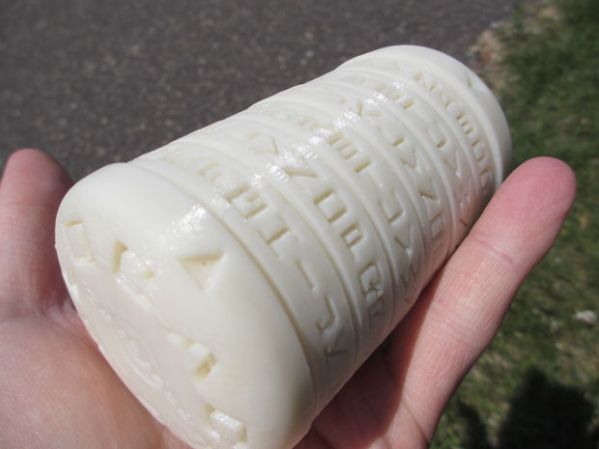
Once you’ve dialed in your 3D printer calibration settings, you enter the phase of printer ownership where you’re eager to show off what you can make, and you’re sure to impress with [pjensen’s] 3d printed cryptex spinning around in your hands.

If you’re a regular reader of our 3D Printering column, then the behind-the-scenes screengrabs should look familiar: [pjensen] used Autodesk Inventor to sculpt the shapes, staring with the cryptex’s individual rings. After embossing the alphabet across each ring, [pjensen] adds slots into the inner loops for pins to slide through. An outer chamber holds the rings in place and prohibits access to the interior chamber, which is held in place on both sides by an end cap.

Lining up the rings to spell the correct word allows the inner chamber to slide free of the whole assembly, revealing whatever goodies may lie inside. You can follow [pjensen’s] step-by-step guide to build your own cryptex, or just download his model and start printing.

Update: Tetris Handheld Get PCB And Case

update-handheld-tetris

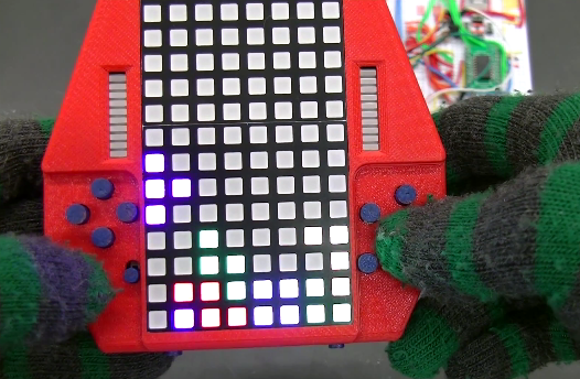
Check out this sweet-piece of homemade handheld gaming! [Jianan Li] has been hard at work on the project and published the updates in two parts, one that shows off the PCB he had fabbed for the project, and another which details the 3D printed case. This is, of course, is the culmination of the Tetris project we first saw as an incredbily packed, yet thouroughly tidy breadboarded circuit.

We really enjoy the 8-sided PCB design which hosts all the parts and gives you a place to hold and control the unit, all without seeming to waste much real estate. The case itself is quite impressive. The openings for the square-pixel LED matrices (the original design had round pixels) and the bar graphs all have nice bevel features around them. The control area has a pleasant swooping cutout, with blue buttons which stand out nicely against the red. Check out the slider switch by his left thumb. He printed matching covers for this slider, and the two that stick out the bottom. Also on the bottom are female pin headers so that you don’t need to disassemble the case to interface with the electronics.

All of this and more are shown off in the clip after the break.

Continue reading “Update: Tetris Handheld Get PCB And Case”

3D Printed Netduino Remote Controlled Car

netduinocar

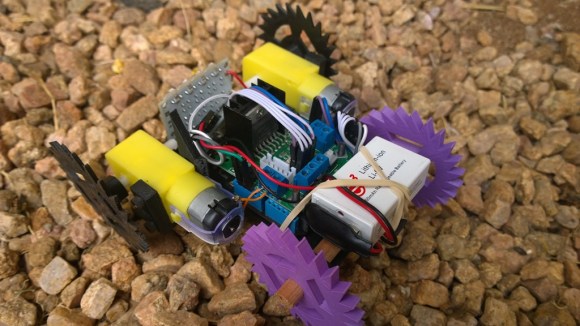
[Matt] lives in South Africa, where homes have smallish crawlspaces (some only 30cm high!) that he can’t quite squeeze himself into. Even if he could, he probably wouldn’t: they’re apparently vacation homes for the local rats. He did, however, want to explore these spaces to get a better idea what’s going on inside, so he built a Windows Phone-controlled car with a Netduino and 3D-printed parts.

Such a specialized application requires unique parts, so [Matt] designed and 3D-printed the wheels and frame from scratch. You’ve probably noticed that the wheels aren’t your typical cylinders. The terrain [Matt] faces is sand, so the spiked shape provides better grip. The body’s design required extra attention because it holds the motors, the Netduino, the motor driver, and the battery.

A Bluetooth module connects to the Netduino and allows [Matt] to drive the car with his Windows Phone, and an inexpensive 5V LED board provides some light for those dark corners. How does it see once inside the crawlspace? It looks like [Matt’s] getting to that part. His plan is to simply mount a second phone running Skype and watch the stream. Stick around after the break to see [Matt] use the car to both confuse and excite his dog.

Continue reading “3D Printed Netduino Remote Controlled Car”

3D Printed Guitar

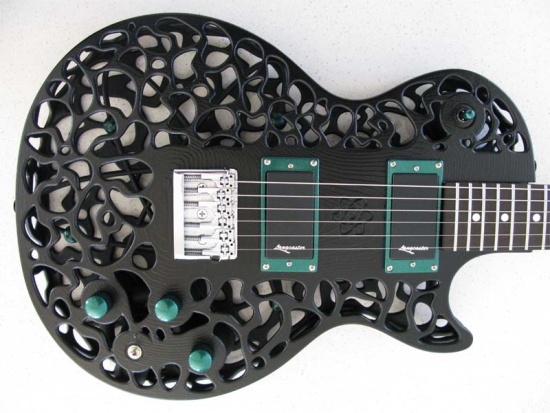
We’re not sure how we missed this one, but it definitely deserves a look. Professor of Mechtronics [Olaf Diegel’s] 3D printer must go to 12, because he’s printed these incredible electric guitar bodies. You probably won’t be making your own on your filament printer, however, because [Diegel] uses SLS (Selective Laser Sintering) to create the body out of nylon, then he dyes the resulting piece in a two-step process. You can read more about the construction specifics on his website.

And, they’re more than just eye-candy: the guitars sound brilliantly metallic. There are more than enough pictures and videos to keep you occupied on the site, where you can sift through all eight designs to your heart’s content. You’ll want to keep reading for a couple of videos embedded after the break, which feature some demonstrations of the guitar and comparisons to traditional electric guitars, as well as a brief history of its construction and build process.

Continue reading “3D Printed Guitar”

AxCut: An Open Source Laser Cutter

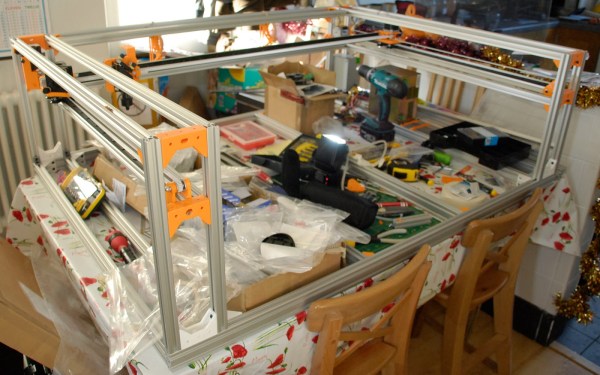
If you’ve always wanted a laser cutter and you have £1500 lying around (approx. $2500 as of today) — and you have access to a 3D printer — then you’ll want to take a look at [Damian’s] open source laser cutter: axCut. The project has evolved over the last few months from some mockups in OpenSCAD to a working prototype.

You’ll want to dig through his blog posts as well as his YouTube channel for all the juicy details, but from what we can gather, [Damian] is on the home stretch. The current implementation includes a 40W CO2 laser with functioning laser control and an impressively quiet watercooling system. Although the build’s wiring remains a bit of a tangle, the prototype cuts (almost) as expected. His next hurdle is ironing out the air assist, which should prevent some fire hazard issues and keep the lens free of debris.

Check out a couple of videos after the break, and if you’re interested in getting into laser cutting but want to start smaller, have a look at the MicroSlice from a few months ago.

Continue reading “AxCut: An Open Source Laser Cutter”

Scratch-built Smart Flashlight

scratch-built-smart-flashlight

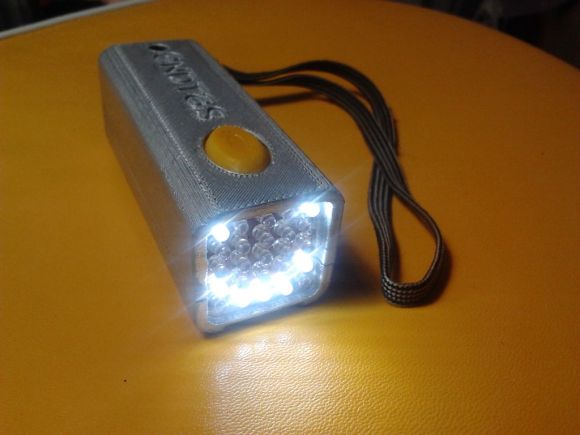
This flashlight has a face; one of the many tricks which [Hobbyman] included during the development process. The smart flashlight build turned out to be a great way to practice so many different aspects of product development.

It was envisioned as a light for use when walking or biking that could do more than just light your way or flash on and off. Of course we know it’s really just a reason to spend way too much time in his lair. He started with the electronics, driven by a PIC 16F88. The 5×5 LED matrix gives him just enough to work with for patterns and rudimentary text. The prototype is wrapped up into a pretty tight package which leaves enough room in the 3D printed case for 4 AAA batteries. As the project progressed more and more features were added in. The most current offering includes a temperature sensor as well as the ability to react to ambient sound. See for yourself after the break.

Continue reading “Scratch-built Smart Flashlight”

Arduino-based Sieve Of Eratosthenes

ofTs7UD

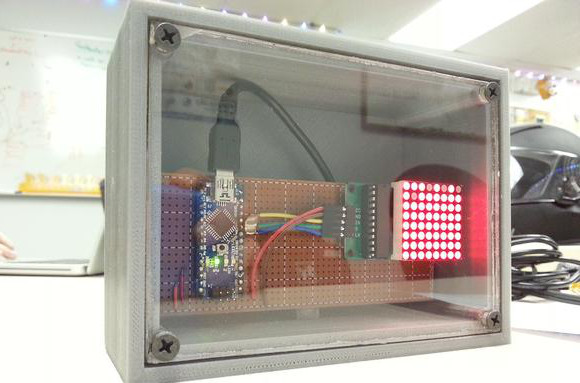
[Darkmoonsinger’s] sister is finishing her graduate degree in mathematics, and [Darkmoonsinger] wanted to give her a gift that fit with her achievement. Naturally, building a Sieve of Eratosthenes using an LED matrix and an Arduino made perfect sense. If you’re unfamiliar, a Sieve of Eratosthenes is a simple, but very efficient, technique for finding prime numbers. Starting with a group of numbers, you step through each one in order. If it’s prime, you eliminate any multiples from the list. After a few iterations, the numbers remaining are all primes. After getting the LED matrix and sieve algorithm running, [Darkmoonsinger] designed an enclosure for the project. She made a couple of mistakes with this part, and happily included them for everyone’s benefit.

It only figures primes up to 64, and she lights the LED for 1 because it ‘makes the array look prettier’. Also, we couldn’t help but think that mounting the components a bit differently would have made a cleaner install (here’s a prime number generator with a backlit faceplate). However, that probably doesn’t matter to his sister. As they say, it’s the thought that counts, and we never get tired of seeing people build rather than buy!