Print Tasty Treats With MIT’s Ice Cream Printer

Ice Cream Printer

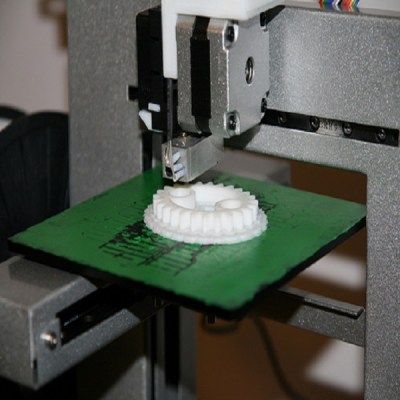
Three MIT students decided that 3D printers just aren’t interesting enough on their own any more. They wanted to design a new type of printer that would really get young kids engaged. What’s more engaging to children than sugary treats? The team got together to develop a new 3d printer that prints ice cream.

The machine is built around a Solidoodle. The Solidoodle is a manufacturer of “accessible” 3d printers. The printer is enclosed inside of a small freezer to keep things cold during the printing process. On top of the machine is a hacked Cuisinart ice cream maker. The machine also contains a canister of liquid nitrogen. The nitrogen is used to blast the cream as it leaves the print head, keeping it frozen for the 15 minute duration of the print.

It sounds like the team ran into trouble with the ice cream melting, even with the liquid nitrogen added. For a single semester project, this isn’t a bad start. Be sure to watch the clip of the machine running below.

Continue reading “Print Tasty Treats With MIT’s Ice Cream Printer”

THP Entry: TOME, The Portable 3D Printer

TOME Alright, 3D Printers exist. They’re machines you can simply buy for a few hundred dollars, set them on your desk, and have them start churning out plastic parts. A little pedestrian, isn’t it? How about something you can take into the field for a client, and print out some new parts right there? How about sending a printer to the latest humanitarian crisis? After all, all those humanitarian uses for 3D printers we’ve been hearing about won’t do any good without a 3D printer.

TOME is [Philip]’s attempt at portabilizing a 3D printer and also his entry into The Hackaday Prize. The preliminary goals for TOME are the ability to print for four hours on a single battery, an auto leveling bed, and an accessible hot end that’s easy to replace.

Already the design for TOME is rather interesting. The astute printer aficionado will notice there is no stepper motor on the X carriage. The task of moving the head in the X axis is taken care of by a stepper in the base, with a square shaft and set of gears moving everything back and forth.

With this odd yet ingenious motor setup, the entire printer is able to collapse in on itself, allowing it to be installed in a waterproof plastic case. That’s something you’re going to need if you’re taking a printer on the road.


SpaceWrencherThe project featured in this post is an entry in The Hackaday Prize. Build something awesome and win a trip to space or hundreds of other prizes.

The Beginning Of The Age Of 3D Resin Printers

resin

For several years now, filament-based plastic printers have ruled the hobbyist market, with a new iteration on squirting plastic appearing on Kickstarter every week. SLA printers, with their higher resolution and historically higher price for raw materials, have sat in the background, waiting for their time to come.

Now, with the Sedgwick printer now available on Kickstarter, we may finally be seeing some resin printers make their way into hackerspaces and workshops the world over. Instead of other DLP projector-based resin printer where projector light shines up through the resin tank, the creator of the Sedgwick, [Ron Light] is doing things the old-fashioned way: shining the projector down onto the surface of the resin. He says it’s a simpler method, and given he’s able to ship a Sedgwick kit minus the projector for $600, he might be on to something.

There are a few other resin printers coming on the scene – the LittleSLA will soon see its own Kickstarter, the mUVe 1 is already shipping, and over on Hackaday Projects, the OpenExposer project is coming along nicely. All very good news for anyone who wants higher quality prints easily.

3D Printed Trays For Your Pick And Place Machine

3dprintedPNPTray Pick and Place machines are one of the double-edged swords of electronics.They build your boards fast, but if you don’t have everything setup perfectly, they’ll quickly make a mess. A pick and place can’t grab a resistor from a pile and place it – so far only humans can pull that one off. They need parts organized and oriented in reels or trays.

[Parker Dillmann] had to load some parts, but didn’t have a tray for them, so he 3D printed his own. [Parker] works at a small assembly house in Texas. He’s working on a top secret design which includes FFC connectors. Unfortunately, the connectors shipped in pick and place unfriendly tubes rather than reels. If he couldn’t find a tray, [Parker] would have to hand place those connectors as a second operation, which would increase the time to build each board and leave more chances for mistakes.

Rather than place each part by hand, [Parker] got in touch with his friend [Chris Kraft] who is something of a 3D printing guru. [Chris] confirmed that a 3D printed tray would be possible, though the PLA he prints with was not static safe. That was fine for the connectors, but [Parker] was hoping to save some tray space by putting his PSOC4 chips in the printed tray as well.

[Parker] used SketchUp to design a tray that would fit his Madell DP2006-2 pick and place. He left .15mm clearance around the parts – just enough to cover any inaccuracies during printing, but not enough to throw off parts placement. He sent the STL file over to [Chris] who used Simplify3D to a create a Gcode file. [Chris] printed the tray at .2 mm layer height on his MakerGear M2 printer, and the results looked great. Would they be good enough for the pick and place machine?

[Parker] received the printed trays in the mail and loaded them with parts. The pick and place had no problem finding and placing the connectors, making this job a huge success. [Parker] even left room for the PSOC4 chips.He plans to paint the tray with anti-static paint before giving them at try.

We really like this story – it’s a perfect example of how 3D printers can speed up processes in manufacturing. Now that the basic design is done, creating new trays is a snap. Nice work [Parker] and [Chris]! Continue reading “3D Printed Trays For Your Pick And Place Machine”

THP Entry: An Affordable Metal 3D Printer

metalFor years now, people have been trying to develop an affordable, RepRap-derived 3D printer that will create objects in metal. There has been a lot of work with crazy devices like high-powered lasers, and electron beams, but so far no one has yet developed a machine that can print metal objects easily, cheaply and safely. For The Hackaday Prize, [Sagar] is taking a different tack for his metal 3D printer: he’s extruding low temperature alloys just like a normal 3D printer would extrude plastic.

[Sagar]’s printer is pretty much a carbon copy of one of the many ‘plastic-only’ 3D printers out there, the only change being in the extruder and hot end. As a material, he’s using an alloy of 95.8% tin, 4% copper, and 0.2% silver in a 3mm diameter spool. This alloy melts at 235° C, about the same temperature as the ABS plastic these printers normally use.

The only real problems with this build are the extruder and nozzle. [Sagar] is milling his own nozzle and hot end out of stainless steel; a challenging bit of machining, but still within the realm of a hobbyist. He has some doubts about the RepRap derived plastic geared extruder being able to handle metal, so he’s also looking at designing a new version and milling that out of stainless as well.

It’s an awesome project, and we hope we’ll be seeing some updates to the project shortly. While a 3D printer that produces objects out of a low temperature alloy won’t be building rocket engines any time soon, it could be a great way to fabricate some reasonably high-strength parts at home.


SpaceWrencherThe project featured in this post is an entry in The Hackaday Prize. Build something awesome and win a trip to space or hundreds of other prizes.

A Closer Look At New Matter’s MOD-t 3d Printer

So last week the SupplyFrame office Prusa i3 finally gave up the ghost — the z-axis threaded rods unwound themselves from their couplers and the whole thing fell apart. So we needed to get some better couplers as our tubing wasn’t going to cut the mustard anymore. Thankfully Pasadena is full of 3d printer people! Within a few blocks of our office we have New Matter, DeezMaker, and a soon to be announced 3d printer from ToyBuilderLabs.

The one everyone is talking about right now is New Matter who recently announced an already successful fundraising campaign for the first run of their $250 3d printer, the MOD-t. This has been making the rounds recently due to its low price and stated aim of bringing 3d printing into the home of the masses (a tale as old as time, right?). It’s a lovely goal for sure, but they will definitely have their work cut out for them, but perhaps this is the team to make it happen? We decided to head over to their lab since it’s just around the corner from our office and see if we could get them to print some new couplers and maybe take a look at their printer while we were at it, videos and pictures after the break!

Continue reading “A Closer Look At New Matter’s MOD-t 3d Printer”

Customized IPad LCD Screen Clips Onto Macbook As A Slick Second Screen

Macbook with iPad second screen

Last year, [Ben] found a good deal on iPad 3 LCD screens. He couldn’t resist buying a couple to play around with. It didn’t take him long to figure out that it’s actually quite simple to use these LCD screens with any computer. This is because the LCD panels have built-in Apple Display port interfaces. This means that you can add your own Display Port connector to the end of the LCD’s ribbon connector and just plug it into a computer. You’ll also need to hook up a back light driver, which [Ben] was able to find pre-made for around $35.

The hack doesn’t stop there, though. [Ben] wanted to have a nice, finished product. He laser cut an acrylic bezel for the LCD screen that was a perfect fit. He then milled out a space for the LCD to fit into. The acrylic was thick enough to accommodate the screen and all of the cables. To cover up the back, [Ben] chose to use the side panel of a PowerMac G5 computer case. He chose this mainly for aesthetics. He just couldn’t resist the nice brushed aluminum look with the giant Apple logo. It would be a perfect match to his Macbook.

Once the LCD panel was looking nice, [Ben] still needed a way to securely fasten it in the right place. He knew he’d want it next to his Macbook, so why not attach it directly to the Macbook? [Ben] got to work with his 3D printer and printed up some small plastic clips. The clips are glued to the iPad screen’s acrylic bezel and can be easily clipped on and off of the Macbook screen in seconds. This way his laptop is still portable, but he has the extra screen real estate when he needs it. [Ben] also printed up a plastic clip that turns the iPad’s USB power connector and the Display Port connector into one single connector. While this is obviously not required, it does effectively turn two separate plugs into one and makes the whole project that much more slick.