Ultimaker Quality FAQ Is Like Porn For 3D Printers

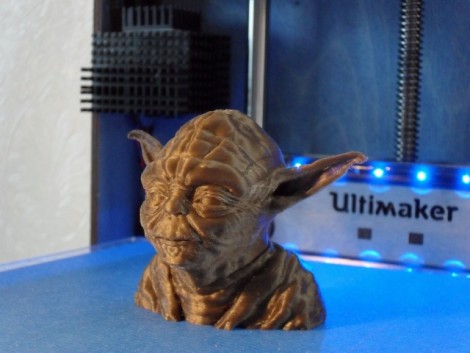
Do you think it’s not really possible to get amazing resolution from extruder-based 3D printers? You’re wrong, and this post about the attainable quality of prints on the Ultimaker proves it. The Yoda bust seen above was printed with a layer thickness of 0.02mm. This is a hack in itself because this process actually used two different layer thicknesses. The interior of the print, which you can’t see, but serves as a support mechanism for the object was printed at 0.04mm, with just the visible perimeter printed in the smaller thickness. That trickery is just fine with us if this is the result.

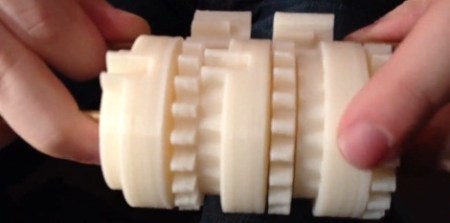
[Dave Durrant] discusses the press the Ultimaker has received, which mostly focused on the relatively fast printing process this hardware uses. But he didn’t think the story of the quality you can get with the device was being told. So he put out a call on the mailing list to send in pictures of high-quality 3D prints and he wasn’t disappointed by the response. You’ll see images of busts, bodies, gears, animals, and art pieces. There’s information about how they were printed, but even those not interested in the particulars will appreciate the macro photography that gives you an up-close look at how far we’ve come with these table-top rapid prototyping machines.

[Thanks Taylor]

Cheap Ikea Camera Boom Ensures Shake-free Video

ikea_webcam_jig

[Chris] recently got himself a nice web cam for documenting his Makerbot builds, and much like [Dino], he was looking for a way to get a bird’s-eye view of the action while keeping the camera nice and steady. While [Dino] ventured off to the hardware store, [Chris] tried a few different options that included tape, before heading off to Ikea to see what he could find.

$9 and a few Swedish meatballs later, he was on his way home with a “TERTIAL Work Lamp” that can be mounted on virtually any desk-like surface. He had to remove most of the web cam’s useless mounting hardware, doing the same with the lamp’s light fixture. He put together a small bracket in Google Sketchup, which he then printed out using his Makerbot.

It fit perfectly, and now he can get steady video of his Makerbot prints every single time.

3D-printable Laser Cutter

[peter] send in a reprappable laser cutter that he’s been working on. Even though he’s still having some problems with the accuracy of the beam over the entire square meter bed, it’s still an amazing build.

The build started off with a bunch of t-slot aluminum extrusions. After taking delivery of an absurdly large package containing a CO2 laser tube, [peter] started working on attaching motors to the axes. The optics travel the solid rods on pillow block bearings driven by the age-old stepper motor & timing belt drive.

The 1-square-meter of cut area on this machine is enormous for a homebrew laser cutter. [peter] discovered that once the necessary components are in place, it’s really how much aluminum you’d like to buy that becomes the limiting factor for the cut area. [peter] put the files for the 3D-printed carriages, brackets and mounts up on Thingiverse in the hopes his design can be improved by others.

Print The Best Mascot, Win A Shiny New Makerbot

If you’ve always wanted a 3D printer, here’s your chance to win one. Makerbot Industries wants the Internets to design a new mascot for them. The contest winner will receive a Makerbot Thing-o-matic.

Don’t worry about a chicken or egg situation with this contest. You don’t actually need to print your design (although printability is a quality considered when judging). All you need to do to enter is upload your design files before the deadline on September 28th. Designs must be robot themed, and anything uploaded as Private will be made Public after contest results are announce. It should be fun looking through all of the submissions. There’s several other design restrictions so make sure to read carefully before you get to work.

Those that would rather work with a soldering iron than design plastic robot parts need not despair. You haven’t missed the deadline for the 7400 Logic contest, which is accepting entries through October 21st.

super_sized_3d_printer

Huge DIY 3D Printer Predictably Prints Huge 3D Items

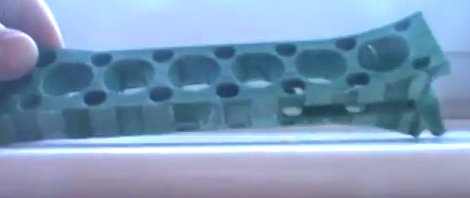
Well, if we ever need something huge built on a RepRap, now we know who to call. [Jim] over at Grass Roots Engineering wrote in to share a large 3D print he just finished, which was extruded by an equally impressive home-built 3D printer.

The part he built consists of a bunch of hollow green tubing in a criss-cross pattern and was printed in just under 2 days. He never mentions what the part is going to be used for, but at 376 x 376 x 250mm (14.8 x 14.8 x 9.84in), he estimates that this is the biggest single part printed with a DIY 3D printer.

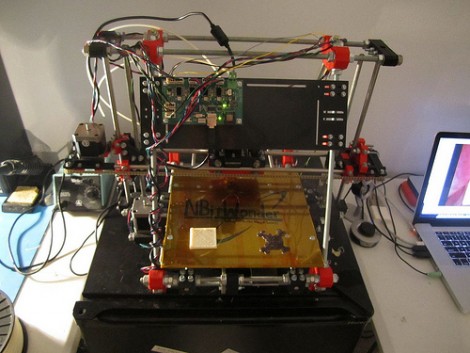
The printer itself is based on the RepRap, but is obviously far larger. It prints using ABS plastic utilizing a maximum build area of 403 x 403 x 322.7mm (15.86 x 15.86 x 12.7in). Built over the course of 3 years, it was fully operational in 2010 but has undergone several improvements as [Jim’s] needs have changed.

It’s a fantastic looking machine, and it seems to print quite nicely. We would sure love to have one of these in our workshop.

Continue reading to see [Jim’s] 3D printer in action.

Continue reading “Huge DIY 3D Printer Predictably Prints Huge 3D Items”

Delta Robot 3D Printer

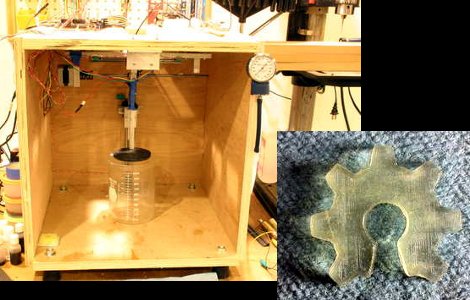
Sometimes, not all our builds work out the way we hoped. That’s what happened to [Rob] and his attempt at a Delta robot that does stereo lithography. A Delta robot is capable of very fast and precise movements, so [Rob] slapped a laser module on the end of the arms. After putting some UV curing resin in front of the laser, he was left with a blob of goo and we’re trying to figure out why.

[Rob] thinks the admittedly terrible print quality was due to diffraction and the reflective build plate. If this were the case, we’d agree with the assessment that adding some dye to the resin would help. Some commentors on [Rob]’s blog have suggested that he’s running the laser too slowly. It’s a shame [Rob] scrapped his build and turned it into a plain-jane X & Y axis build. Delta robots can be really damn fast, and adding a printer to one might mean prints that take minutes instead of hours. There are a few people working to get a Delta RepRap off the ground, but this project still has another prototype or two before that happens. Check out [Rob]’s attempt at Delta robot stereolithography after the break.

Thanks to [techartisan] for sending this one in.

Continue reading “Delta Robot 3D Printer”

A 3D Printed Aerial Drone

Drones come in many shapes and sizes, but now they can also be 3d printed! To make these drones, the [Decode] group used a selective laser sintering process which is pretty interesting in itself. Once the printing process is done, these little planes are built with only five structural and aerodynamic components. Because of their simplicity, these drones can reportedly be assembled and ready to fly with no tools in only ten minutes!

This design was done by the [Engineering and Physical Sciences Research Council] at the University of Southampton in the UK by a group of students. Besides this particular plane, they concentrate their efforts on building autonomous drones under 20 Kilograms. Using a 3D sintering process with this design allowed them to make this plane how they wanted, regardless of the ease of machining the parts.

This group has several videos of their planes on their website to download, but check after the break for an embedded video of the [Newscientist] piece about their project. Continue reading “A 3D Printed Aerial Drone”