Breadboarding A 68000 Computer In Under A Week

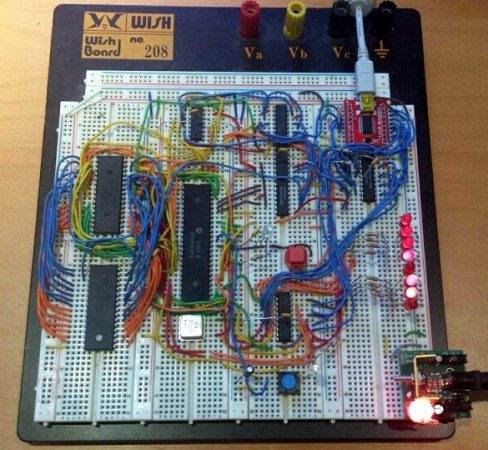
We’ve been lurking over at Big Mess ‘o Wires as [Steve] geared up for his 68000 computer build. One of his previous posts mentioned a working breadboard version but we figured it would be a ways off. Surprise, he’s got it working and what you see above took just 6 days of “occasional work” to get running.

The chip in use is actually a 68008 but we remember reading that he does plan to migrate to a 68000 because this one lacks the memory pins to address more than 1 MB of RAM. The trick here was just to get the thing running and he made some common choices to get there. For instance, he grounded the /DTACK in much the same way [Brian Benchoff] explained in his own 68k build.

We’re not sure if his address decoding was a time saver or not. If you study [Steve’s] original planning post you’ll learn that he’s going to use programmable logic to handle the address decoding. But above he wired up 74-series logic chips to perform these functions. On the one hand you know your Hardware Description Language isn’t the problem, but did you terminate one of those wires where you ought not?

Additional tripping points include a bouncing reset pin. Looking at that we’d tell [Steve] there’s a problem with his chip, except that this was his first thought as well. He went the extra mile by building and testing a replica of the reset system. This makes our brain spin… shouldn’t the reset be among the most reliable parts of a processor?

At any rate, great work so far. We can’t wait to see where this goes and we hope that it unfolds in a way that is as exciting as watching [Quinn Dunki’s] Veronica project take shape.

When Worlds Collide: 68008 Bootstrapped By An Arduino Uno

68008-ardu

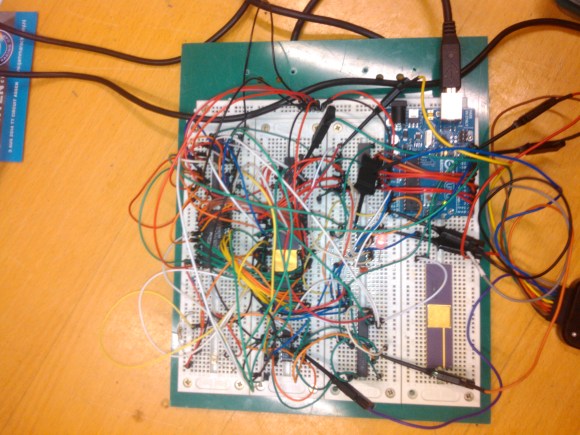
[Peter Bjornx] brings classic microprocessors and modern microcontrollers together with his Arduino bootstrapped 68008 computer. The Motorola 68008 is the 8-bit external bus version of the well-known 68000 (or 68k) microprocessor. A friend gave [Peter] one of these chips, so he built a simple computer around it.

This isn’t one of those clean retrocomputers with every connection carefully planned out and wire wrapped. [Peter’s] created a true hack – a working 68k system on a breadboard created with whatever he had on hand at the time. The real gem of this system is the ROM. [Peter] replaced an EPROM chip with an Arduino.

In the not-so-good-old-days, microprocessors (and many microcontrollers) ran from an external ROM chip. This often was a UV-erasable EPROM. Carefully compiled code was burned into the EPROM with a device programmer. If the code wasn’t perfect, the EPROM had to be pulled and placed under a UV lamp for 20 minutes or so to erase it before it was time to try again. EPROM emulators were available, but they were way too expensive for the hobbyist.

Thankfully those days are far behind us now with the advent of EEPROM and then Flash. [Peter] didn’t want to revisit the past either, so he wrote a simple Arduino sketch which allowed it to act as an EPROM emulator, including address logging via the serial port.

The design still caused [Peter] some headaches, though. His major problem was a classic 68k issue, /DTACK timing. /DTACK or Data Transfer Acknowledge is one of several bus control signals used by the 68k. When the 68k performs a read from the data bus, it waits for /DTACK before it transfers data. The Arduino was too slow to release /DTACK in this case, which caused the 68k to think every read was immediately completed. There is a much clearer explanation of the 68k bus cycles on this Big Mess O Wires page. [Peter’s] solution was simple – a D flip-flop connected to the address strobe took care of the timing issues.

It took quite a bit of tinkering, but the system eventually worked. Peter was able to run the 68008 from its reset vector into a simple loop using the Arduino. It’s only fitting that the 68k program loaded by the Arduino was an LED blinker, everyone’s favorite hardware Hello World.

Thanks [Robert!]

The Coolest Homebrew Computer Gets Its Own Case

SONY DSC

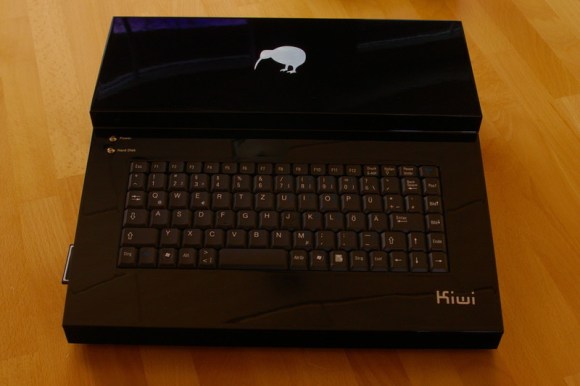
When you’re building one of the best homebrew computers ever created, you’ll also want a great case for it. This was [Simon]’s task when he went about building an enclosure for his Kiwi microcomputer.

We were introduced to the Kiwi last year as the end result of [Simon] designing the ultimate computer from the early to mid-1980s. Inside is a 68008 CPU, similar to the processor found in early Macs and Amigas, two SID chips taken from a Commodore 64, Ethernet, support for IDE hard drives and floppy disks, and a video display processor capable of delivering VGA resolution video at 32-bit color depth. Basically, if this computer existed in 1982, it would either be hideously expensive or extraordinarily popular. Probably both, now that I think about it.

The case for the Kiwi was carefully cut from ABS sheets, glued together with acetone, and painted with auto body paint by a friend. It’s a great piece of work, but the effort may be for naught; [Simon] is reworking the design of his Kiwi computer, and hopefully he’ll be spinning a few extra boards for everyone else that wants a piece of the Kiwi.

Ask Hackaday: Who Likes Retrocomputing?

Last week we posted a link to Project Kiwi, a homebrew Motorola 68008-based microcomputer built by [Simon] that includes Ethernet, a very good display adapter, an interface for IDE hard disks, two Commodore SID chips (for stereo chiptunes), a floppy disk controller, and an already existent software library that will make it very easy to develop your own software for this wonderful computer.

After thinking about [Simon]’s Project Kiwi for a while, I’ve been thinking there really hasn’t been a homebrew computer made that is so perfect for a proper Open Hardware release. There are more than enough peripherals in the computer to make development very fun. I’ve suggested doing a group buy to get Kiwi PCBs out into the wild and into the hands of other retrocomputer fanatics, but [Simon] would like a little more feedback.

Of course, this means turning to you, the wonderful Hackaday reader. Would any of you be interested in your own Kiwi microcomputer?

[Simon] tells me there are a lot of problems for turning the Kiwi microcomputer into a Open Hardware project. His prototype PCB cost €300, greatly reducing the number of people who would be interested in making their own Kiwi. Also, there are a few problems on the current PCB design (easily fixed for the next revision), and [Simon] would like to add a few features like DMA and a proper framebuffer.

Despite all those problems, I can’t see a better way to learn about computer architecture the hard way (i.e. 80’s microcomputers as opposed to futzing around with a Raspberry Pi). You’ll also get a really wonderful computer system that will show the power of 80s-era electronics, with the very hopeful goal of spreading the gospel of retrocomputing with the venerable Saint MC68000.

If you’d like to add your two cents – if having an Open Hardware 80s microcomputer is a good idea, or some technical requests such as adding a proper 68000 CPU to future designs, leave a note in the comments or on the forum [Simon] set up on his Kiwi page.

I think it’s a cool idea, but then again I’m probably blinded by how cool an 80s computer of this caliber is. The fate of this project is now in your hands.

Building The Best Homebrew Computer Ever

A few days ago when I posted a homebrew Motorola 68000 computer spectacular, I briefly mentioned a truly spectacular homebrew computer built by [Simon Ferber]. When I posted a link to a Youtube demo of his 68k board, he was working on a website to document the architecture  design, hardware, and software. That website is now up (cache if you need it) and now we can all get a good look at the best homebrew computer ever built.

Built around the 68008 CPU – slightly less capable than the 68000 found in the original Macs, Amigas, and the TI-89 – [Simon]’s Kiwi computer has peripherals out the wazoo. A Yamaha V9990 Video Display Processor provides a 640×480 display with 32k colors. Two SID chips taken from a Commodore 64 provide stereo chiptune audio, and a floppy disk controller, IDE/ATA bus, and CS8900A Ethernet controller provide all the practical functionality you’d expect from an awesome computer.

On the software side of things, [Simon] is running Enhanced Basic 68k, but of course he can’t just use BASIC to fiddle around with all the cool chips on the Kiwi. With that in mind, he came up with a C-based toolchain that included porting libc to the Kiwi.

Like any good homebrew computer project, all the schematics, a bit of code, and a BOM are provided. [Simon] is currently working on (slightly) redesigning the PCB layout of the Kiwi, and we’ll be happy to see those files released. Anyone up for a Kiwi PCB group buy?