An Android Controlled Arduino Drone

Drone

Who among us has not wanted to create their own drone? [Stefan] wrote in to tell us about a project for high school students, where a Styrofoam glider (translated) is converted into an Android (or PC) controlled drone.

[Stefan] tells us that the inspiration for this project comes from 100 years ago, when “steam-engines were THE thing” and children became introduced to modern technology with toy engines. “Today, mechatronic designs are all around us and this is an attempt to build the equivalent of the toy steam engine.” This project showcases how modern tools make it easy for kids to get involved and excited about hardware hacking, electronics, and software.

At the heart of the glider is an Arduino Pro Mini which communicates with either a computer or an Android phone via Bluetooth. It is especially interesting to note that the student’s used Processing to create the Android app, rather than complicating things by using Eclipse and Android Development Tools (ADT). While the more detailed PDF documentation at the end of the project page is in German, all of the Processingand Arduino code needed to build the project is provided. It would be awesome to see more Bluetooth related projects include a simple Android application; after all, many of us carry computers in our pockets these days, so we might as well put them to good use!

Do you have any well documented projects that introduce young and budding engineers to hardware or software hacking? Let us know in the comment section or send us a tip!

Are We Not Indestructible? We Are Quiz Buttons!

In what we hope is a new trend in interviewing, some of the people at [Anthony]’s place of work asked him to make some wireless quiz buttons. He took the task quite seriously, making them extremely robust and low-power.

[Anthony] is experienced in the button arts, having made this party push button for a wedding reception. His design for the quiz buttons is a little different. Each button has an Arduino Pro mini and an nRF24L01 wireless RF module. On the receiver side is an Arduino Pro micro and an another RF module. A connected PC captures the serial data and  displays the pressed button’s ID. It also shows the order in which subsequent buttons were pressed and the time elapsed between them.

The really notable part of this build aside from the awesome laser-cut MDF Devo energy dome button housings is the extremely low power consumption of the transmitting Arduinos. [Anthony] has designed them to go into sleep mode which disables all on-board circuitry and only wakes on interrupt. He removed the power LED and the voltage regulator since they run on 2-AA batteries. The voltage regulator was drawing more than 25mA in sleep mode. Because of these mods, each button consumes < 1μA, which is less power than the batteries can self discharge over their lifetime.

[Thanks Jef]

DIY Arduino Pro Mini Quadcopter

[execUc] took a stock V929 quadcopter and started making some crafty customizations. The main change – the control electronics were replaced by an Arduino Pro Mini (16Mhz model). He soldered all the modules on a prototyping board and, although admittedly a bit heavy, the little guy takes flight with no problem.

Among other details, an HMC5883L (magnetometer) and MPU6050 (accelerometer / gyroscope) are used as sensors. A LiPo 7.4V battery pack supplies the power. The brushed motors are controlled by pulse-width modulation from SI2302 MOSFET with added diodes. He plans to swap out the micro-controller for an ARM7 stm32F103 for extra computing power, and needs to play with the PID values to correct a slight problem he seems to be having when rotating.

Check out a test flight video after the break. [execUc] has a thorough list of all the alterations he made in the video description, so be sure to read it.

[via Hacked Gadgets]

Continue reading “DIY Arduino Pro Mini Quadcopter”

Real Multifunction “Sonic Screwdriver”

dr who sonic screwdriver

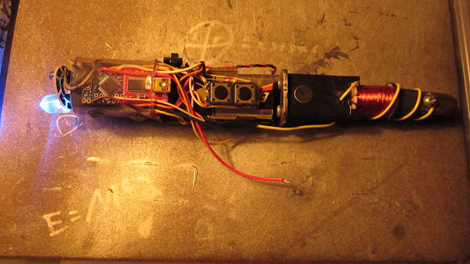
“I don’t understand, you don’t have the technology.” OK, so it’s not actually a futuristic tool with the same capabilities as the one off the hit TV series Dr. Who, but this homemade “sonic screwdriver” is a multifunction device that’s pretty cool nonetheless.

Created around an Arduino Pro Mini, [Gunther] really one-upped the last screwdriver we featured. Built in functions include: brown note tone generator, dog whistle, EMF meter, flashlight, IR universal remote, laser pointer, ohm meter, sound level meter, voltage detector, and a voltage meter.  You can also have an electromagnet or output voltage supply if you want. If that wasn’t enough, it can even play the theme song from Star Wars! Whew. That’s a mouthful of functionality.

Although he has posted the Arduino code, you’ll have to keep an eye on his site for more details if you want to create your own. He’s mentioned that he’s working on blue prints and a full parts list… Awesome. Now where’s that lock pick function?

Check out a video showing off some of the features after the break.

[via Make]
Continue reading “Real Multifunction “Sonic Screwdriver””

Micro Arduino Bot Skitters Its Way Into Our Hearts.

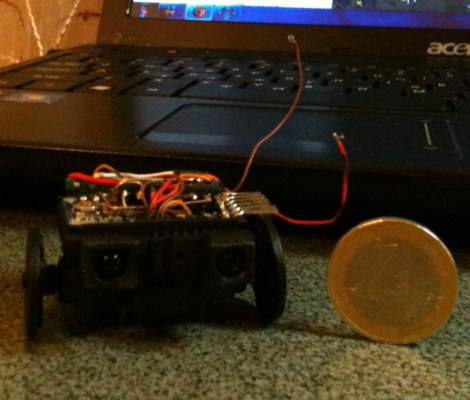
Here’s a quick and easy little robot with a not-so-pint-sized brain. [Dikos] over at grobot, slapped together some gutted micro servos, an Arduino pro mini, H bridge chip, and a solar key-chain charger  to make this little three wheeled cutie. The robot boasts some very simple object avoidance thanks to the Sharp GP2Y0A21YK analog IR distance sensor, and that’s about it. This leaves tons of Arduino Pro left for a whole slew of sensors and robot stuff. We can’t spot it but somewhere under the pro mini is the solar key-chain’s 3.7V Lipo battery. The PCB for the emergency charger also makes a convenient little back panel housing a few LEDs, charging electronics, and a handy spot to hang a bead roller.

The micro bot has a pretty mean starboard list due to the lack of wheel position feedback, after all the micro servos were gutted to just function as simple gear boxes. We might have kept the servo mostly untouched, ditched the H bridge and performed a continuous rotation mod. We even have a guide for it! This is a really cool little bot though, and not terribly expensive if you need a little maze roller… or if you have a ton of money and like swarms of things.

Check out a (silent) video of the robot after the jump, the bot doesn’t hit the table until 1:16.

Continue reading “Micro Arduino Bot Skitters Its Way Into Our Hearts.”

Bare-bones Electronic Advent Calendar

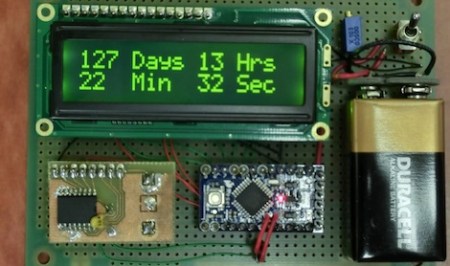
It’s officially September now (in some parts of the world), and that means we’ve been watching the Christmas decorations go up on the floor of Costco, Walmart and Target for the last few weeks. As a small test of reality, [Eric] decided to build an electronic advent calendar that counts down the days until Christmas. As a simple build using parts lying around on the bench, [Eric] did a pretty good job at deferring his kid’s questions of, “How long until Christmas?” to a machine.

The build is fairly bare-bones, using only an Arduino Pro Mini, RTC and LCD display. For the real-time clock, [Eric] used the ever popular DS3231 RTC. The software reads the time from the clock and calculates the number of seconds between the present time and the hard-coded target date.

Everything is powered by a 9 Volt battery that wouldn’t last the remaining 115 days until Christmas. There is a power switch and the RTC has a battery backup, so the build will probably suffice for all but the most fanatical child.

An Arduino Board For Your Tiniest Of Projects

1inch_by_1inch_mini_arduino_board

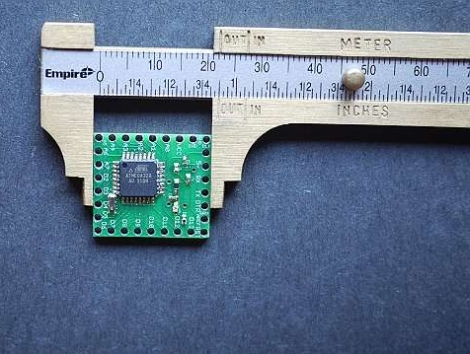
Instructables user [dustinandrews] just took the wraps off his latest creation, a DIY Arduino Pro Mini clone.

Actually, to call it an clone is technically incorrect – while he aimed to produce a tiny Arduino-compatible board, his goal was not to replicate the Mini’s design. Instead, he developed a 1” x 1” board from scratch, covering the construction process in great detail.

When you are working with components this tiny, the only reasonable way to get things done is via solder reflow. He walks through the steps he took to produce the board, which should be enough to guide those doing reflow for the first time through the process without too much trouble.

The end result looks pretty nice, and when he puts it up side by side against the Arduino Pro Mini, his board can definitely hold its own. While his design lacks an on-board power regulator and reset button, he does provide two more analog I/O pins than the Mini, along with several other enhancements.