Helmet Of Many LEDs Built For Burning Man

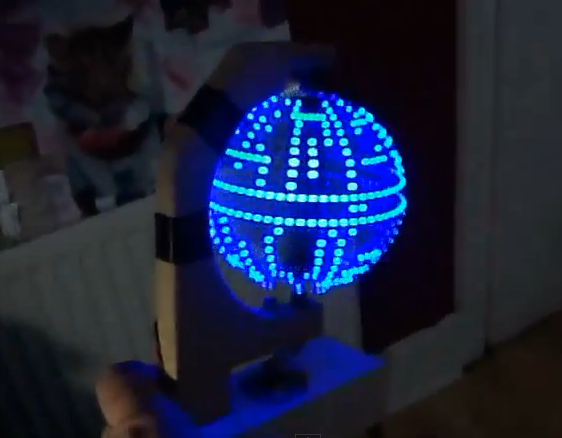
This motorcycle helmet was heavily altered to accept all of the hardware that goes into driving that huge array of LEDs. [Brian Cardellini] built it to wear at burning man. He claims to have been in over his head with the project, but we certainly don’t get that feeling when we see the thing in action. It’s light on build details, but there are plenty of demo shots in the video after the break. The animation and fading action really gets started about a minute and a half into it.

One of the early frames of the video is a shot of the parts order webpage. Since it’s an HD clip we were able to glean a few bits and pieces from that. It includes a MAX7219 LED Display Driver and fifteen 25-packs of Blue LEDs. Now that chip is a great choice, and one of the later shots shows two of them on breakout board driven by an Arduino. The look is very clean since he carved out most of the helmet’s padding to make room for the electronics.

Continue reading “Helmet Of Many LEDs Built For Burning Man”

16×8 Pixel Laser Projector

[Michiel] gave us a little shout-out by drawing the Hackaday logo with his recently completed 16×8 pixel laser projector. It uses a spinning set of mirrors mounted at slightly different angles to redirect the path of the red laser diode.

The projector is driven by an Arduino. To give it more than just a hard-coded existence [Michiel] included an Xbee module. This lets him connect to it with a computer in order to stream messages. One of the demo videos linked in his project log shows the web interface he coded which will push a message typed in the submission form out to the projector where it is scrolled like a marquee.

This type of spinning display is one of a few common methods for making laser projectors. In the image above you can see the optical sensor which is used to sync the diode with the spinning mirrors, each of which is responsible for a different row of pixels. He lists off several things that he learned when working on the project. We think the most important is the timing issues which go into something like this.

Bits And Pieces Robotic Arm

[V0R73X], who is 17  has been working on a project, to build A robotic arm. This project started out as a challenge put forward from one of his school teachers to build a robotic arm for $200.  [VoR73X] accepted, and the challenge began.

He came up with a robotic arm that can be controlled from his mobile phone and other bluetooth enabled devices. He also designed it so that he can control it from the infrared remote control of an old tv set. [VoR73X] decided to kept the design simple, to make it easy for others to build.  [VoR73X] has shared the code and a step by step process of how to build in the hopes that others would also like to take up the challenge.  Watch the video after the break for further details on his project.

via[Instructables]

Continue reading “Bits And Pieces Robotic Arm”

Genetic Research On The Cheap

When you think of DIY hardware, genetic research tools are not something that typically comes to mind. But [Stacey] and [Matt]’s OpenPCR project aims to enable anyone to do polymerase chain reaction (PCR) research on the cheap.

PCR is a process that multiplies a specific piece of DNA a few million times. It can be used for many purposes, including DNA cloning and DNA fingerprinting for forensics. PCR is also used for paternity testing.

The process involves baking the DNA at specific temperatures for the right amount of time. The DNA is first denatured, to split the helix into individual strands. Next, the temperature is lowered and primers are bound to the strands. Finally, another temperature is used to allow the polymerase to duplicate the DNA. This process is repeated to multiply the DNA.

The OpenPCR uses an Arduino to control a solid state relay. This relay provides power to two large resistors that act as heaters. A MAX31855 is used to read a thermocouple over SPI and provide feedback for the system. A computer fan is used to cool the device down.

A milled aluminium sample holder houses and heats the samples during cycling. The laser cut, t-slot construction case features some helix art, and houses all of the components. It will be interesting to see what applications this $85 PCR device can perform.

Via Adafruit

3D Games For The Arduino With Raycasting

For all the Arduino-based video game builds we’ve seen, we’re really only left with a bunch of 2D platformers and other sprite-based games. [Reimecker] wasn’t satisfied with this level of computational complexity, so he ported the 3D game engine made famous by Duke Nukem 3D to the Arduino (German, Google translation).

[Reimecker]’s project is based on the very popular Build Engine written by [Ken Silverman] and used in games such as Duke Nukem 3D,  Shadow Warrior,  Blood, and TekWar. The Build Engine can be used to make a first person shooter, but more on the level of Wolfenstein 3D instead of Half-Life.

The hardware [Reimecker] used is a regular ‘ol 8-bit Arduino with an attached LCD touch screen displaying 320×240 pixels of a ray cast environment. From the videos of the build (available after the break), [Reimecker] has a fairly decent game engine capable of displaying a 2.5D environment. The frame rate might not be very high, but it’s still an amazing build considering the hardware [Reimecker] is working with.

Continue reading “3D Games For The Arduino With Raycasting”

It Was Only A Matter Of Time Before We Saw Nixie Modules For The Arduino

The Nixie tube, a neon-filled tube with a series of 10 cathodes shaped like numerals, is a classic display for any build wanting a unique, vintage, or steampunk aesthetic. We shouldn’t be surprised a factory in China is now turning out Arduino-compatable Nixie modules (English translation, but don’t get your hopes up), but there it is.

The modules are based on the QS30-1 Nixie tube capable of displaying the digits 0 through 9, and include an RGB LED behind the tube for some nice additional illumination. According to the manual, the modules themselves are based on a pair of 74HC595 shift registers, and are ‘stackable.’ By applying 12 volts to a pair of pins and connecting another 5 wires to an Arduino, it’s possible to drive as many of these Nixie modules as you’d like.

[Paul Craven] got his hands on a quartet of these modules and is planning on building a steampunk style alarm clock as a personal project. [Paul] was able to get the modules up and running fairly quickly, as seen after the break.

While they’re most certainly not the cheapest option, if you’re planning a build with Nixies, this probably is the easiest way to get a vintagey, steampunkey numerical display.

Continue reading “It Was Only A Matter Of Time Before We Saw Nixie Modules For The Arduino”

Hacking A Floating RGB LED Decorative Ball

Knowing that I’m always happy to get something new and glowy, my wife brought home a cheap “floating pool light” that she found on sale for roughly $10. This is a large white floating ball that has LEDs inside and cycles through different colors. Meant to be put into a pool for neat effects, we found it to be much more interesting just used around the house.

However, it was a bit too bright and cycled colors too quickly for our taste. It was actually somewhat distracting when we were just trying to sit and have a few beers late at night on our patio. This gave me a perfect excuse to tear it apart and start hacking… like I wasn’t going to do that anyway.

What I found inside was extremely simple. There’s a single un-marked chip that holds the different display modes (there were 3 display modes: warm, cool, and white). The LEDs were arranged in an array of Reds, Blues, Greens, and Whites (half marked yellow).

Continue reading “Hacking A Floating RGB LED Decorative Ball”