A slide from the presentation, showing the power trace of the chip, while it's being pulsed with the laser at various stages of execution

Defeating A Cryptoprocessor With Laser Beams

Cryptographic coprocessors are nice, for the most part. These are small chips you connect over I2C or One-Wire, with a whole bunch of cryptographic features implemented. They can hash data, securely store an encryption key and do internal encryption/decryption with it, sign data or validate signatures, and generate decent random numbers – all things that you might not want to do in firmware on your MCU, with the range of attacks you’d have to defend it against. Theoretically, this is great, but that moves the attack to the cryptographic coprocessor.

In this BlackHat presentation (slides), [Olivier Heriveaux] talks about how his team was tasked with investigating the security of the Coldcard cryptocurrency wallet. This wallet stores your private keys inside of an ATECC608A chip, in a secure area only unlocked once you enter your PIN. The team had already encountered the ATECC608A’s predecessor, the ATECC508A, in a different scenario, and that one gave up its secrets eventually. This time, could they break into the vault and leave with a bag full of Bitcoins?

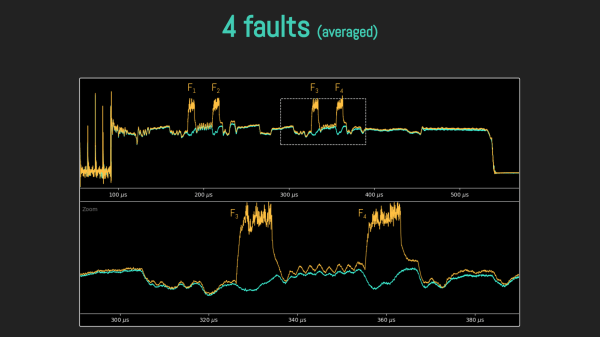
Lacking a vault door to drill, they used a powerful laser, delidding the IC and pulsing different areas of it with the beam. How do you know when exactly to pulse? For that, they took power consumption traces of the chip, which, given enough tries and some signal averaging, let them make educated guesses on how the chip’s firmware went through the unlock command processing stages. We won’t spoil the video for you, but if you’re interested in power analysis and laser glitching, it’s well worth 30 minutes of your time.

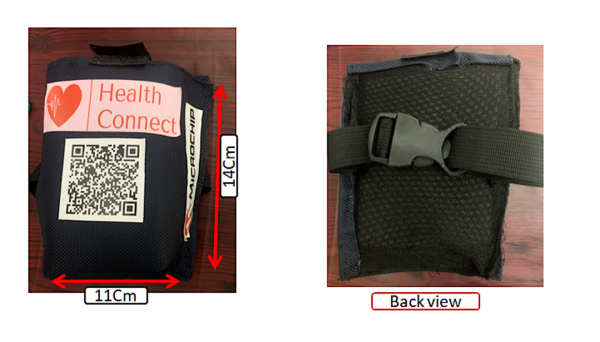
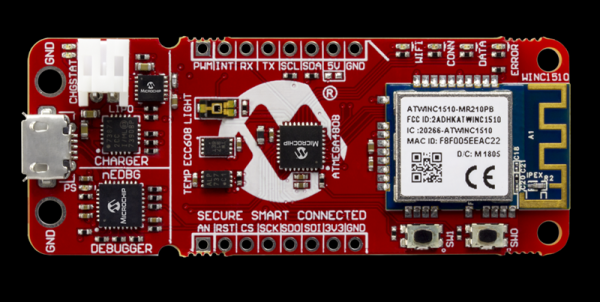
You might think it’s good that we have these chips to work with – however, they’re not that hobbyist-friendly, as proper documentation is scarce for security-through-obscurity reasons. Another downside is that, inevitably, we’ll encounter them being used to thwart repair and reverse-engineering. However, if you wanted to explore what a cryptographic coprocessor brings you, you can get an ESP32 module with the ATECC608A inside, we’ve seen this chip put into an IoT-enabled wearable ECG project, and even a Nokia-shell LoRa mesh phone!

Continue reading “Defeating A Cryptoprocessor With Laser Beams”

Comfortable, wearable packaging for biometric device for monitoring physiological data and pushing the data to the cloud

A DIY Biometric Device With Some Security Considerations

Biohacking projects are not new to Hackaday and it’s certainly a genre that really piques our interest. Our latest biohacking device comes courtesy of [Manivannan] who brings his flavor of a wearable biosensor with some security elements built-in through AWS.

The hardware is composed of some impressive components we have seen. He has an AD8232 electrocardiogram front end, the MAX30102 integrated pulse oximeter IC for determining blood oxygen and heart rate, and the ever-popular LM35 for measuring body temperature. Either of these chips would be perfect for your next DIY biosensor project though you might try the MAX30205 body temperature sensor given its 0.1-degree Celsius accuracy. However, what really piqued our interest was the use of Microchip’s AVR-IoT WA Development Board. Now we’ve talked about this board before and also mentioned you could probably do all the same things with an ESP-device, but perhaps now we get to see the board a bit more in action.

[Manivannan] walks the reader through the board’s setup and everything looks to be pretty straightforward. He ultimately rigged together a very primitive dashboard for viewing all his vitals in real-time, demonstrating how you could put together your own patient dashboard for remote monitoring of vitals or other sensor signals. He emphasizes that all this is powered through AWS, giving him some added security layers that are critical for protecting his data from unwanted viewers.

Though [Manivannan’s] security implementation doesn’t rise to the standard of medical devices, maybe it will serve as a case study in the growing open-source medical device movement.

Continue reading “A DIY Biometric Device With Some Security Considerations”

New AVR-IOT Board Connects To Google

Readers of Hackaday are no strangers to using a microcontroller to push data to WiFi. Even before the ESP8266 there were a variety of ways to do that. Now Microchip is joining the fray with a $29 board called the AVR-IOT WG that contains an 8-bit ATmega4808, a WiFi controller, and hardware-based crypto chip for authenticating with Google Cloud.

The board has a section with a USB port for charging a battery and debugging that looks like it is made to cut away. There are a number of LEDs and buttons along with a light sensor and a temperature sensor. It feels like the goal here was to pack as many Microchip parts onto a single dev board as possible. You’ll find the ATmega4808 as the main controller, an ATWINC1510 WiFi controller (a castellated module reminiscent of the ESP8266), the ATECC608A cryptographic co-processor, MCP73871 LiPo charger, MIC33050 voltage regulator, and an MCP9808 temperature sensor. We can’t find much info about the “nEDBG Programmer/Debugger” chip. If you’ve used it on one of a handful of other dev board, let us know in the comments about off-board programming and other possible hacks.

Naturally, the board works with AVR Studio or MPLAB X IDE (Microchip bought Atmel, remember?). Of course, Atmel START or MPLAB Code Configurator can configure the devices, too. There’s also an AVR-IoT-branded website that lets you use Google cloud to connect your device for development. The headers along the top and bottom edges are compatible with MicroElektronika Click boards which will make anyone with a parts bin full of those happy.

Looks like you can pick up the Microchip boards now from the usual places. From reading what Microchip is saying, they would like to position this as the “IoT Arduino” — something someone without a lot of experience could pick up and use to pipe data into Google cloud. While that’s probably good, it isn’t that hard to use an ESP-device to do the same thing using the Arduino IDE and then you have a 32-bit processor and you can use whatever cloud vendor you want. Sure, it would be a little more work, so maybe that’s where this offering will appeal.

On the plus side, we really liked that there was a battery option with a charger already on board — it seems like that’s something we always have to add anyway. It may be buried in the documentation, but the user’s guide and the technical guide didn’t appear to have an average and maximum current draw specified, so battery life is an open question, although the video says “low power.”

Although it isn’t quite the same thing, we’ve seen ESP8266’s talk to Google servers for interfacing with Google Home. And while it is on the Amazon cloud, we’ve even seen a 6502 up there.

Continue reading “New AVR-IOT Board Connects To Google”