Snap Together Boombox Great For Taking Your Music On The Go

fab-boombox

[Matt Keeter] wanted to take his music on the go, and wrote in to share a great looking boombox he built for under $100. His goal was to put something together that could be made in pretty much any hackerspace/fab lab, so his boombox was made using simple materials.

He first modeled the boombox using cardboard, later fabbing it from wood on a laser cutter. The design allows the stereo to be snapped together, though [Matt] says that some joints were glued as an extra precaution. Inside the boombox resides an custom PCB he built which incorporates an ATmega328, an MP3 decoder, and an SD card to store his music.

One feature we really like is the control scheme [Matt] built into the boombox. Each of the capacitive touch buttons are positioned on top of a copper pad, which are wired into the control board. He says that while good in theory, he had a difficult time getting the buttons to work properly, though they seem to do the job well enough.

If you’re looking for a portable music solution and have access to a laser cutter, be sure to check out [Matt’s] page for schematics and firmware.

DIY Clapper Is The Ideal Gift For The Laziest Person In Your Life

diy-clapper

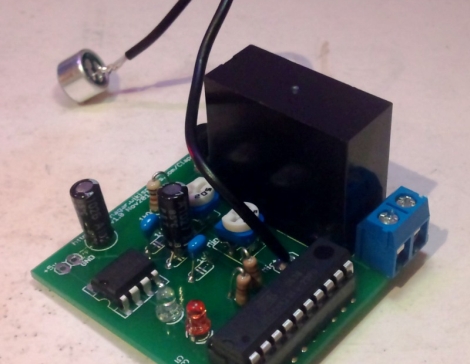
If you haven’t yet wrapped up your Christmas shopping, you may want to consider building [AlanFromJapan’s] implementation of the ever-classic “Clapper”. With its theme song burned into the brain of anyone old enough to remember the 80s, the clapper was a wonderful device that certainly put the “L” in laziness.

Looking for an excuse to play around with an opamp and microphone [Alan] decided to build his own version of the Clapper based off this similar circuit, which he calls the ClapClap. He built the device using an electret mic that feeds a signal through a small amplifier on the way to the ADC of an ATmega328 microcontroller. The mcu constantly polls the ADC looking for the sound of clapping hands, a solution that works, but isn’t as clean as [Alan] wanted.

He went back to the drawing board, this time building a circuit around an ATtiny2313 microcontroller. Most of the other components remained the same, though the new, smaller design sports some nice PCBs he had made at Seeedstudio. Rather than constantly polling the ADC, this version of the ClapClap looks for peaks in the signal coming from the mic to identify the clapping of hands.

He says that the newer version works great, though he still has a software bug or two that need fixing before he parks himself on the couch for all eternity.

Chicken Light Keeps Up Egg Production

It turns out that as the days get shorter, chickens lay fewer eggs. But you can trick them into keep up production using artificial light. [Jpitz31] decided to build his own timed coop light to bridge the gap until the days of plentiful sunlight return.

He already had an LED camping light to use, but needed to find a way to power it and to switch it on and off on a schedule. He chose an ATmega328 for the latter, as he had a bunch of extras sitting around. As for power, there isn’t AC available where the coop is, so he opted for a 12V lead-acid battery with hopes of adding solar charging features in the future.

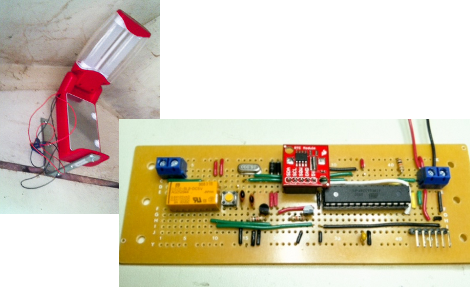
Switching is handled by a relay, with accurate time kept by a DS1307 real-time clock (it’s the red PCB seen above). Everything fits nicely on the board, and we have a couple of feature suggestions for future improvements. The linear regulators will eat up some extra power so moving to a switching regulator will help save juice. Also, it would be very easy to add a light sensor so that the light will only be on when the ambient light drops to a preset level. This way he won’t need to mess with the schedule as the length of the days change.

Video: Analog To Digital Conversion On The ATmega328p

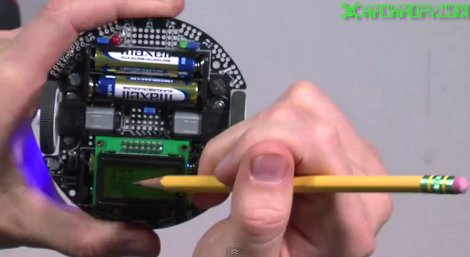
In this week’s video, we continue on where we left off last week with another in our series of videos where we discuss how to program for the ATmega328p processor. This week, [Jack] takes a look at the analog to digital converter and takes us through how to set things up and then how to perform a conversion using the potentiometer on the 3pi as the analog source. Playing with potentiometers isn’t the most interesting thing in the world, but after watching this video, you will be able to do things like take light readings using a cadmium sulfide cell, read the weight applied to a sensor, calculate the temperature from a resistor and a thermistor, or interface with an analog gyroscope.

If you have missed our previous videos, here are some links:
Part 1: Setting up the development environment
Part 2: Basic I/O
Part 3: Pulse Width Modulation

Stay tuned for next week’s* video where we will take a look at how to interface with the 3pi’s line sensors.

Video is after the break…

* HAD is in the process of moving our secret headquarters so next week’s video may come some time later than next week.

Continue reading “Video: Analog To Digital Conversion On The ATmega328p”

Update: Bluetooth Super Nintendo Controller For Android

[Rich’s] newest version of a Bluetooth connected Super Nintendo controller takes what was already good and makes it better. We looked at the original version back in May, which is built into a knockoff controller  — [Rich] mentions that he got a lot of flack for defacing retro equipment and wants to set the record straight. The most notable difference between the two controllers is that the batteries are now housed inside the case. He switched over to an 850 mAh Lithium Ion battery, which takes much less room than the four AA batteries did. There is an integrated charger which connects via a mini USB jack as seen in the image above. Bother versions of the controller can be used to play emulators without rooting your Android device.

Unfortunately you won’t get to look inside the case. What we can tell you is that the build no longer uses a BlueSMiRF board , opting for a less expensive Bluetooth solution. We also know that the build is still Arduino compatible, sporting an ATmega328 chip running the bootloader. The lack of detail is because [Rich] is working to market the controller with a limited-quantity preorder. Check out his video presentation of the new version after the break.

Continue reading “Update: Bluetooth Super Nintendo Controller For Android”

Defusable Alarm Clock – Wastes Wire But Fun For The Kids

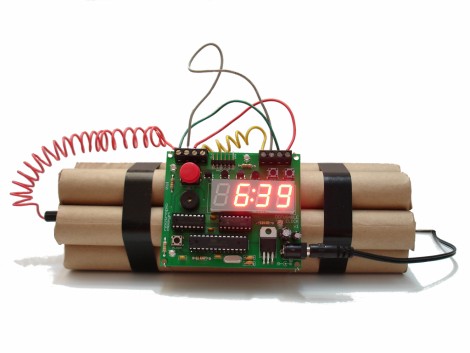
Nothing makes you feel the pressure of getting out of bed in the morning like a ticking-time-bomb on the bedside table. It may look like it came in the mail from ACME, but all that went into this is some wooden dowels covered in craft paper and an Arduino-compatible board. The 7-segment display can act as a clock, or count down to your doom. You can set an alarm that requires you to clip the wires to shut it off. Each time that alarm is set the wires are randomly chosen; one will set of the bomb, one will safely defuse it, and the others do nothing. See for yourself after the break.

The wires are easily replaced because they are connected via terminal blocks. It still seems like an awful waste of wire. We like the Think Geek bomb clock concept that works in much the same way but uses wires that have a male/female RCA plug pair that can be disconnected and reconnected without waste.

This one will apparently be available as a kit, at which point the schematics and code will be released. But it shouldn’t be too hard to build one from scratch yourself, and it’s an obvious winner if you’ve got kids.

Continue reading “Defusable Alarm Clock – Wastes Wire But Fun For The Kids”

A Badge Without A Conference

We saw this one a few days ago when it was first bouncing around the interwebs but never took a close look at it. Today, when we ran across a direct link in the tips box it was the promo video (embedded after the break) that won us over. Once you dig into the particulars of The Verbalizer we think you’ll agree that this is a hackable conference badge without the pesky need to attend a conference.

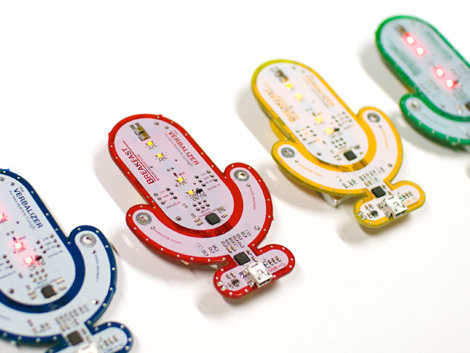
As you probably guessed from the design of the PCB, this is a microphone. It’s intended for use with Google’s new voice search feature, and connects to a computer via a Bluetooth module. But really it’s just another roll-your-own Arduino with a few extra bits. You’ll find an ATmega328 and an FTDI chip which provides a USB connection for programming. The real fun starts with the microphone and speaker circuitry which is just waiting to be breadboarded at home. We found a few other things while poking around in the schematic (available by downloading their Product Docs and Schematics package). It looks like there’s some capacitive touch… you what? Isn’t it more fun if you find this stuff yourself, kind of like the hidden gems of the DEFCON badges?

Continue reading “A Badge Without A Conference”