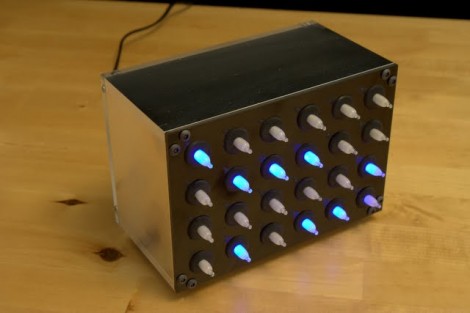
Neon Binary Clock

[Josiah] said ‘no’ to LEDs and instead used blue-phosphor neon lamps to build this binary clock. The ATmega328 inside uses three 8-bit shift registers to control the display. Each lamp needs a high-voltage NPN transistor in order to switch on the 150V necessary for proper illumination. A simple circuit was used to pull a 60 Hz clock signal out of the incoming 16VAC power. Unfortunately it was a bit too simple and didn’t provide a clean signal. [Josiah’s] workaround is something of a debounce subroutine in the firmware to prevent multiple interrupts on the falling edge.

The last project we saw from [Josiah] was the Coachella Lamp. That was a show piece of antiquated technology and this is another show piece with a minimalistic style. We also liked seeing the protoboard work on the inside. That’s a pretty jam-packed circuit board and keeping everything in the right place while you build up each trace with blobs of solder is no small feat.

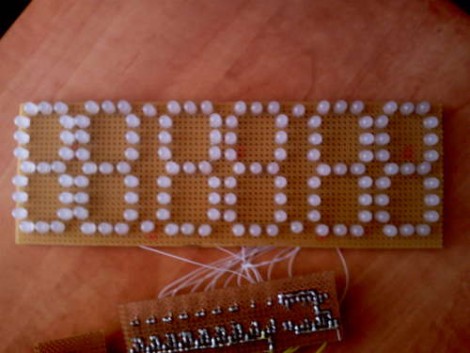
Six Digit LED Clock

Got a bag of LEDs handy? Why not build a display with them? We’ve seen a lot of clocks that make use of LED modules but soldering your own is a fun pastime. [Vadim Suhovatih] did just that using 130 LEDs to build this clock. Each segment of the 7-segment digits consists of three LEDs in parallel which are switched by some 2N4401 transistors. An ATmega328 in the form of an Arduino controls the device with the aid of a DS1307 real-time clock for timekeeping and a 4017 decade counter to assist with scanning the display. Check out the demo after the break.

Continue reading “Six Digit LED Clock”

Clock Hides Time Until You’re In Close Proximity

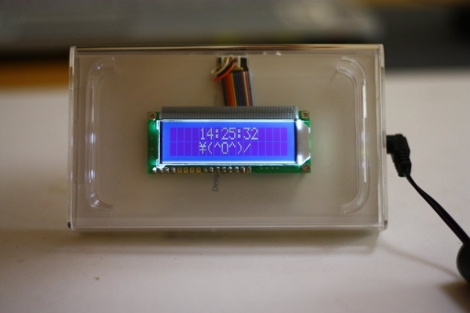
[Alan] is branching out beyond the Arduino with this clock. He’s still using the same code but built this board around an ATmega328 and the components he needed, saving his Arduino board for further development. The concept uses a character display housed in an old iPod Touch case. The build relies on an infrared sensor to actuate the LCD backlight. The closer your hand is the brighter the light.

The Maxim DS3232 RTC chip keeps time in this application. We’ve seen this little marvel used before, popular because it uses temperature compensation to maintain accuracy. If you’re interested in this part, check out the library file that [Alan] wrote for it.

112-LED Coffee Table

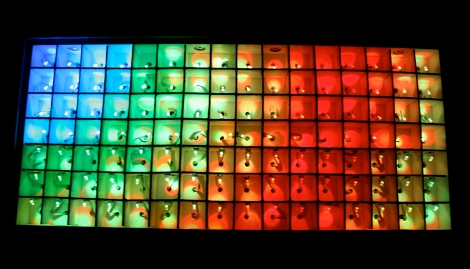
[Joe] tipped us off about his 112 LED coffee table. This 12-ups the LED matrix from Friday and 31-ups the Shiftbrite table. Driving this grid is an ATmega328 in i2c slave mode. It listens for display data from a second ATmega328 and uses that to set the array of TLC5940 driven LEDs appropriately. Separating the processing microcontroller from the display microcontroller allows for fast and smooth display changes that can be seen after the break. [Joe’s] table exhibits exquisite cable management, clean code, and an amazing amount of flexibility. Maybe [Caleb Kraft] will finally pony up the dough and make this project for his own home.

[Joe] waited until he saw some other LED tables to send us a link to his hack. This is obviously an awesome project, one that we want to see just as much as our readers do.  So please, don’t wait for someone else to stumble upon your project, send us a tip once you’re done sharing the details.

Continue reading “112-LED Coffee Table”

Yet Another Pong-clock

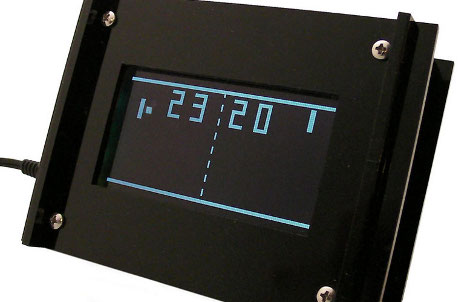
[PT] let us know that Adafruit Industries has just release a pong clock kit. The $80 price tag might seem a bit steep but it does come with a custom-ordered KS0108 display in order to get white on black like the classic video game, as seen after the break. Also included is the laser-cut case, an ATmega328 microcontroller, RTC, and all the other bits needed to get this working.

We just saw a pong clock built on a breadboard using a KS0108 display but that one used a PIC processor. Adafruit always open-sources their designs and code so you can head over to the kit details page if you already have the hardware on hand to throw this together.

Continue reading “Yet Another Pong-clock”

Arduino Programmer For Arduino

[youtube=http://www.youtube.com/watch?v=M-sFQNIXde8]

Wow, that title is flamebait… but give us a chance to explain. [George] wrote some code for the Arduino that allows it to program another Arduino. You may be thinking to yourself “this has already been done”. In a way it has, with the AVR ISP programming shield. But once the code has been uploaded to the Arduino, you don’t need a computer to program the next chip. This concept turns an Arduino into an in-the-field programmer. Right now his code only programs the ATmega328 and it’s a little buggy, but the concept is solid. A fully functioning independent programmer is easy to image; [George] has laid the ground work, the AVR ISP programming firmware has proven this can work with several different chips, and if your AVR has an ATmega328 there should be plenty of room to store the code you plan to flash to the target microprocessors. It’s up to you to put all the pieces together.

Arduino Nano Updated

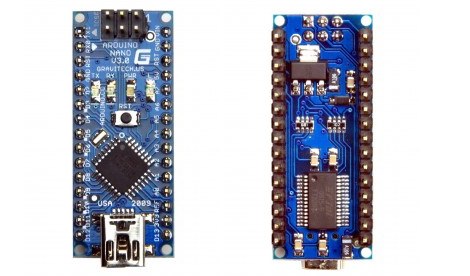
The official Arduino Nano design has been updated to version 3.0. Like other new Arduino designs, it’s using the ATmega328 instead of the ATmega168. It’s also a slightly more reasonable $35. The small board is designed to be plugged directly into a breadboard and accessed via mini USB cable. This new design is also two layers instead of four making it easier to produce and modify. The new Nanos will ship at the end of the month.