The Fastest Path To SuperCon Badge Firmware Hacking

Hackaday SuperConference begins tomorrow and every ticketed attendee will get their hands on this sexy piece of hardware which is the conference badge. Yes, it looks fantastic hanging around your neck, you can play a wicked game of Tetris on it, and it runs a crypto challenge. But badge hacking is a thing and this post is the most concise information you’ll find on hacking on the firmware. Whether this is your first time blinking an LED, or you cut your teeth on PIC assembly, you can make this badge do your bidding with minimal effort.
Continue reading “The Fastest Path To SuperCon Badge Firmware Hacking”

Hacker’s Wishlist: What Must-Have Components Let You Build Anything?

We’re putting in a parts order at the end of the week, yet we don’t have a specific project in mind. Trying to wrap your noggin’ around a bill of materials to build anything is tough, but that’s the gist of stocking components for a hackathon.

So we put it to you: what components can’t you live without when you roll your sleeves up for some good old fashioned hardware hacking?

What Can You Build in Two Days?

multiplier
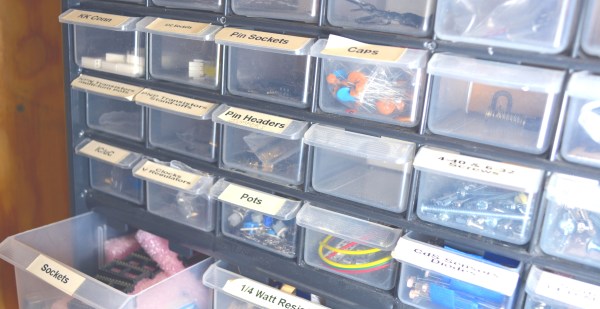
This parts order is for the badge hacking at this year’s SuperCon. What we saw last year was amazing considering the parts we had available. What you see above is the back of the conference badge with a lot of caps and diodes added to it. It’s a voltage multiplier that [Sprite_TM] built onto his badge to get the 9V input up to a 1000V output.

So diodes and caps, check. They’ll be on the order. But we want to know what you would add to a parts order where anything is possible? Let us know in the comments below.

Unlock Beast Mode

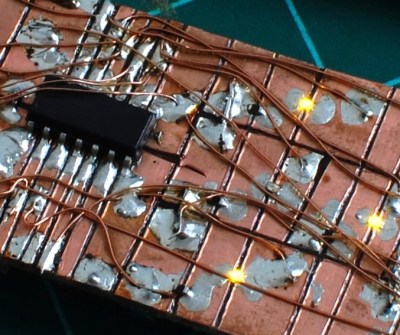
Part of the fun last year was starting from a badge that had no circuitry built onto it at all. [Brian Benchoff] joked in his coverage of the hacking that this year’s badge would just be a piece of copper clad FR4 — a great idea and challenge accepted. In addition to the normal badge, for those willing to test their mettle, we want you to go for Beast Mode. We’ll have copper clad (single and double-sided) and protoboard on hand.

We’re looking for Manhattan style, dead bug, and any other elegant, interesting, or hacky method of rapid prototyping. Bring along your own pre-spun or home-etched boards — if they’re not already populated you can do that in the badge hacking area. If you want to learn the awesome X-Acto knife method of carving up copper clad, Zach Fredin will be helping out in the badge hacking area. You’ll also find Voja Antonic, Paul Stoffregen, and others hanging out there too.

But What About the Badge?

2016-supercon-badge-circuitYes, there is a hardware badge and it’s a doozy this year. Voja Antonic designed it and published a great explanation last week. It’s based around a PIC18LF25K50 and features an LED Matrix and user inputs. This will be a lot of fun for the firmware hackers, but why not get in on the hardware hacking action while you’re at it?

The back of the badge has a 9-bin breakout header (2x 3V, 2x Gnd, 5x GPIO). This pin header is 0.1″ pitch so you can design in advance for any add-on circuits you might want to build. We’ll also have connectors on hand to use in your hacks.

Last year Paul Stoffregen’s Teensy audio workshop was hugely popular and one of the most interesting badge hacks added a Teensy, audio board, and LCD to the mix to create a spectrum analyzer with waterfall display. I’m sure we’ll see some hacks that reach that level this year. But it’s a welcoming and jovial environment; even if you never blinked an LED there will be throngs of people waiting to cheer your accomplishment in the name of getting everyone in the world excited about hardware.

Seriously Though, What Components Should We Order?

Tools are going to be no problem this year since we have the Supplyframe Design Lab at our disposal. But we really are putting in a parts order this week and need your advice. We’ll have the usual suspects: pin headers, shift registers, voltage regulators, level converters, 7400 series logic and 555 timers, extra battery holders, passives, etc.

Even if you’re not in on the hacking, let us know what you can’t live without. What’s your analog hacking wishlist? What type of sensor breakouts would you like to see people playing with? Sound off in the comments below.

Design And Hacking Drilldown: SuperCon Badge

One can imagine a political or business conference without an interactive badge — but not a hacker conference. Does this make the case for hackers being a special breed of people, always having something creative to show for their work? Yes, I think it does.

Following the Hackaday Belgrade conference in April of this year, we met at the Supplyframe offices to discuss the badge for the Hackaday SuperConference that will happen in Pasadena on 5+6th of November. The Belgrade conference badge (which was fully documented if you’re curious) was surprisingly popular, and I was asked to design the new one as well.

I was prepared to come up with something completely new, but [Mike Szczys] suggested keeping with the same basic concept for the project: “No reason to change anything, we have a badge that works”. To which I responded: “Well, the next one will also work”. But then I realized that “works” does not stand for “being functional”. The key is that it was embraced by visitors who played with it, coded on it, and solved a crypto challenge with it.

The World Doesn’t Have Enough LEDs

led-modules-versus-smd
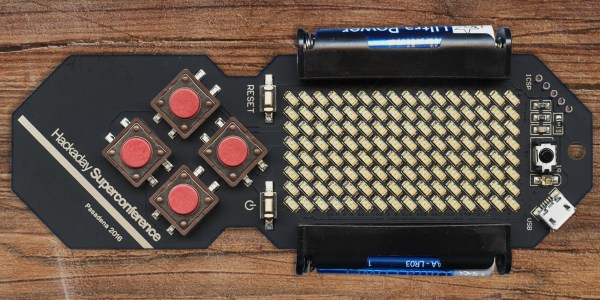
Fast forward six months — here are the modifications made to the basic concept. First, the existing LED matrix, which was composed of two compact 8×8 blocks, was replaced by 128 discrete SMD LEDs. It was a much needed change to help scale down the dimensions and clunkiness, but also to avoid another painful experience of trying to purchase and have the matrix displays shipped, which seriously threatened the production of the previous badge.

It’s a long story which I discussed in my Belgrade talk — it turned out we did not manage to get enough common anode (CA) displays from all distributors in the whole world. We had a plan B, which also fizzled, leaving us with the plan C which actually included two “C”s: Common Cathode. We cleaned up all the supplies at five distributors, and managed to get 122 CA red, 340 CC red and 78 CA green displays (enough for only 270 badges) — the entire world supply. After that, you couldn’t get any 38 mm Kingbright’s display for months! The only problem was that there were two different versions of PCBs, one for CA and the other for CC displays, but luckily only one version of software, as it could autodetect the display type.

accelerometer-on-the-boardMotion and Expansion

So, what else was new in the concept? In the Belgrade version, the badge supported an accelerometer module and included an unpopulated footprint in case you decided to install it, but now the badge has the MEMS chip LIS3 as an integral part. There are nine pads (with five I/O ports, driven directly from the MCU) to which you can add a 9-pin expansion connector. There will be a number of these connectors at the Design Lab, so that anyone can expand their badge for their convenience, on the spot.

The Visual Design

The biggest change was in the visual design. What we came up with ended up being a fair bit smaller, lighter, with a more convenient shape, and less than half the thickness of the previous one. After we had scrapped quite a few ideas during the development process (including stylized skull, frog, etc), we were left with a couple of options which you can see on the image below. The wireframe drawing on the left hand side is the Belgrade badge, shown here for a size comparison. At this point the locale and date of the conference weren’t yet definitive, which is why you see San Francisco written on the images.

design-options-2016-supercon-badge

Design number 4 prevailed, so the PCB layout could begin. I don’t like autorouted PCBs, so I was in for quite a rough time trying to solve the routing manually having only 2 layers on the board at my disposal.

Routing a Compact LED Matrix

The LED matrix is so dense that there was virtually no room on the LED layer, so most of the tracks on the component layer had to be routed as if it was a single layer PCB. To make matters worse, the LED layer is routed as a matrix, with a bunch of horizontal and vertical tracks, otherwise a good reason to use a 4-layer PCB. To stay inside the budget, everything had to be placed on 2 layers, and that’s why the final result seems so confusing at the populated area between batteries:

Continue reading “Design And Hacking Drilldown: SuperCon Badge”

New SuperCon Badge Is 40% Lighter And A Work Of Art

The 2016 Hackaday SuperConference is just around the corner and today we get a good look at the hardware badge. It was designed by [Voja Antonic] — a legend of hardware creation who will be at the conference. I like to think of him as the Woz of the Eastern Bloc, having designed the Galaksija computer. This badge is a beautiful example of embedded design. We’ll dive into all of the details after the break.

Get your ticket now for 48-hours of talks, workshops, the Hackaday Prize party, badge hacking,  and so much more.

Continue reading “New SuperCon Badge Is 40% Lighter And A Work Of Art”

DEF CON’s X86 Badge

This year’s DEF CON badge is electronic, and there was much celebrating. This year’s DEF CON badge has an x86 processor, and there was much confusion.

These vias are connected to something.

The badge this year, and every year, except badges for 18, 17, 16, 15, and 14, designed by [Joe Grand], and badges from pre-history designed by [Dark Tangent] and [Ping], was designed by [1057], and is built around an x86 processor. Specifically, this badge features an Intel Quark D2000 microcontroller, a microcontroller running at 32MHz, with 32kB of Flash and 8kB of RAM. Yes, an x86 badge, but I think an AT motherboard badge would better fulfill that requirement.

As far as buttons, sensors, peripherals, and LEDs go, this badge is exceptionally minimal. There are eight buttons, laid out as two directional pads, five LEDs, and a battery. There’s not much here, but with a close inspection of the ‘chin’ area of the badge, you can see how this badge was programmed.

As with any [1057] joint, this badge features puzzles galore. One of these puzzles is exceptionally hard to photograph as it is in the bottom copper layer. It reads, “nonpareil bimil: Icnwc lsrbcx kc htr-yudnv ifz xdgm yduxnw yc iisto-cypzk”. Another bottom copper text reads, “10000100001 ΣA120215”. Get crackin’.

A gallery of the Human and Goon badges follows, click through for the best resolution we have.

This post has been updated to correct the record of who designed badges for previous cons.

128 LEDs, 5 Buttons, IR Comm, And A Few Hours: What Could You Create?

When the second band had played its last encore, before the legendary DJ took the stage, a cadre of hardware hackers climbed three steps with a twinkle in their eyes and glowing electronics in their hands. I’m surprised and relieved that the nugget of excitement that first led me to twiddle a byte in a microcontroller is still alive, and this moment — this crossroads of hacker family — stirred that molten hot center of adventure in everyone.

The badge hacking demoscene is a welcoming one. No blinking pixel is too simple, and no half-implemented idea falls short of impressing everyone because they prove the creativity, effort, and courage of each who got up to share their creation. How could we ever get together as a community and not do this?

It was after midnight before we began the demoparty. I somehow managed to come to the Hackaday | Belgrade conference without a USB webcam to use as a top-down camera. I also didn’t line up someone to record with a camera until minutes before. Please forgive our technical difficulties — we first tried to use a laptop webcam to project to the bigscreen. When that failed, focusing on the badges because tough for our ad-hoc camera operator. This video is a hack, but I think it’s worth looking past its tech problems.

The crowd gathered as close to the stage as possible and there was electricity in the audience as the wiles of the day were explained. Join me after the break for a brief rundown of each demo, along with a timestamp to find it in the video.

Continue reading “128 LEDs, 5 Buttons, IR Comm, And A Few Hours: What Could You Create?”

Hackaday Belgrade Talks Will Live Stream Saturday

We have an amazing line-up of talks for Hackaday | Belgrade, Saturday April 9, in Belgrade, Serbia. The talks have been sold out for weeks. You can still get a ticket to the night’s concerts if you’re in the area. Either way, the big news this morning is that we will stream all of the talks live!

Live-stream links will be posted on the conference page as soon as we get them. You should also join the chat over on the Hackaday | Belgrade project page. Just click the “request to join this project” button in the upper right. Do that right now.

There are a ton of great speakers, check the poster below. I’m excited to hear Mike Harrison (mikeselectricstuff) speak about his journey down the rabbit hole of video projection tech, Phoenix Perry’s talk on Forward Futures, Voja Anotic’s talk about the hardware badge, Peter Philip’s talk about reinventing VHDL, and pretty much all of the rest too! From the Hackaday crew you can watch Sophi Kravitz give a talk on her shutter glass project, Chris Gammell will be talking Top Down Electronics, and I will end the 8-versus-32 argument once and for all (yeah right!).

While you’re listening to the talks, why not try your hand at badge hacking. You don’t need any hardware, you can use the emulator to try out your hacked code right now your own computer. We’ll be sending out prizes for the best entries and there are only a handful so far.

You do not want to miss these talks! If you don’t believe me, check out the talks from SuperCon last November and you’ll be convinced — Hackaday conferences provide the best collection of hardware talks anywhere.

Continue reading “Hackaday Belgrade Talks Will Live Stream Saturday”