Imagine yourself in a labyrinth, vast – endless for all you know. You wander the corridors, stumbling upon a closed door. You could invest some effort into unlocking it to find out what’s inside. Pretty soon you realize there are many more doors in the maze and you wish you had some sort of tool to help you see what’s behind them, and whether they are worth the effort.
If the labyrinth is a metaphor for your life or your work, then you should know that there is such a tool, and its name is Critical Thinking. It can save you a lot of time and money, sometimes your health and even your life. It can help you optimize or debug your projects, and even boost your creativity.
Why Should We Think Critically?
Even though many equate it with criticism, critical thinking is not a negative process. It keeps you open to new ideas, and at the same time it acts as a firewall against harmful ideological, political, or marketing delusions and scams, and especially against your own self-delusions. It suggests how to think, not what to think.
You can find a lot of definitions of critical thinking on the internet, and most of them are worth reading. I like the definition which [Richard Paul] gave in an informal presentation: “Critical thinking is thinking about your thinking, while you’re thinking, in order to make your thinking better”.
In a hacker’s work, critical thinking is very useful as a defense mechanism against self-delusion in problem solving, and dead ends in creative process. If you want to be a creative hacker, you have to think critically. It is even more severe in science, where the process called scientific skepticism (also spelled scepticism) involves systematic doubt – questioning every single step in scientific activity. It results in scientific method, which is not just doubt, but a set of methods for examining reality.
Here is an example in which critical thinking takes place and saves not only time and effort, but also leads to a creative result. When you start creating a concept for a new project, you get an idea and you probably like it from the beginning. That’s good, as it keeps you motivated, but the first idea is not necessarily the best one, and a process of trying out alternatives often leads to a better solution. If you know how to use critical thinking to attack your initial concept, it can help you get a better idea. To do so, you have to restart from the beginning many times, trying out a different approach each time. You will probably not have a perfect concept until you have made several modifications, some of which assume you forget everything up to that point and start fresh. It may seem like a waste of time, but it is quite the opposite – your initial concept is crucial for the final value of the project, and it is better to modify it in the early stage of the process.
Don’t despair even if you have to do it when you are already halfway through the project. In the early days of the computer era, data storage was not very safe and backing up data was slow and expensive. On several occasions I had lost all of my data and had to start from scratch. Yet every time, I was happy that it happened like that, as in redoing it I could add a new quality I hadn’t thought of before.
How to Think in a Creative Way
Critical thinking is a learned skill, that can be reinforced by habit. The same is valid for logical thinking, but we shall not discuss it here, as most hackers have already practiced logic over many years, and they surely know how to apply it in their activity. You can say that the logic is a necessary part of critical thinking.
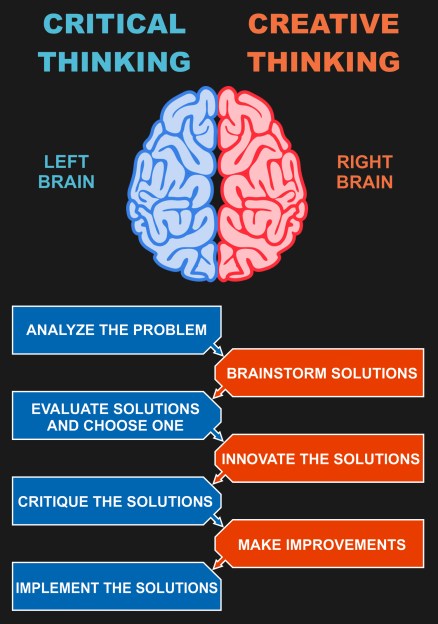 It is hard to imagine debugging, servicing or any other form of problem solving without critical thinking, but if you are creating a project from scratch, you also have to think creatively. Creative thinking is different from critical thinking, but they share a strong bond. The creative process needs to have a critical check of ideas, and on the other hand, creative thinking can help you imagine all the possibilities when you need to pinpoint a problem.
Creative thinking is more motivating and generally brings more pleasure than critical thinking, and you can use it even when you are relaxed. While daydreaming, but still holding the problem in the back of your head, you may suddenly get a burst of creative energy and arrive at an “Aha” moment. Seems like a naive game, but it can be empowering.
If you hang around artists and designers, you can observe from how many different angles the creative process can be approached. Some of it can be applied to the hacker’s domain as well. You might, for example, start composing a new project that does not have a defined function; imagine the shape you like, define its dimensions, color, even draw it or make a 3D model. Then ask yourself – what would I like that shape to do? This inverse process can result in some pretty cool projects.
You will notice that many creative thinkers with have a small notebook on hand (not a computer, but an ordinary copybook) to write down ideas the moment they appear, so that they can be examined later. I knew a painter who held an exhibition which had no actual paintings, but a hundred of such palm-sized papers with rough sketches.
Who is a Good Critical Thinker?
Do you think that you can think critically? Let’s say someone wants to find a specific place in an unknown city. If you can give them a good, eloquent explanation, which helps them find it, you probably have the gift of critical thinking. This ability means that you can “observe” your own explanation through someone else’s mind, and the same “parallel processing” engine is used for critical thinking. If you can deliver that explanation in a witty and imaginitive way, then you are not only a good critical thinker, but also a good creative thinker.
It is much easier to recognize non-critical thinkers. They egoistically take their facts as the only relevant ones, seeing things in binary form: black or white, right or wrong, clever or dumb and so on – rather than recognizing all alternatives. They never doubt, especially when evaluating their own creations: “My idea is brilliant, because I’m a genius”.
This attitude is the worst possible basis for critical thinking; the bad news is that most likely none of us is a genius, but the good news is that even a real genius is hardly ever sure that their ideas are good. Being a genius does not mean having ideas without trying hard, but quite the opposite. So, if someone always admires their own creations and doesn’t ever doubt them, he is no genius – he simply doesn’t match the milieu.
There is one more parameter which can help us evaluate someone’s thinking qualities. If he believes that astrology, dowsing, and similar techniques are based on true facts, he is probably not very familiar with critical thinking. Not familiar enough to be a hacker that builds cool stuff anyway.
How to Become a Critical and Creative Thinker
So, how do you think we should evaluate new ideas? However appealing they might seem, they should be treated as 50/50, good/bad ab initio. Some people will tell you that’s being optimistic, as 9 out of 10 initially bright ideas turn out to be worthless. It would be prudent to expose your idea to scrutiny. Consult with someone or publish it online and read the comments, but remember to always take public commentary with a grain of salt.
Critical thinking is an unnatural act. We evolved to survive in a cruel world, not to play around with our hacks. To make things worse, we evolved in a herd, which means that we intuitively respect the authority of the leader. But we also have to be creative, so we have to respect ourselves first. Finding the right dose of self-respect is a crucial thing in creative work. Too little self-respect could destroy our motivation and creativity, and too much will interfere with our ability to estimate the value of our ideas, and can easily result in investing time, money and effort in worthless projects.
Noone is born a critical thinker, but almost anyone can become one. Think about what [Edward de Bono] said:
“The need to be right all the time is the biggest bar to new ideas. It is better to have enough ideas for some of them to be wrong than to be always right by having no ideas”.

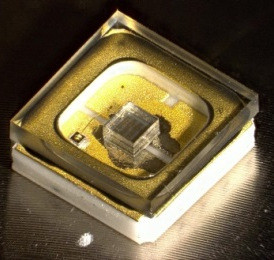


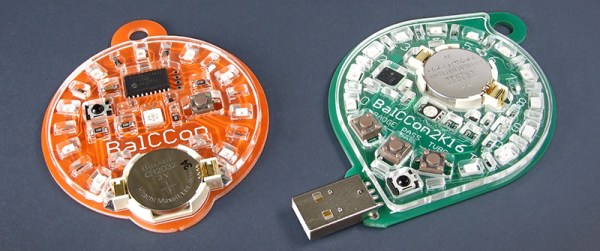
 Fast forward six months — here are the modifications made to the basic concept. First, the existing LED matrix, which was composed of two compact 8×8 blocks, was replaced by 128 discrete SMD LEDs. It was a much needed change to help scale down the dimensions and clunkiness, but also to avoid another painful experience of trying to purchase and have the matrix displays shipped, which seriously threatened the production of the previous badge.
 Motion and Expansion
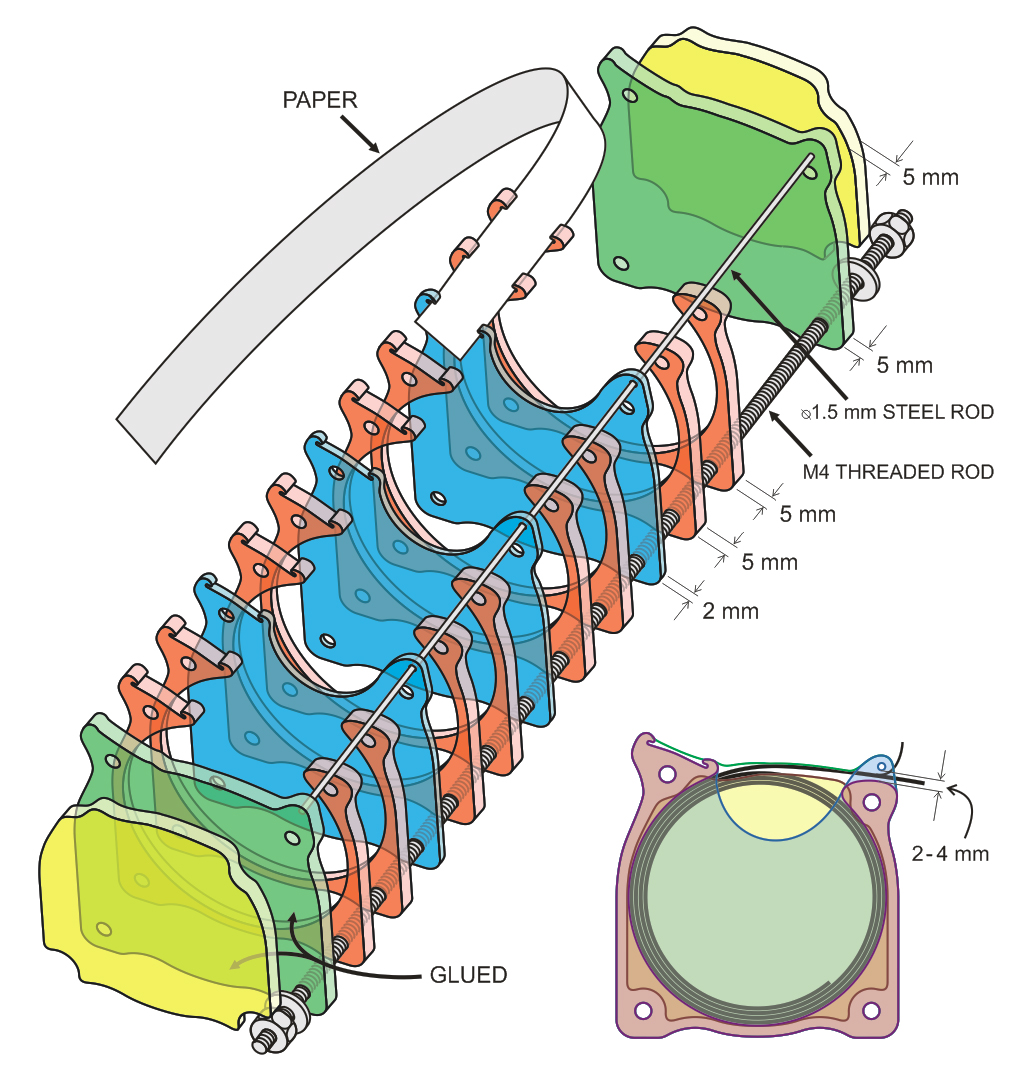
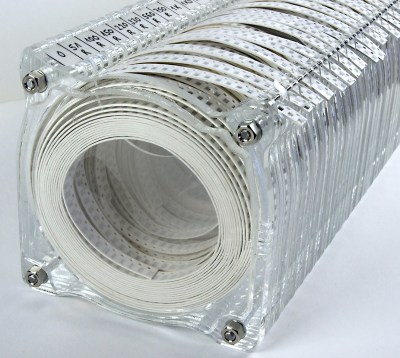 SMD resistors are packed in thick paper tapes that don’t bend easily, and thus need larger containers than other components, which are packed mainly in flexible PE tapes. The first version of this organizer was built with a 96mm diameter space for resistors and 63mm diameter for other components, but it seems that there is no need for such large compartments. If I were to make it again, I would probably scale everything down to about 80% of it’s current size.