Bicycle Generator with Cordless Drill

Cordless Drill Turned Into Bicycle-Powered Generator

The bicycle is a great invention. It is an extremely efficient method of transportation, even more so than walking. So why not harness that efficiency for other things? [Tony] had that same thought so he ordered a bike generator but after waiting too long for the company to send it, he decided to make his own.

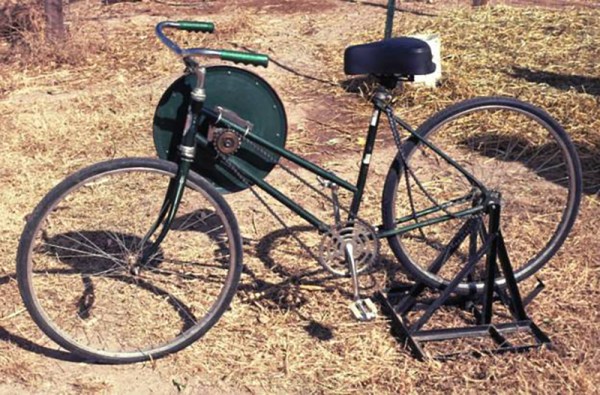
[Tony] is an bicycle enthusiast so he had an old bike and an old training stand he could use for the project. Generating electricity from pedaling the bike requires some sort of generator. Lucky for him, [Tony] happened to have a cordless drill that stopped going in reverse. Since he had since upgraded, this was the perfect candidate for the generator. The drill was mounted to the training stand so that a pulley inserted in the chuck pressed against the rear wheel. Wires were added to connect the drill’s battery connectors to a 12vdc to 120vac inverter. As the bike is pedaled, the rear wheel spins the drill, which spins the drill motor creating DC voltage. That DC voltage is then converted to AC by the inverter. With a multimeter connected to the output from the drill, it is easy to adjust the pedaling speed to keep the output in the 11-14v range which is required by the inverter.

In the photo above, you can see a light bulb being powered by the bike. However, the bike powered generator could not power the larger load of a computer. The remedy for this was to purchase a solar charge controller and a 12 volt battery. The bike charges the battery and the battery can power the computer through the inverter.

Redesigned Bike Light Controller

[JP] was looking for a bicycle light to do some night biking around his home. He found a reasonably priced light that suited his needs, but when he started using it he found that the controller was a little lackluster. To solve some of its problems, he ended up building his own lighting controller from scratch.

The original controller’s main problem was that the it didn’t debounce the input from the single pushbutton. This meant that a single press of the button might cause it to cycle through two or three different modes, which was inconvenient and annoying. The new controller took care of this along with implementing several new brightness modes and a “strobe” mode for commuting to work to help alert other drivers of [JP]’s presence on his bicycle.

While [JP] notes that an Arduino would have been very easy to use in this situation, it wouldn’t have fit in the original enclosure. He went with an 8-pin ATtiny45, which was perfectly sized for what he needed. Everything fit together perfectly and is much more useful than the original. Maybe next he could pair it with a light that is even brighter than the one he’s currently using.

The DIY Open Crank Engine Moped

Anyone can strap a two-stroke engine on a bicycle to create a moped. But [robinhooodvsyou] has created something infinitely more awesome. He’s built an inverted open crank engine on a 10 speed bicycle. (YouTube link)  As the name implies, the engine has no crankcase. The crankshaft, camshaft, and just about everything not in the combustion chamber hangs out in the open where it can be seen and appreciated.

[robinhooodvsyou] started with an air-cooled Volkswagen cylinder. He filled the jug with a piston from a diesel car. Camshaft, flywheel, valves, and magneto are courtesy of an old Briggs and Stratton engine. The cylinder head, crankshaft, pushrods, and the engine frame itself are all homemade.

Being an open crank engine, lubrication is an issue. The crankshaft’s ball bearing is lubricated by some thick oil in a gravity fed cup. Even though the engine is a four-stroke,[robinhooodvsyou] adds some oil to the gas to keep the rings happy. The camshaft and connecting rod use Babbit bearings. While they don’t have an automatic oiling system, they do look pretty well lubricated in the video.

Starting the engine is a breeze. [robinhooodvsyou] created a lever which holds the exhaust valve open. This acts as a compression release. He also has a lever which lifts the entire engine and friction drive off the rear wheel. All one has to do is pedal up to cruising speed, engage the friction drive, then disengage the compression release.

We seriously love this hack. Sure, it’s not a practical vehicle, but it works – and from the looks of the video, it works rather well. The unmuffled pops of that low 4:1 compression engine reminds us of old stationary engines. The only thing we can think to add to [robinhooodvsyou’s] creation is a good set of brakes!

Continue reading “The DIY Open Crank Engine Moped”

Auto Bike Light: On When Moving Off When Not

If you’re plagued by perpetually dead bike light batteries you’ll like this one. It’ll also fix the problem of remembering to turn the lights on in the first place. This hack uses an accelerometer to switch the light when the bike is in motion.

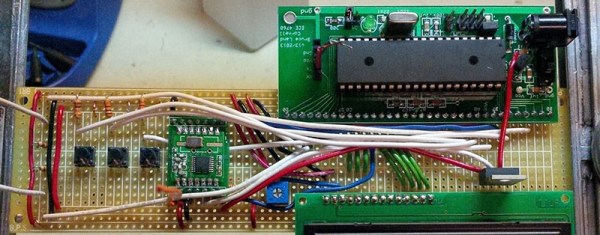
In this case the bike light was chosen for its ability to fit the control board inside the case. But with this proof-of-concept you can easily spin a tiny board with uC and accelerometer to replicate the functionality (the Bluetooth module shown above is going unused in this application). Many accelerometer chips have low-power mode that can be used to was a uC so we could easily see this having very little impact on the normally battery life of your light. The one caveat being the need to regulate the voltage as many of these lights take a 12V cell.

The other alternative is to make sure your battery is always charging during the day. This solar setup is one way, but then you won’t want to leave the thing unattended.


DIY Bike Turn Signals

DIY Bike Brake Light And Turn Signals

If you ever take your bike out and share the road with large automobiles, you know that sometimes it can get a little hairy. As a biker, you will stand no chance in a collision with a vehicle. Communicating your intentions, i.e. turning and braking, can certainly reduce your risk of getting in an accident. [Mike] didn’t like the traditional idea of taking a hand off the handlebars in order to signal to traffic so he did something about it, he built turn signals and a brake light for his bike.

The business end of this project is the rear-facing light bar mounted under the rider’s seat. It is made from Radio Shack project boxes and mounted to an off-the-shelf L bracket. A bunch of LEDs were installed in the project boxes, the yellow turn signal LEDs are arranged in the shape of arrows and the red brake light LEDs are in an oval. Inside the project boxes you will find the 9v battery that powers the circuit and also a breadboard that is home to the circuits responsible for blinking the turn signals.

DIY Bike Turn Signals

Check out the switch assembly that is mounted to the handle bars. It was built using an old reflector bracket which was already the correct size to mount to handle bars. As you would expect, there is a toggle switch for turning the turn signals on and off. A little bit more interesting is the brake switch. It is a hinge-lever style limit switch and positioned in a manner such that it is activated when the brake lever is pulled. There is no additional thought or effort required on the cyclist’s part!

Something that is certainly not expected on the switch assembly is the headphone jack. [Mike] likes to listen to music while he rides and a cord dangling around from a backpack or bike bag gets in the way. On the rear light bar, there is a headphone jack that allows an MP3 player to be plugged into. The audio signals travel up the same CAT5 cord used for the turn and brake signals. This allows only a short run of headphone cable from the handlebars to [Mike’s] ears.

The “Unstealable” Transformer Bike

A team of Chilean engineering students have designed a bike that comes complete with detachable parts that can be re-positioned to lock the vehicle in place. They are calling it the Yerka Project and have marketed it as the world’s first unstealable bike.

The genius of it is the frame itself literally acts as the locking mechanism. This means that if a thief wanted to break the lock, they would have to break the actual bike, leaving little to be desired. This also eliminates the need to go out and purchase a standalone bicycle lock, which can be opened up relatively easily anyway.

The Yerka works by splitting the bike’s down tube in half and extending it outwards around a nearby object like a tree, a light post, or a designated bicycle rack. The saddle and seatpost is then removed and inserted into a hole that was drilled into the down tube. After that, a lock at the end is secured and the rider can walk away knowing that their bike is safe.

However, clever hackers will probably still find a way to unlock this bike. No matter how unstealable it might be, someone will figure it out. In the meantime though, it gives a nice sense of security for those hoping to deter your average bike thief from attempting to jack the bicycle.

For a good look at the design, watch the videos posted below:

Continue reading “The “Unstealable” Transformer Bike”

A Bicycle Built For One

diyBike

[Bcmanucd] must have been vying for husband of the year when he set out to build his wife a custom time trials bicycle. We’re not just talking about bolting together a few parts either – he designed, cut, welded, and painted the entire frame from scratch. Time trial racing is a very specific form of bicycle racing. Bikes are built for speed, but drafting is not allowed, so aerodynamics of the bike and rider become key. Custom bikes cost many thousands of dollars, but as poor college students, neither [Bcmanucd] nor his wife could afford a proper bike. Thus the bicycle project was born.

[Bcmanucd] created the basic geometry on a fit assessment provided by his wife’s cycling coach. He designed the entire bike in Autodesk Inventor. Once the design was complete, it was time to order materials. 7005 aluminum alloy was chosen because it wouldn’t require solution heat treating, just a trip to the oven to relieve welding stresses. Every tube utilized a unique cross section to reduce drag, so [Bcmanucd] had to order his raw material from specialty bike suppliers.

Once all the material was in, [Bcmanucd] put his mechanical engineering degree aside and put on his work gloves. Like all students, he had access to the UC Davis machine shop. He used the shop’s CNC modified Bridgeport mill to cut the head tube and dropouts.

The most delicate part of the process is aligning all the parts and welding. Not a problem for [Bcmanucd], as  he used a laser table and his own jigs to keep everything lined up perfectly. Any welder will tell you that working with aluminum takes some experience. Since this was [Bcmanucd’s] first major aluminum project, he ran several tests on scrap metal to ensure he had the right setup on his TIG welder. The welds cleaned up nicely and proved to be strong.

The entire build took about 3 months, which was just in time for the first race of the season. In fact, during the first few races the bike wasn’t even painted yet. [Bcmanucd’s] wife didn’t seem to mind though, as she rode it to win the woman’s team time trial national championships that year. The bike went on to become a “rolling resume” for [Bcmanucd], and helped him land his dream job in the bicycle industry.

Echoing the top comment over on [Bcmanucd’s] Reddit thread, we’d like to say awesome job — but slow down, you’re making all us lazy spouses look bad!