3D Printed Strandbeests Made To Order

strandbeest

If you love Strandbeests but don’t have the patience to build your own, Dutch artist [Theo Jansen] has you covered. You might remember him from a story we ran last year, detailing his awesome beach-going strandbeest creations.

His beach walkers are typically built out of PVC conduit and plastic tubing, towering over their creator. For the time being however, he is focusing his work on a much smaller scale. [Theo] has recently teamed up with a 3D printing shop in order to offer miniature working replicas of his creations to the public. The current models can be had for $105, which seems like a pretty steep price to us. Then again, these models come fully assembled and are composed of 76 individual pieces, which is nothing to sneeze at.

That said, considering how easily a Strandbeest can be created with a stack of thick paper and some free time, we imagine that an enterprising individual could build one using readily available plastics at a fraction of the cost. Anyone out there up for giving it a shot?

Continue reading to see a video of the Strandbeest creation process.

[via Gizmodo]

Continue reading “3D Printed Strandbeests Made To Order”

Save Boatloads Of Cash By Building Your Own Laser Cutter

diy_laser_build

Have a bunch of time on your hands, and about $2,500 sitting around? Why not settle in and build yourself a laser cutter?

That’s exactly what Buildlog forum member [r691175002] did, and he told us about it in our comments just a few moments ago. Laser cutters can be pretty cost prohibitive depending on what you are thinking of picking up. The cheapest Epilog laser we could find costs $8,000, and you know what can happen when you try buying a cheap laser online.

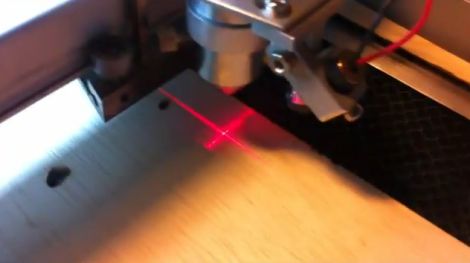
Instead of going for a ready-made cutter, he purchased an open-source kit from Buildlog, documenting the highlights of the build process online. The build log walks through a good portion of the construction starting with the frame and motor mounts, continuing through wiring up the electronics as well as some of the finishing touches. If you happen to head over to take a look around, you will find that there are plenty of pictures from various stages of the construction process to keep you busy for awhile.

With everything said and done, [Ryan] is quite happy with his laser. After going through the build process, he offers up some useful construction advice, as well as tips on sourcing cheaper hardware. He estimates that if he built the laser today, he could probably cut the costs nearly in half.

There’s no doubt about it – a $1300 laser cutter sounds pretty darn good to us.

PC Case Using CNC Router And Home Building Products

[Reinventing Science] needed a project that he could use to test out his skills on a new CNC routing machine he recently acquire. He settled on building a PC case using easily obtained materials. What he ended up with is the clean-looking case seen above that was machined from materials you can pick up at the home store.

The bulk of the case is made from extruded PVC which is designed to perform like solid wood trim. He picked up one piece of the ‘lumber’ and cut out the front, back, top, bottom, and drive bay bezel. We expected the joints between the horizontal and vertical pieces to either be butt joints, or rabbits. But [Reinventing Science] wanted a cleaner look and managed to mill mortise and tenon joints. These are strong joints that leave a very nice finished look. Since the material is designed as a lumber replacement it shouldn’t be too surprising to see drywall screws used as the fasteners.

In addition to joinery, some other CNC tricks were used. The sides of the case were cut from clear acrylic, with a decorative bead milled in the surface. There’s also fan ports cut in the top and vents on the bottom, as well as some engraving with the name of the project just above the optical drive. The wood-grain embossing makes for an interesting final look; we’d like to see how this takes a few careful coats of paint.

If you’re interested in the CNC hardware used, take a look at the unboxing post that shares a few details.

CNC Etch-a-Sketch Draws On Itself

cnc_etchasketch

Having never been any good with an Etch-a-Sketch, [Ben] decided it was time to tame the children’s toy that had taunted him for so long. He received one in a gift exchange a few years back and hung onto it, recently digging it out again to fit it with some CNC components.

Using his RepRap, he printed a set of mounting plates and gears to drive the Etch-a-Sketch’s dials. He installed a pair of Airpax steppers to the gears and wired them up to an ATmega AT90 USB board he had sitting around. He installed RepRap firmware on the microcontroller, since it has a built-in gcode interpreter, making it easy for him to upload any gcode file to the Etch-a-Sketch for drawing.

You can see a quick demonstration of the device in action below. He converted a spiral image to gcode, then uploaded it to the Etch-a-Sketch – the machine does the rest. It draws pretty quickly as well – [Ben] even suggests that he could probably get it moving fast enough to melt the stylus!

It would be great to see the Etch-a-Sketch configured to support an online interface. That way he could allow people to upload images to the device, later showing off the artwork in a web gallery not unlike the LOL Shield Theatre we featured last week.

[via Make]

Continue reading “CNC Etch-a-Sketch Draws On Itself”

CNC-built R2-D2 Brings Childhood Dreams To Life

r2d2_build

As a kid, [Wes] always dreamed of building a full-size, functional R2-D2 droid from Star Wars. While most youthful aspirations such as this fall to the wayside amid adult responsibilities and commitments, he did not allow his dreams to disappear along with his childhood.

He began his droid-building journey armed only with his dreams and some assistance from the friendly folks over at R2Builders. The entire replica was built using MDF, wood, and styrene sheeting, along with just one tool: a CNC machine. He walks you through the every step of the construction, stopping to give recommendations on CNC hardware, software, etc. along the way. He also provides Gcode files for each of the pieces he has constructed, which should be a huge help to anyone looking to build a R2-D2 clone of their own.

It looks like he is just getting around to fitting motors into the leg housings of his R2-D2 replica, but we can’t wait to see what it looks like once he has all of the electronics and other details finished.

If you are interested in more R2-D2 coverage, look no further than right here.

Magnetic SMD Pick And Place

magnetic_pick_and_place

[svofski] sent us this pick and place robot (Google translation) that he found , and it’s quite unique. The majority of the components that make up this pick and place have been recycled from old computer equipment. The X-axis motion is accomplished using old printer parts, while an old CD-ROM drive was gutted to provide motion along the Y-axis. Floppy drive components were ultimately chosen to give the pick and place Z-axis motility.

What makes this pick and place unique however is the way in which components are moved. Most pick and place devices we have seen rely on suction in order to lift and carry components, but this one uses a magnet instead. The machine is used to build small circuit boards for a robotics platform offered on the builder’s web site, which primarily utilizes SMD parts. Once they realized that the majority of their small components were ferromagnetic, they built a hand-wound electromagnet to lift them. While the design limits the usage of the device to strictly ferromagnetic parts, they have a very specific need, which this fills perfectly.

Another unique aspect of this pick and place is the grooved table that sits under the workpiece. It is used to route up to four reels of SMD components, with the placement head providing all of the reel motion instead of relying on separate motors.

If you have a few minutes, be sure to check out the video of the pick and place at work.

CNC Milled Docking System For Droid

[Steve] wanted a dock for his Droid phone but couldn’t bear to put cheap-looking parts in his nice BMW. He decided to build his own in order to satisfy his functional and stylistic needs. His main goal was to have a dock with no wires showing, but it also needed to be removable and have the ability to work with different devices (GPS, Droid, etc.).

The hardest part of a build like this is matching the bracket system to the car’s interior. [Steve] sidestepped the problem by starting with a commercial mounting bracket made specifically for the BMW E90 series. From there he added the female half of a mounting bracket he milled himself. The male half connects to this part using an edge connector, passing signals and power between the car and whichever device is currently installed. This way he can design brackets for different devices and not change what’s in the car.

To get a closer look, check out the video after the break. The system he came up with looks wonderful and works great.

Continue reading “CNC Milled Docking System For Droid”