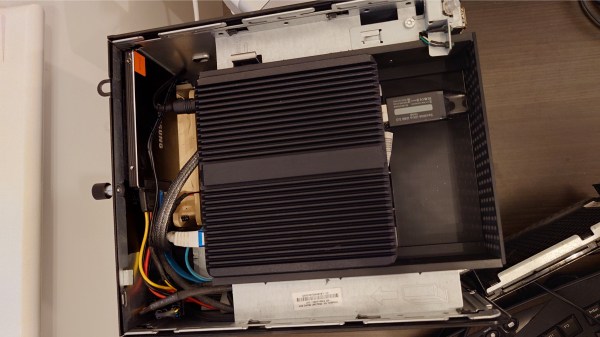
An open top of a black PC case. Inside we can see an aluminum extruded mini PC case inside the 5" optical drive bay. A Samsung SSD sits along the back wall of the case and a flash drive sits between the front of the 3D printed "drive" and the actual mini PC.

Outdated HP Microserver Gets A New Brain

What to do if you have a really cool old HP MicroServer that just can’t keep up with the demands of today? [jacksonliam] decided to restomod it by installing a mini PC into the drive bay.

The HP N54L MicroServer was still running, but its soldered CPU and non-standard motherboard made a simple upgrade impossible. Evaluating the different options, [jacksonliam] decided to save the case and PSU by transplanting an Intel Alder Lake mini PC into the drive bay with 3D printed brackets and heat set inserts.

Selecting a fanless “router” model to increase reliability, he was able to find an M.2 to mini-SAS adapter to attach the four drive cage to the NVME slot on the new PC. Power is supplied via the 12 V line on the ATX power supply and one of the mini PC’s Ethernet lines was broken out to a 3D printed PCI slot cover.

Looking for more ways to rejuvenate an old computer? How about putting a Mac mini inside an old iMac or a Raspberry Pi inside an Apple ][?

3D Printing A NAS Server Case

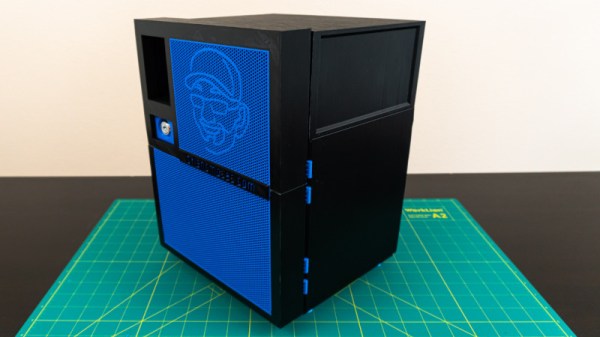
It’s good to back up, and despite that, few of us do. [Brian] we suspect is of the more diligent persuasion, given his strong enthusiasm for network attached storage. Recently, he found himself looking for a new case for his DIY build, and decided to go the 3D printed route.

The case is the design of one [Toby K], who sells the design online. [Brian] set out to produce the case himself using a Prusa i3, investing much time into the process. Total print time for the successful parts alone was over 227 hours, not including the failed parts and reprints.

Assembly caused some headaches, with various hinges and dovetails not fitting together perfectly first time. Not one to shy away from some proper down and dirty making, [Brian] was able to corral the various parts into fitting with a combination of delicate hammering, filing, and reprinting several broken pieces.

Overall, accounting for the filament used and hardware required, [Brian] spent over $200 producing the case. For those who just need a housing for their NAS, it doesn’t make a whole lot of financial sense. But for those who enjoy the build, and like the opportunity to customize their case as they see fit, the time and money can certainly be worth it. As [Brian] states, there aren’t too many cases on the market that ship with his logo on the grill.

We’ve seen other 3D printed case builds before, too. Video after the break.

Continue reading “3D Printing A NAS Server Case”

A Lasercut ATX Case For Your Next Desktop Rig

Case modding exploded in the late 1990s, as computer enthusiasts the world over grew tired of the beige box and took matters into their own hands. The movement began with custom paints and finishes on existing cases, with competitions and bragging rights then taking over to further push the state of the art. It’s one thing to mod a case, however, and another to build one entirely from scratch. [Wesley]’s lasercut case build is an excellent example of the latter.

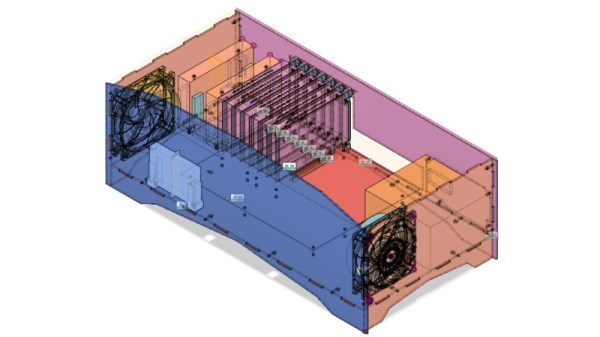
The build is designed for the ATX form factor, making it suitable for regular desktop computer parts. There are provisions for 3.5 and 2.5 inch drives, as well as a standard ATX PSU and provisions for case fans. The large lasercut panels are supplemented by some 3D printed parts, and the usual metric M3 hardware used with the ATX standard.

It’s a tidy build you can replicate yourself, with the parts available on Thingiverse for your making pleasure. [Wesley]’s build is resplendent in orange, but we’d also love to see an all-transparent build with blinding LED light effects. If you build it, you know where to send it.

Of course, if you’re looking for something more compact, you could always build the whole computer inside the power supply. 

The Improved Luggable PC

There are exactly two types of personal computers available today. If you need a lot of horsepower, a powerful GPU, or a full-power CPU, you’re going to end up with a desktop. If you need something portable, you’re getting a laptop with a wimpy CPU and an underpowered GPU. Historically, there has been a third type of PC, the luggable. The luggable is a desktop PC crammed into a case that makes it slightly more portable than a desktop and a monitor.  You cannot buy a luggable PC case right now. They simply do not exist as a commercial product you can shove your own hardware into. This is a form factor an entire industry forgot.

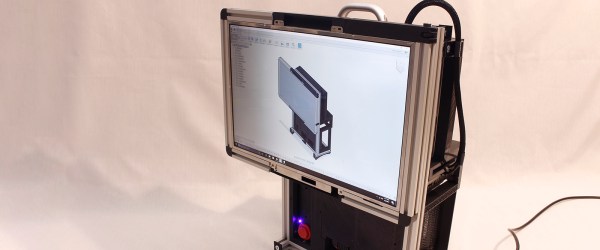
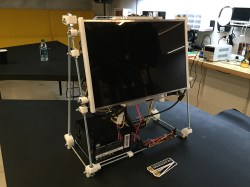
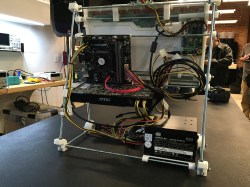
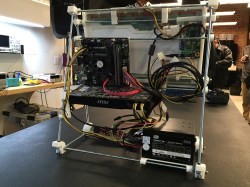
Now there’s a DIY luggable PC. This project from [Roger] packs a standard ATX motherboard, a full-size GPU, a full-size power supply, and everything else that makes a desktop PC powerful into a case that can be stored in an overhead bin.

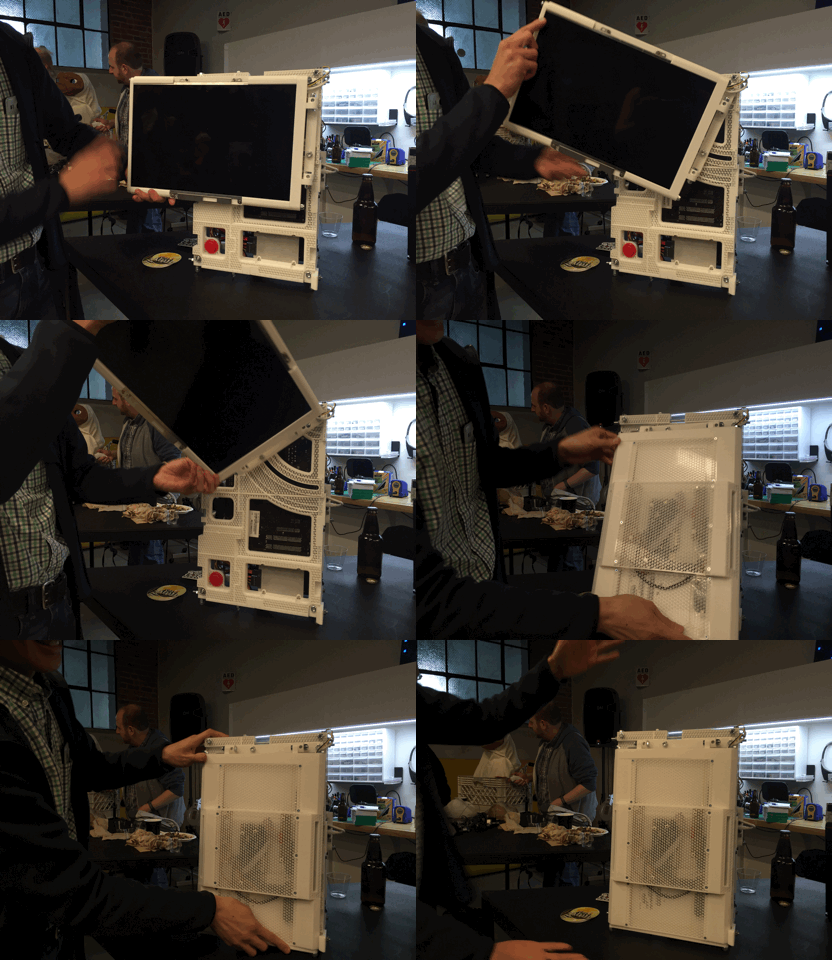
[Roger] has been working on this project for a while, and it was featured on Hackaday back when it looked like a RepRap Mendel. There have been some significant improvements over the earlier iterations of this project, including a very, very cool hinge mechanism that allows the display to fold in when the computer isn’t being used. It’s a mechanical wonder that prevents scratches. Neat. The rest of the case is constructed out of 2020 aluminum extrusion, and about a one kilogram spool of filament.

Since this is a portable case, there are a few compromises. There are no 5.25″ bays, no 3.5″ bays, and few 2.5″ bays. M.2 SSDs and USB-powered CD drives exist, so this isn’t a big deal.

This is a truly fantastic case in a form factor you can’t buy anywhere else. If you have a spare monitor and a bit of extrusion sitting around, this is one to build yourself.

The DIY Luggable PC

If you haven’t gone laptop shopping recently, you’re in for a big shock when you do. Recent consumer laptops are thin, powerful, surprisingly inexpensive, and Apple’s latest MacBook Pros even have a fantastic ‘Touch Bar’ – a touch-sensitive OLED display where the function keys should be. The greatest laptops ever made are available right now, and they don’t cost much, either.

Unfortunately, the laptop as a platform is inherently a compromise. If you want a discrete CPU, or if you simply want to choose your own parts, you’re relegated to a desktop build. The middle ground between extensibility and portability isn’t really covered by case manufacturers, and even the rare ‘LAN party’ cases rarely have a handle.

[Roger] is taking steps to solve this problem. He’s designed a 3D printable luggable PC. Yes, now you can have a GTX 1080 and a 22-core Xeon in a form factor you can carry around. It’ll fit in the overhead bin on your next flight, and yes, the monitor is included.

The construction of this DIY luggable PC should be familiar to anyone who built a 3D printer in 2011. It’s made out of threaded rods, with brackets for an LCD panel, ATX power supply, motherboard, and SSDs. Since this is effectively a modular system, you can load this case up with hardware. The included monitor in [Roger]’s build is taken from an old laptop and driven through an eBay “LCD Controller Board”.

While a luggable PC might be a very niche use case, it is still one that’s vastly underserved. I recently built a new battlestation, and after searching for a case like this for a few months, I eventually gave up, caved in, and bought whatever Linus told me to buy. You simply cannot buy an ATX case that has a monitor bolted to the side, and [Roger]’s build is the first DIY solution we’ve seen.

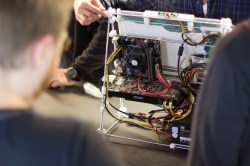
All the files to replicate this project are linked to on the [Roger]’s Hackaday.io project, and this would be an excellent basis for a community-based project to build an Open Hardware luggable PC enclosure. A few days ago, [Roger] brought this PC out to the Hackaday LA January meetup. He brought to the meetup on the train, providing more than enough evidence this is a truly portable PC. Check out the pics from the meetup below.

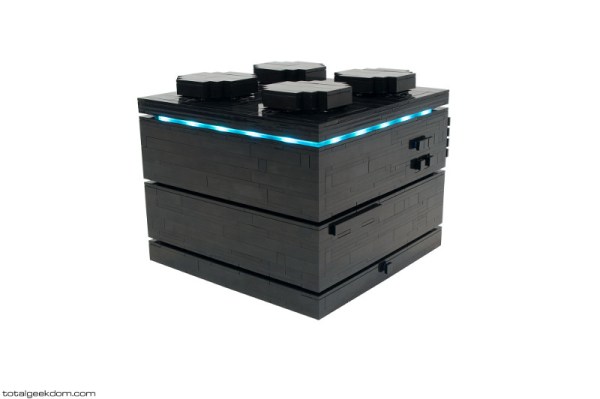
LEGO Computer Case

With over 40,000 pieces in his possession, [Mike] is definitely a huge fan of LEGO. Given that he’s also very much a fan of technology, it’s no surprise that he has built more than one type of LEGO computer case. He wrote in to tell us that he’s finished work on a well-rounded system designed for everyone.

[Mike] is no stranger to interesting case builds. In the last couple of years, he’s also made a functioning wind tunnel case and a bio computer that uses generated heat to warm soil for wheat grass plants. In the course of planning the LEGO computer, he thought a lot about heat and airflow, ultimately deciding on a top-down cooling path.

He’s quoting custom LEGO computer builds, providing the choice between an i3, i5, or i7 with either 8 or 16 gigs of RAM. They will run Linux or Windows 7/8 and are 10-compatible. There are a few choices for the top of the case: classic LEGO brick, the industrial look with diagonal slats, and a colored, tiled top. These systems are completely upgradeable and are held firmly together with great engineering and the occasional support rod.

dash board pc case

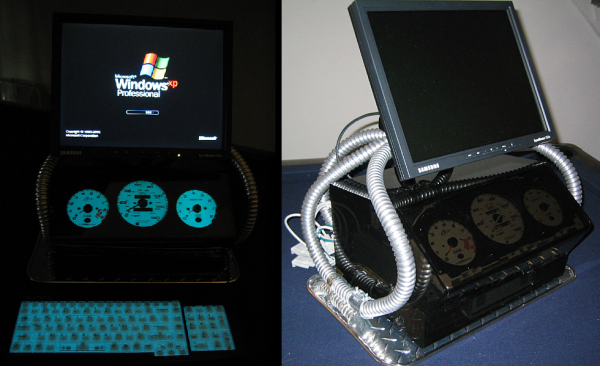
Dashboard PC Case Build Utilizes Honda Civic Gauge Cluster

The last thing you’d expect to see adorned on a computer case is an Indiglo gauge cluster straight out of a Honda Civic…. but that is exactly what [Envador] has created. He was driving around town one evening when a car past him. The blue glow of the passing car’s dash board was extremely noticeable and caught his attention in a positive way. Any computer nerd would, of course, immediately think “hey, that would make a cool computer case“. [Envador] then set out on a mission to make it happen.

Clearly, the focus of the case is the gauge cluster. It was taken out of a Honda Civic found in a junkyard. And it just wouldn’t be cool enough to just have the gauges light up, they definitely had to display some sort of info from the computer. CPU, RAM and hard drive usage seemed like pretty good parameters to display. [Envador] expected that each of the 3 gauges would accept a pulsed signal to move the needle. After tearing down the gauge panel he found only the tachometer worked that way. The other two gauges worked by some unknown means. Instead of messing around with figuring those two out, the mechanical components of the rogue gauges were replaced with those of two aftermarket tachometers. The stock needles and indiglo backlighting were kept.

To move the now-3 tachometer needles, [Envador] used a product called PCTach that connects to the PC via serial cable. It works with accompanying software to monitor PC information and output the necessary signals to make the tachometers move according to the PC’s performance. The computer case, itself, was fabricated from smoked acrylic behind which sits the gauge cluster. A matching backlit keyboard finishes off the look nicely.