PC Fan Controller Works On Most Operating Systems

For better or worse, most drivers for PC-related hardware like RGB components and fan controllers are built for Windows and aren’t generally of the highest quality. They’re often proprietary and clunky, and even if they aren’t a total mess they generally won’t work on Linux machines at all, or even on a headless setup regardless of OS. This custom fan controller, on the other hand, eschews the operating system almost entirely in favor of an open-source fan controller board that can be reached over a network instead.

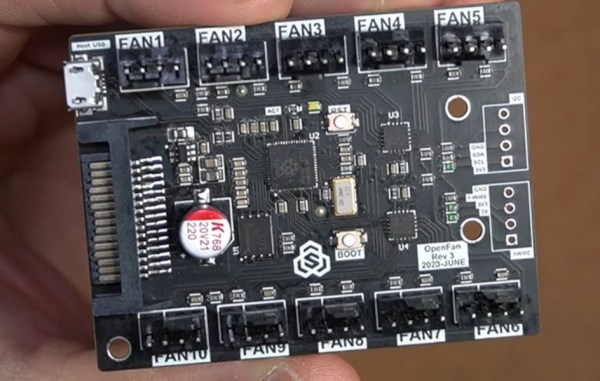
The project’s creator, [Sasa], experimented with fan splitters to solve his problems, but found that these wouldn’t be the ideal solution given the sheer number of fans he wanted in his various computers, especially in his network-attached storage machine. For that one he wanted ten fans, with control over them in custom groups that would behave in certain ways depending on what the computer was doing. His solution uses two EMC2305 five-fan controller chip which communicates over I2C on a custom PCB with a RP2040 at the center. This allows the hardware to communicate with USB to the host computer for updating firmware and controlling over the network. There’s also a 1-wire and I2C bus exposed in case any external sensors need to be integrated into this system as well. To get power for all of those fans, the board uses a SATA connector to get power from the computer’s power supply.

With the PCB built and all of the connections to the host computer made, the custom board is able to control up to 10 fans in any custom configuration without needing a monitor or a driver since it is accessible over the network through an API. It’s also open-source so any changes to the firmware or hardware can easily be made for most air-cooled PC situations. If you’re less concerned about the internal case temperature and more concerned about all the heat your PC is dumping into a living space, you might want to look into venting your PC outside instead.

Continue reading “PC Fan Controller Works On Most Operating Systems”

The WebStick Is A Small, Cheap NAS

The ESP8266 was one of the first chips that provided wireless functionality at a cost low enough to be widely popular for small microcontroller projects. This project uses one to provide rapid, small, and inexpensive network-attached storage (NAS) capabilities wherever you happen to go.

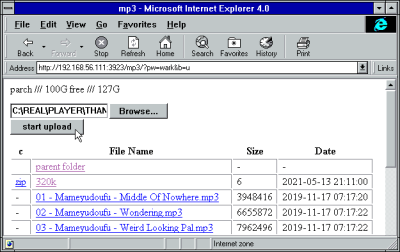
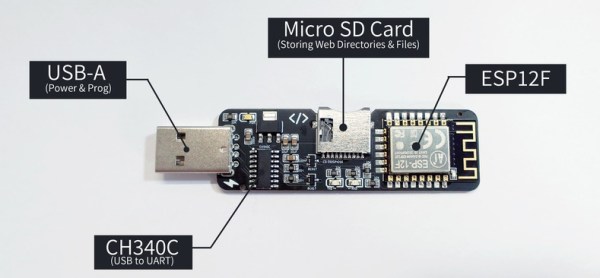
With an ESP12F board at the heart to provide network connectivity, the small device also hosts a micro SD card slot and a USB-A port to provide power and programming capabilities for the device. It’s Arduino-compatible, and creator [tobychui] has provided the firmware source code necessary to bring it up on your network and start serving up files. Originally intended for people to host web services without experience setting up all of the tools needed for it, there’s services for storing and streaming music and video over the network as well.

While it includes a lot more functionality than is typically included on a NAS, [tobychui] notes that with a library, something like WebDAV could be added to provide more traditional NAS capabilities. As it stands, though, having networked storage with web hosting capabilities on a PCB with a total cost of around $5 is not something to shy away from. If you’re looking for something a little more powerful for your home network, take a look at this ARM-based NAS instead.

DIY All-Flash NAS Vs. Commercial Hardware

[Jeff Geerling] has tried building his own network-attached storage before, but found that the Raspberry Pi just wasn’t able to keep pace with his demands. He’s back with a new all-flash NAS build, and put his new design to the test against proper store-bought gear.

His build is based around the ROCK 5 Model B, which is able to truck data around far faster than most other single-board computers. Internally, it can top 1 GB/sec without too much hassle. He decided to build a NAS rig using the board, putting it up against the turn-key ASUSTOR AS-T10G3.

Using OpenMediaVault to run the ROCK 5 as a NAS, [Jeff] was able to get decent performance out of the setup. With a 3-drive RAID 5 configuration, he recorded write and read speeds of 100 MB/sec and 200 MB/sec respectively, over a 2.5 Gbps network connection. There were also some spikes and curious performance wobbles. While speed was better than [Jeff]’s previous Raspberry Pi experiments, it wasn’t capable of double or triple the performance like he’d hoped. In comparison, the ASUSTOR solution was capable of much greater speeds. It topped out at 600 MB/sec write speeds, and 1.2 GB/sec on reads.

If you’re looking to build a high-performance DIY NAS, the ROCK 5 may be a better solution than most Raspberry Pi boards. However, if you want speed over all else, existing commercial NAS solutions really have the edge. Video after the break.

Continue reading “DIY All-Flash NAS Vs. Commercial Hardware”

Building A NAS That Really Looks Like A NAS

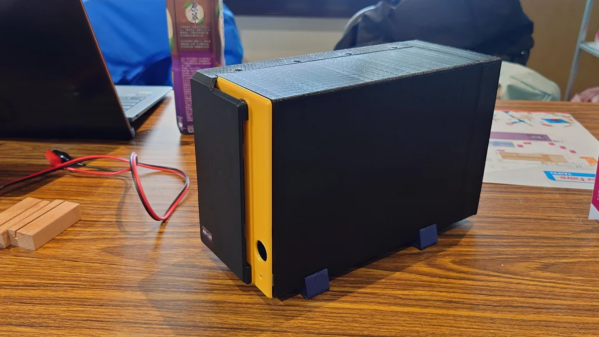
Building your own network attached storage (NAS) for personal use isn’t all that difficult. A single board computer, a hard disk and a power supply in an enclosure is all the hardware you need. Then, choose from one of several open source NAS software solutions and you’re up and running. [tobychui] decided to notch things up by designing a NAS that really looks like a NAS. It’s tailored to his specific requirements and looks like a professional product to boot. The design features dual 3.5 inch HDD bays, a small footprint, is low cost, compatible with a variety of single board computers, and can handle high data transfer speeds by using RAM and SD card for buffering.

Not only has he done a great job with the hardware design, but he’s also developed a companion software for the NAS. “ArozOS” is a web desktop operating system that provides full-fledged desktop experience within a browser. ArozOS has a great user interface and features a lot of networking, file, disk management and security functions. He has also developed a launcher application to enable over-the-air (OTA) software updates.

Assembling the device will need some planning and preparation, even though most of the hardware is off the shelf. You will need a SATA to USB 2.0 adapter, a SBC (Orange Pi Zero, Raspberry Pi 4, Orange Pi Zero 2, etc) , three buck converters — one each to provide 12 V to the two hard disks and a third to provide 5 V to the SBC. You’ll also need a 12 V / 6 A or 24 V / 3 A external power brick, or a USB-C 65 W GaN charger with a triggering module to set the desired voltage and current.

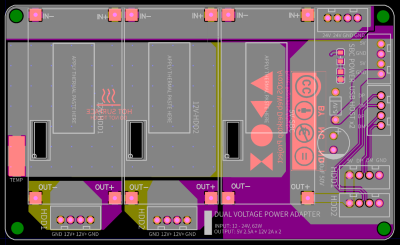
There is also one custom power distribution board which is essentially a carrier board to mount the buck converters and connectors for power and USB data. For the 3D prints, [tobychui] recommends printing at the highest resolution for a nice finish.

The off the shelf SATA to USB adapter will need to be taken apart before it can be fixed to the 3D printed SATA adapter plate and might pose the most challenge during construction, but the rest of the assembly is fairly straightforward. Once assembly is complete, [tobychui] walks you through installation of the ArozOZ software, mounting the drives and making them accessible over the network.

Have you got your data backup act in order ? If not, it’s still not too late to make it a new Year’s resolution. And if you need help figuring things out, check out New Year Habits – What Do You Do For Data Storage?

Continue reading “Building A NAS That Really Looks Like A NAS”

Back Up Encrypted ZFS Data Without Decrypting It, Even If TrueNAS Doesn’t Approve

[Michael Lynch] recently replaced his Synology NAS with a self-built solution built on ZFS, a filesystem with a neat feature: the ability to back up encrypted data without having to decrypt it first. The only glitch is that [Michael] is using TrueNAS, and TrueNAS only wants to back up unencrypted ZFS data to another TrueNAS system. Fortunately, there’s a way around this that isn’t particularly complicated, but definitely requires leveraging the right tools. It also provides an educational walkthrough for how ZFS handles these things.

The solution is a small handful of shell scripts to manage full and incremental backups and restores of encrypted datasets, without having to decrypt the data first. As mentioned, this is something TrueNAS will handle by default, but only if the destination is also a TrueNAS system. Now, [Michael] can send that backup to off-site cloud storage with only a little extra work.

There’s one additional trick [Michael] uses to monitor his backups. He leverages a paid (but with a free tier) service called Cronitor. It’s not very obvious from the site’s features, but there is a way to implement cron job monitoring that doesn’t require adding any software whatsoever. Here’s how that part works: Cronitor provides a custom, unique URL. If that URL isn’t visited regularly (for example, because the cron job fails), then the user is notified. By integrating this into an existing cron job, one can be notified. Such an integration would look like this:

0 0 3 * * monthly-job && curl --silent https://cronitor.link/p/<API-KEY>/monthly-job?state=complete

In short, if the cron job runs successfully, curl checks in by visiting the custom URL. If that doesn’t happen, the user gets a notification. No added software, just a simple leveraging of a free service for some added peace of mind.

Backups are easy to neglect, so maybe it’s time to take a few moments to consider what you do for data storage, including how you’d recover from disaster.

Hacking An Extra SATA Port Into A Thin Client

Thin clients were once thought by some to be the future of computing. These relatively low-power machines would rely on large server farms to handle the bulk of their processing and storage, serving only as a convenient local way for users to get access to the network. They never quite caught on, but [Jan Weber] found an old example and set about repurposing it as a NAS.

The Fujitsu Futro S900 was built up to 2013, and only had one SATA port from the factory. [Jan] wanted to add another as this would make the device more useful as a network attached storage server.

The motherboard design was intended primarily for industrial control or digital signage applications, and thus has plenty of interfaces onboard. [Jan]’s first target was some unpopulated footprints for SATA ports onboard, but after soldering on a connector, it was found that the BIOS wouldn’t recognise the extra ports anyway.

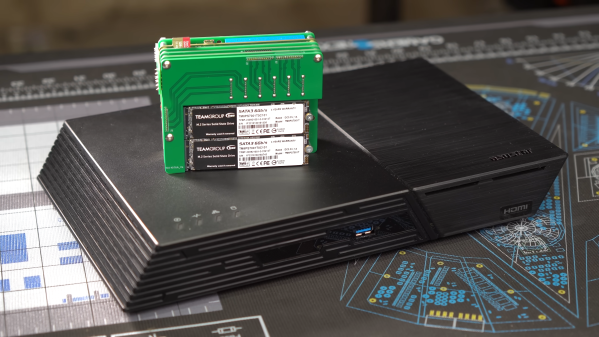
However, after reflashing the BIOS with one from an alternate model, the port worked! The system also seemed to then imagine it was connected to many additional LAN interfaces, but other than that glitch, the hack is functional. Now, with a pair of 2 TB SSDs inside, the S900 is a great low-power NAS device that can store [Jan]’s files.

It’s a tidy hack, and one that will likely appeal to those who prefer to run their own hardware rather than relying on the cloud. If you’re working on your own innovative NAS project, be sure to let us know!

Compute Module 4 NAS With Custom Carrier Board

At this point, we’ve seen more Raspberry Pi Network Attached Storage (NAS) builds than we can possibly count. The platform was never a particularly ideal choice for this task due to the fact it could only connect to drives over USB, but it was cheap and easy to work with, so folks made the best of it. But that all changed once the Compute Module 4 introduced PCIe support to the Raspberry Pi ecosystem.

If this impressive NAS built by [mebs] represents the shape of things to come, we’re more than a little excited. On the outside, with its 3D printed case and integrated OLED display to show system status, it might look like plenty of builds that came before it. But pop the top of this cyberpunk-styled server, and you realize just how much work went into it.

At the heart of this NAS is a purpose-built carrier board that [mebs] designed based on the KiCad files the Raspberry Pi Foundation released for their official CM4 IO Board. While not much larger than the CM4 itself, the NAS board breaks out the board’s PCIe, Ethernet, HDMI, and USB. There’s also a header for I2C, used primarily for the OLED display but naturally expandable to additional sensors or devices, and nine GPIO pins for good measure.

Of course, that alone doesn’t make a NAS. Into that PCIe port goes a four channel SATA controller card, which in turn is connected to the hard disk drives that are nestled into their respective nodes of the printed case. A central fan blows over the electronics at the core, and thanks to clever design and a few cardboard seals, pulls air over the drives by way of intake vents printed into the sides.

As impressive as this build is, not everyone will need this level of performance. If you don’t mind being limited to USB speeds, you can 3D print a NAS enclosure for the standard Raspberry Pi. Or you could always repurpose an old PC case if you’d like something a bit more substantial.