Qube Robots Use Well-designed Laser-cut Acrylic

These robot cubes, called BOXZ, use an interesting interlocking part design to mount and protect the parts within. But to really make them pop you need to color and apply your own papercraft skins.

The actual hardware is quite simple. They’ve used an Arduino, along with motor driver and Bluetooth shields, to control a set of geared DC motors. There’s a battery pack which holds four AA cells and a pair of servo motors which seem to be there to act as arms. This base can then be adorned with sensors to add functionality (line following, wall following, obstacle avoidance, etc.).

Despite the simple appearance of the cube, the chassis is the most complicated part. It uses sixteen pieces of acrylic, but they may also be hand cut from cardboard by printing out templates and gluing them onto the material. The parts are designed with interlocking tabs which we often see used on laser-cut wooden box parts.

We’ve embedded the video presentation of BOXZ after the break.

Continue reading “Qube Robots Use Well-designed Laser-cut Acrylic”

Minimalist RGB LED Cube Has A Very Short BoM

charlieplexed-led-cube

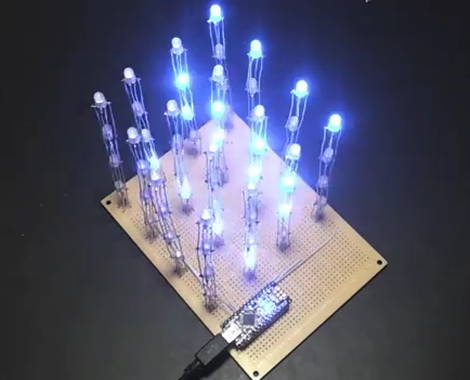
[Asher Glick] wrote in to share a project he has been working on with his friend [Kevin Baker], a 4x4x4 RGB LED cube. The pair are students at Rensselaer Polytechnic Institute and also members of the newly-formed Embedded Hardware Club on campus. As their first collaborative project, they decided to take on the ubiquitous LED cube, trimming down the component count to nothing more than 64 LEDs, a protoboard, some wire, and a single Arduino.

Many cubes we have seen use shift registers or decade counters to account for all the I/O required to drive so many LEDs. Their version of the cube has none of these extra components, solely relying on 16 of the Arduino’s I/O pins for control instead. You might notice something a bit different about the structure of their cube as well. Rather than using a grid of LEDs like we see in most Charlieplexed cubes, they constructed theirs using 16 LED “spires”, tucking the additional wiring underneath the board.

The result looks great, as you can see in the videos below. The cube looks pretty easy to build, and with a cost around $60 it is a reasonably cheap project as well.

Nice job, we look forward to seeing all sorts of fun projects from the Embedded Hardware Club in the future!

Continue reading “Minimalist RGB LED Cube Has A Very Short BoM”

LED Cube Is A Little Bit Of Kit, A Lot Of Point-to-point Soldering

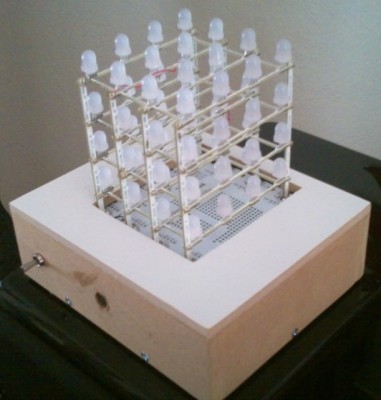
[Craig Lindley] recently finished building his own RGB LED cube project. It’s made up of four layers of 4×4 LED grids, but you may notice that the framework that supports the structure is not the usual ratsnet of wires we’ve come to expect. They’re actually long, thin circuit boards. [Craig] grabbed the Rainbow Cube kit sold by Seeed Studio for this project. But instead of pairing it with their Rainbowduino driver, he built his own to give him more options on how to control the blinky lights.

He’s using an Arduino Uno to control the display, choosing TLC5940 driver chips to safely provide the juice necessary to light up the grid. These drivers also offer 12-bit pulse-width modulation for easy color mixing. Driving the LEDs directly would have taken a large number of these expensive chips (over $4 a piece), but if multiplexed the design only calls for two of them.

Check out a video of the finished cube reacting to music thanks to the microphone and amplifier circuit [Craig] build into the driver board.

Continue reading “LED Cube Is A Little Bit Of Kit, A Lot Of Point-to-point Soldering”

Largest LED Cube We’ve Ever Seen Is Still Only Half Complete

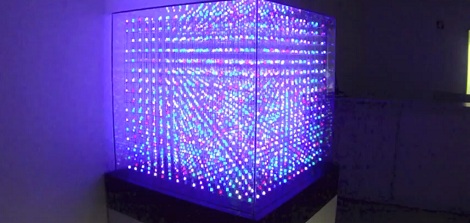
[Brendan Vercoelen] is a university student in New Zealand studying engineering. He says his recent gigantic LED cube build, “isn’t very serious” compared to other student projects, but that doesn’t mean it’s not impressive. The original plan for the build was a 16x16x16 tri-color LED cube. After realizing how much soldering that really was, [Brendan] scaled back his design a little to a 16x16x8 cubeoid, but the other half can be attached when the project is complete.

From the cost breakdown, [Brendan] only spent about $550 USD – far less expensive than we expected. The most expensive item was the 4,000+ Red-Green-Orange tri-color LEDs. The largest LED cubes (1, 2, 3) we’ve covered have maxed out at 8x8x8, or 512 total LEDS. Even though [Brendan]’s build is only half done, it’s still four times larger in volume than the largest LED cube we’ve seen.

The gauntlet has been thrown down. This is the one to beat, folks. Check out a video of the cube after the break.

Continue reading “Largest LED Cube We’ve Ever Seen Is Still Only Half Complete”

512 LED Cube (again)

We’ve seen LED cubes before, but [nick] upped the ante with his 8x8x8 LED cube that uses only three pins on his microcontroller.

Previous LED cubes we’ve covered drove the LEDs with shift registers and latches, but [nick] used STP16CP LED sink drivers to reduce the component count. The STP16CP can control 16 LEDs each, can be cascaded off of each other, and can operate up to 30Mhz. With a component like this, you’re limited by your microcontroller and not your patience or soldering skills.

While he was waiting for his LEDs to arrive in the mail, [nick] decided he would get a head start on the animation code by plunging into MATLAB. After getting an idea of what would look good on the cube, [nick] wrote the code on his PC to send commands to the arduino controlling the sink drivers. To wrap up the project, [nick] put the cube on a very attractive wooden box stuffed with the electronics. All tolled, a very efficient and elegant build.

Continue reading “512 LED Cube (again)”

512 LED Cube

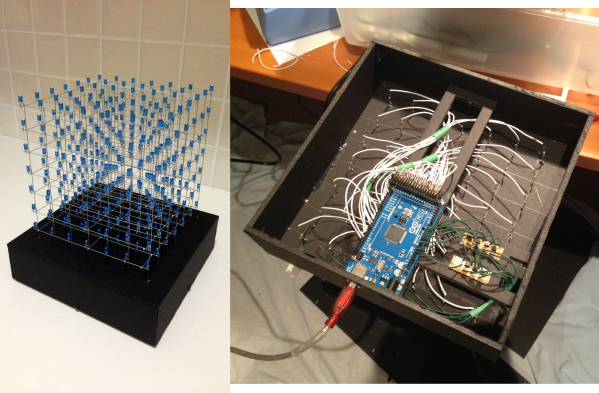
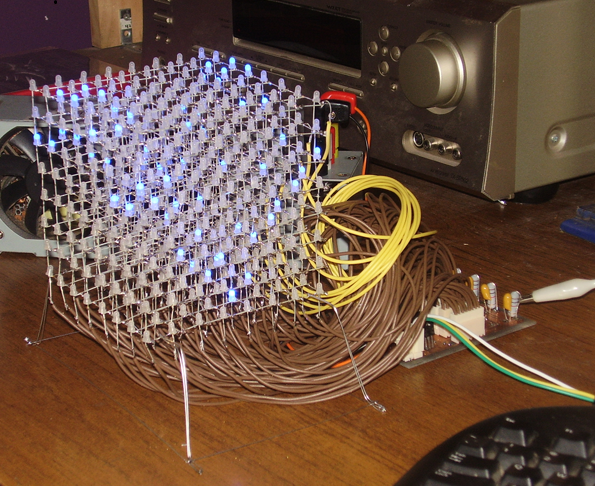
Get out the soldering iron and clear your schedule, it’s going to take you a while to assemble this 8x8x8 LED matrix which contains a total of 512 LEDs. We’ve looked in on a 3x3x3 cube, and [Chr], who is responsible for this one, has assembled a 4x4x4 cube before, but this one is quite a leap in complexity. It isn’t just physical assembly problems that increase with scale, you’ll need to consider a power supply too since one layer of a 3x3x3 cube would need at 90 mA, but a single layer of the cube above requires 640 mA to light all of the diodes. Multiplexing is handled per-layer, controlled by  ICs which share 8 data lines and are latched by a shift register. This means the display only requires 11 microcontroller pins for addressing. It is striking how well [Chr] explains the design process, and how cleanly he builds the driver circuits on protoboard. There’s a lot to look at and a lot to learn, not to mention the stunning results which can be seen in the video after the break.

Continue reading “512 LED Cube”

FPS Controller Hacks Getting Easier

It used to be a major production to build a gun-form-factor FPS controller but commercial tech has adopted many of those traditional hacks over the years. Now, [Nirav Patel] is playing Cube with a Wii zapper and a SpacePoint. All that was really required to make this happen is a patch to Cube, the open source FPS.

[Nirav] has plans to make this controller wireless using a BeagleBoard. We’re wondering if there’s support for using the Wii motion plus? We’ve seen motion plus Arduino connectivity, as well as direct PC connectivity. The Wii remote already connects to Linux, what about pulling that data down from the Bluetooth connection? If you’ve done this, send us a tip about it.