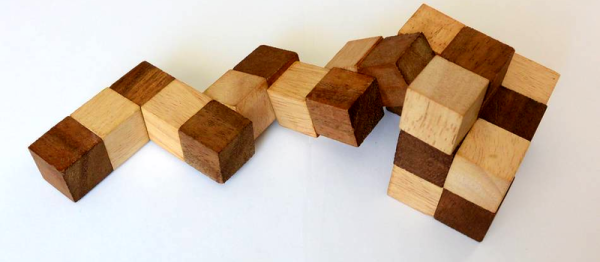
Puzzles provide many hours of applied fun beyond any perfunctory tasks that occupy our days. When your son or daughter receives a snake cube puzzle as a Christmas gift — and it turns out to be deceptively complex — you can sit there for hours to try to figure out a solution, or use the power of Python to sort out the serpentine conundrum and use brute-force to solve it.
cube34 Articles
Make Math Real With This Analog Multiplier Primer
Remember learning all about functions in algebra? Neither do we. Oh sure, most of us remember linear plots and the magic of understanding y=mx+b for the first time. But a lot of us managed to slide by with only a tenuous grasp of more complex functions like exponentials and conic sections. Luckily the functionally challenged among us can bolster their understanding with this demonstration using analog multipliers and op amps.
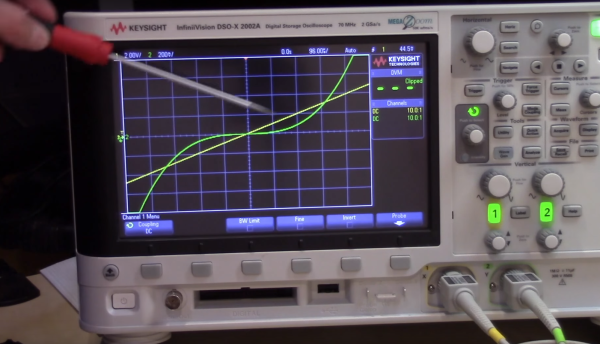
[devttys0]’s video tutorial is a great primer on analog multipliers and their many uses. Starting with a simple example that multiplies two input voltages together, he goes on to show circuits that output both the square and the cube of an input voltage. Seeing the output waveform of the cube of a ramped input voltage was what nailed the concept for us and transported us back to those seemingly wasted hours in algebra class many years ago. Further refinements by the addition of an op amp yield a circuit that outputs the square root of an input voltage, and eventually lead to a voltage controlled resistor that can attenuate an input signal depending on its voltage. Pretty powerful stuff for just a few chips.
The chip behind [devttys0]’s primer is the Analog Devices AD633, a pretty handy chip to have around. For more on this chip, check out [Bil Herd]’s post on analog computing.
Continue reading “Make Math Real With This Analog Multiplier Primer”
LED Notification Cube Is A Good First Project
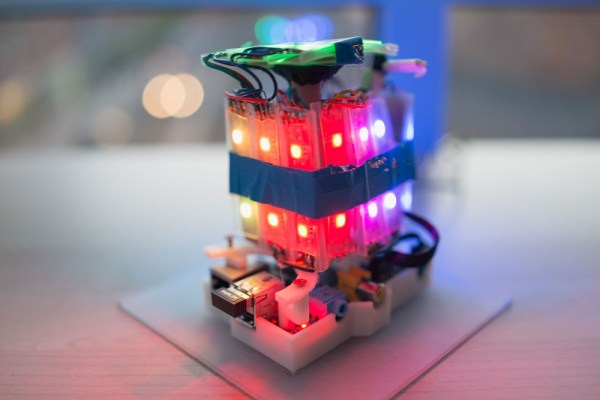
Two years ago, [Matt] made a move away from his software hacks and into the physical world. He was part of a pilot program to provide mentorship to children as part of the Maker Education Initiative. This program gave him access to 3D printers, CNC machines, and laser cutters within the New York Hall of Science makerspace. [Matt] chose to build an illuminated notification cube for his first physical project. The idea being that smart phones have so many alerts, many of which are unimportant. His project would help him to visualize and categorize each alert to better understand its importance.
The brain of the system is a Raspberry Pi. [Matt] found a Python library that allowed him to directly control an RGB LED strip based on the LPD8806 chip. He wired the data pins directly to the Pi and used an old 5V cell phone charger to power the LEDs. The strip was cut into smaller strands. Each face of the cube would end up with three strands of two LEDs each, or six LEDs per side. [Matt] found a mount for the Pi on Thingiverse and used a 3D printer to bring it into existence. The sides were made of frosted laser cut acrylic. The frosted look helps to diffuse the light from the LEDs.
Over time [Matt] found that the cube wasn’t as useful as he originally thought it would be. He just didn’t have enough alerts to justify the need. He ended up reprogramming the Pi to pull weather information instead, making use of the exact same hardware for another, more useful purpose.
LED Cube In An Elongated Cube Be Jammin’
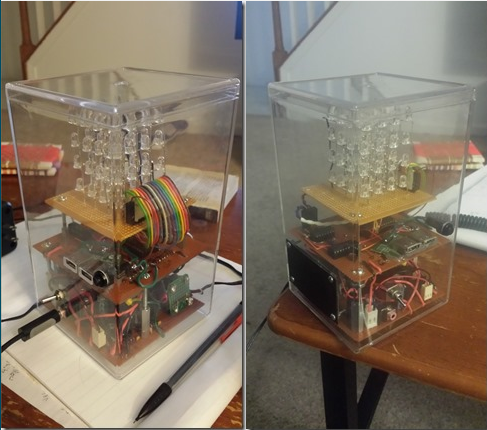
We get a lot of tips about LED cubes. They’re a great build to explore a lot of different things, from the circuit design, to current source and sink, and of course there’s the firmware. Why don’t we see a million of them on the front page? Well, we have seen a lot, but most of what is sent our way doesn’t exhibit such a clean build. It’s obvious that [Justin] took a lot of pride in his work on this 4x4x4 single-color cube.
Hidden away under one of the protoboards is an Arduino that drives it. A lot of the components were salvaged from the e-waste bin at his University. This includes the 12V AC wall wart he uses to power the device. A bridge rectifier converts to DC, and in addition to powering the LEDs there are a couple of USB charging ports. After the break you can see and hear it in action. The cube pulses to the music but the flip of a switch will disconnect the speaker if you want some peace and quiet to go with the light show.
If you’re looking for a challenge, this 8x8x8 RGB offering is several orders of magnitude harder to pull off… block out a lot of extra time if you do decide to take the plunge. We also heard that [Benchoff] might try to make a cube with some of those through-hole ws2812 pixels.
Cube 3D Printer Hack Lets You Use Bulk Filament
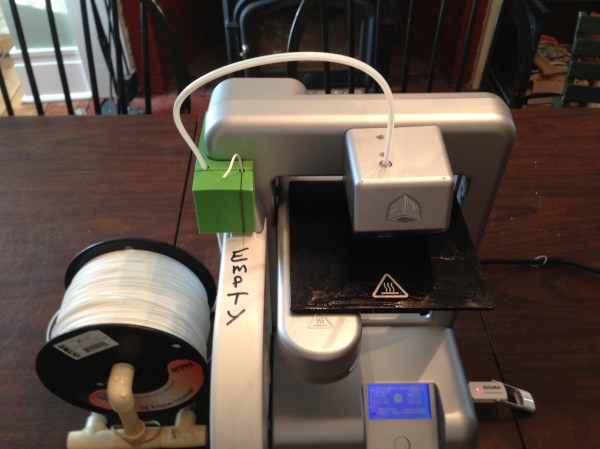
[Chris Nafis] crunched the numbers and found out he could get filament for his 3D printer in bulk for about one-fifth the cost of the cartridges the company sells. This led him to print a feeder for his Cube 3D printer.
We’re skeptical about the Cube 3D printer’s cartridges. They contain a spool of filament, but also include a chip which reports back the filament color and length remaining. We’re sure this provides some nice functionality for those looking to press a button and walk away. But we see it as an annoyance like the laser toner cartridges that stop working based on page count rather than remaining toner.
The solution [Chris] went with still uses the cartridges to ‘trick’ the machine into printing. Basically the interface will tell you that you don’t have enough filament left, but as long as there’s a cartridge in place you can tell it to print anyway. The green adapter he printed has a pass-through for the stock cartridge as well as the bulk spool you see to the left.
This Cube Is Made For Walkin’
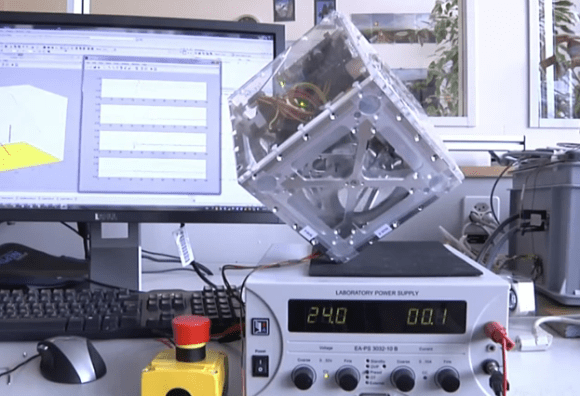
Meet Cubli, a research project which aims to make a cube that can walk around without using any appendages. It’s a research project at the Institute for Dynamic Systems and control in Switzerland. Anyone else thinking about our beloved companion cube right now?
The robotic experiments are based on angular momentum. Inside of the cube there are center mounted motors which each spin a wheel. Three of these are mounted perpendicular to each other to give the cube the ability to change its position along any axis. This is best shown by the first video after the break where just a single side of the assembly is demonstrated. A square frame starts at a rest position. You see the wheel spin up and it is suddenly stopped, which causes the momentum of the wheel to pop the square frame up onto one corner. The wheel then switches into a second mode to keep it balancing there. The final mode is a controlled fall. This theoretically will let the cube move around by falling end over end. So far they’re not showing off that ability, but the second demo video does show the assembled cube balancing on one corner.
Wall Votive Display Controlled With A Glowing Cube
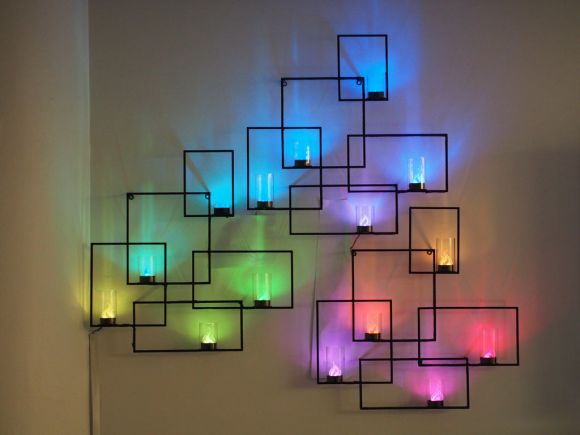
This wall hanging would look great even if it did no more than light up. But thanks to a unique controller it’s meant to work as an interactive display for your living area.
The rectangles and votive candle cups are a set of three store-bought hangings. But lighting the candles and remembering to blow them out was a pain, so [Adiel Fernandez] decided to add the LEDs to make the job easier. But why stop at that, in addition to an RGB light for each cup he made them fully addressable. It’s all the better for a light show, but this also opens up the arena for all manner of different uses.
Accompanying the wall installation is a palm-sized cube meant to sit on the coffee table. Whichever side of the cube us up sets the function for the display, with a rotation tweaking the function, and a fast spin used as a select. If the power icon is on the side facing up, a fast spin will turn the display on or off. There are also functions for weather, temperature, transportation (we were thinking something like a bus schedule notifier but it’s actually a bit different) and animation patterns. After the break you can watch a demo of the cube functionality.
Continue reading “Wall Votive Display Controlled With A Glowing Cube”

