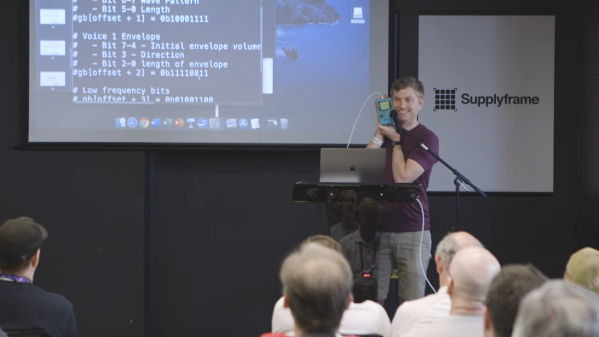
Scott Shawcroft Is Programming Game Boys With CircuitPython

Some people like to do things the hard way. Maybe they drive a manual transmission, or they bust out the wire wrap tool instead of a soldering iron, or they code in assembly to stay close to the machine. Doing things the hard way certainly has its merits, and we are not here to argue about that. Scott Shawcroft — project lead for CircuitPython — on the other hand, makes a great case for doing things the easy way in his talk at the 2019 Hackaday Superconference.

In fact, he proved how easy it is right off the bat. There he stood at the podium, presenting in front of a room full of people, poised at an unfamiliar laptop with only the stock text editor. Yet with a single keystroke and a file save operation, Scott was able make the LEDs on his Adafruit Edge Badge — one of the other pieces of hackable hardware in the Supercon swag bag — go from off to battery-draining bright.

Code + Community

As Scott explains, CircuitPython prides itself on being equal parts code and community. In other words, it’s friendly and inviting all the way around. Developing in CircuitPython is easy because the entire environment — the code, toolchain, and the devices — are all extremely portable. Interacting with sensors and other doodads is easy because of the import and library mechanics Python is known for, both of which are growing within the CircuitPython ecosystem all the time.

CircuitPython is so friendly that it can even talk to old hardware relatively easily without devolving into a generational battle. To demonstrate this point, Scott whipped out an original Nintendo Game Boy and a custom cartridge, which he can use to play fun sounds via the Game Boy’s CPU.

Now You’re Playing With Python

It’s interesting to see the platforms on which Scott has used the power of CircuitPython. The Game Boy brings the hardware for sound and pixel generation along with some logic, but he says it’s the code on the cartridge that does the interesting stuff.

The CPU communicates with carts at a rate of 1MHz. As long as you can keep this rate up and the CPU understands your instructions, you can get it to do anything you want.

Scott’s custom cart has a 120MHz SAMD51. He spends a second explaining how he gets from Python libraries down to the wire that goes to the Game Boy’s brain — basically, the C code underneath CircuitPython accesses direct structs defined within the SAMD to do Direct Memory Access (DMA), which allows for jitter-free communication at 1MHz.

He’s using the chip’s lookup tables to generate a 1MHz signal out of clock, read, and A15 in order to send music-playing instructions to the sound register of the Game Boy’s CPU. It sounds like a lot of work, but CircuitPython helps to smooth over the dirty details, leaving behind a simpler interface.

If you want easy access to hardware no matter how new or nostalgic, the message is clear: snake your way in there with CircuitPython.

Continue reading “Scott Shawcroft Is Programming Game Boys With CircuitPython”

The Multiyear Hunt For A Gameboy Game’s Bug

[Enddrift] had a real problem trying to run a classic game, Hello Kitty Collection: Miracle Fashion Maker, into a GBA (Gameboy Advance) emulator. During startup, the game would hit an endless loop waiting for a read from a non-existent memory location and thus wouldn’t start under the emulator. The problem is, the game works on real hardware even though that memory doesn’t exist there, either.

To further complicate things, a similar bug exists when loading a saved game under Sonic Pinball Party. Then a hack for Pokemon Emerald surfaced that helped break the case. The story is pretty interesting.

Continue reading “The Multiyear Hunt For A Gameboy Game’s Bug”

Better LEDs Through DMA

While regular Hackaday readers already know how to blink a LED with a microcontroller and have moved onto slightly more challenging projects such as solving the Navier-Stokes equations in 6502 assembly, that doesn’t mean there’s not space for newbies. [Rik] has published a great tutorial on abusing DMA for blinkier glowy things. Why would anyone want to learn about DMA techniques? For blinkier glowy things, of course.

This tutorial assumes knowledge of LED multiplexing and LED matrices, or basically a bunch of LEDs connected together on an XY grid. The naive way to drive an 8×8 grid of LEDs is attaching eight cathodes to GPIO pins on a microcontroller, attaching the eight anodes to another set of GPIO pins, and sourcing and sinking current as required. The pin count can be reduced with shift registers, and LED dimming can be implemented with PWM. This concludes our intensive eight-week Arduino course.

Thanks to microcontrollers that aren’t trapped in the 1980s, new techniques can be used to drive these LED matrices. Most of the more powerful ARM microcontrollers come with DMA, a peripheral for direct memory access. Instead of having the CPU do all the work, the DMA controller can simply shuffle around bits between memory and pins. This means blinker projects and glowier LEDs.

[Rik]’s method for DMAing LEDs includes setting up a big ‘ol array in the code, correctly initializing the DMA peripheral, and wiring up the LED matrix to a few of the pins. This technique can be expanded to animations with 64 levels of brightness, something that would take an incredible amount of processing power (for a microcontroller, at least) if it weren’t for the DMA controller.

The setup used in these experiments is an STM32F103 Nucleo board along with the OpenSTM32 IDE. [Rik] has released all the code over on GitHub, and you are, of course, encouraged to play around.

Understanding DMA

In the world of computers, the central processing unit (CPU) is–well–central. Your first computer course probably explained it like the brain of the computer. However, sometimes you can overload that brain and CPU designers are always trying to improve both speed and throughput using a variety of techniques. One of those methods is DMA or direct memory access.

As the name implies, DMA is the ability for an I/O device to transfer data directly to or from memory. In some cases, it might actually transfer data to another device, but not all DMA systems support that. Sounds simple, but the devil is in the details. There’s a lot of information in this introduction to DMA by [Andrei Chichak]. It covers different types of DMA and the tradeoffs involved in each one.

Continue reading “Understanding DMA”

High Speed SSD1306 Library

[Lewin] wrote in to tell us about a high speed library for Arduino Due that he helped develop which allows interfacing OLED displays that use the SSD1306 display controller, using DMA routines for faster display refresh time.

Typically, displays such as the Monochrome 1.3″ 128×64 OLED graphic display , are interfaced with an Arduino board via the SPI or I2C bus. The Adafruit_SSD1306 library written by [Limor Fried] makes it simple to use these displays with a variety of Arduinos, using either software or hardware SPI. With standard settings using hardware SPI, calls to display() take about 2ms on the Due.

[Lewin] wanted to make it faster, and the SAM3X8E on the Due seemed like it could deliver. He first did a search to find out if this was already done, but came up blank. He did find [Marek Buriak]’s library for ILI9341-based TFT screens. [Marek] used code from [William Greiman], who developed SD card libraries for the Arduino. [William] had taken advantage of the SAM3X8E’s DMA capabilities to enable faster SD card transfers, and [Marek] then adapted this code to allow faster writes to ILI9341-based screens. All [Lewin] had to do was to find the code that sent a buffer out over SPI using DMA in Marek’s code, and adapt that to the Adafruit library for the SSD1306.

There is a caveat though: using this library will likely cause trouble if you are also using SPI to interface to other hardware, since the regular SPI.h library will no longer work in tandem with [Lewin]’s library. He offers some tips on how to overcome these issues, and would welcome any feedback or testing to help improve the code. The speed improvement is substantial. Up to 4 times quicker using standard SPI clock, or 8 times if you increase SPI clock speed. The code is available on his Github repo.