Cheap As Chips Arduino Ethernet Shield

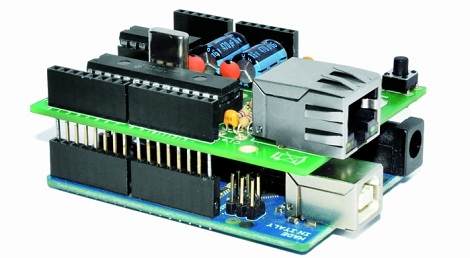
It’s no secret that Ethernet shields for the Arduino are a little expensive. With the official Ethernet shield selling for about $50 and other options not much cheaper, there’s a lot of room for improvement for Arduinofied Ethernet. [Boris] over at Open Electronics has a solution to this problem: his Ethercard powered by a $3 Ethernet controller.

The Ethercard uses the Microchip ENC28J60, a through-hole Ethernet controller. There isn’t much else on the board apart from an RJ45 jack, caps, resistors, and a cheap buffer chip. This board was designed to be easily produced, and we’re thinking it might be possible to etch this board at home.

There are a few drawbacks to this ENC28J60 Ethernet shield – the official Arduino Ethernet shield has a 10/100 Mbps connection where the Microchip-powered shield is limited to 10 Mbps. Given the reduced cost, ease of assembly, and the fact that it’s pretty hard to saturate a 100Mbps connection with an Arduino this flaw can be easily ignored.

Pretty neat, especially considering how much you can do with an Ethernet connection on your Arduino. Files and code available in the git.

Building The Backend Of Internet Controlled Devices

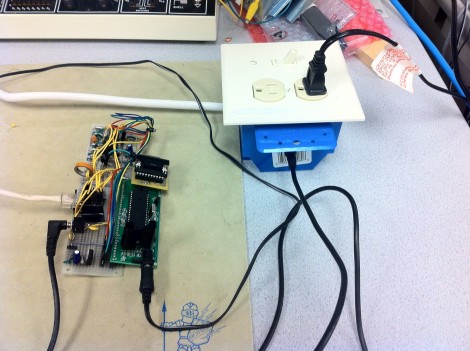
[Adam] and [Jeremy] took on the challenge of designing a system that would make it easy to control appliances from the Internet. We’ve seen the concept many times before; it involves some method of switching mains power and connecting that mechanism to the Internet. This design is both well planned and nicely executed.

We’re always very interested in the power switching for a project like this. It’s good that an approved electrical box houses all of the high-voltage parts in the project. Here a GA8-2B02 solid state relay switches power between the incoming cord and the two outlets. We didn’t get a look in the box, but hopefully there’s a partition between those wires and the low-voltage control wiring which uses a standard 3.5 mm audio jack as an interconnect.

An ATmega644 drives the control signal for the relay. It’s connected via Ethernet cable to the Internet through the use of an ENC28J60 chip which takes care of LAN communications. This is essentially a light-weight web server that will be easy to adapt to receive commands from just about any web-connected sender.

[Thanks Bruce]

Commandeer X10-based Home Automation With Your Favorite Microcontroller

X10 has been around for a long time. It’s the brand name for a set of wireless modules used to switch electrical devices in the home. There’s all kinds of different units (bulb sockets, electrical outlets and plug pass-throughs, etc.) and they’re mass-produced which makes them really inexpensive. Whether you already have some X10 controlled devices or just plan to add them later, we think you’ll find [Jeff Ledger’s] post on controlling the system with a Propeller chip interesting. The technique is not Propeller specific and will be simple to port to your microcontroller of choice.

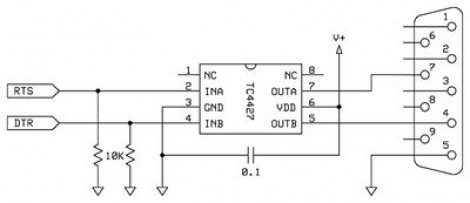
[Jeff] got his hands on an X10 Firecracker. This provides a DB-9 serial connection meant to be used for computer control. But the interface is so simple all you need is two I/O pins feeding the level converter circuit seen above. You can get the TC4427 for less than a dollar, and the Firecrcker module for as little as $6. Since [Jeff] has already covered adding Ethernet via a ENC28J60 he goes on to detail a web-server that lets him switch his devices, all served from the Propeller chip.

Here’s a different ENC28J60 Ethernet tutorial for those interested in webpages from microcontrollers. And then there’s also a ZigBee home automation project if you’re not warming up to the idea of using X10 modules.

Building A Message Board With A Web Interface

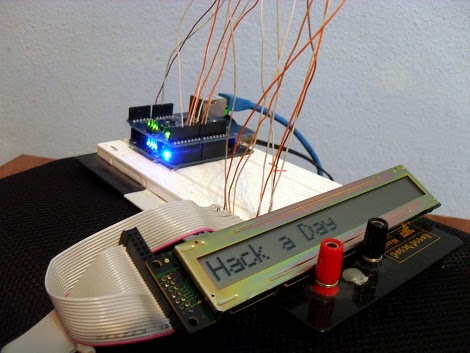
[Sergio] is just getting into hardware hacking. He started by getting an HD44780 compatible LCD screen running with his Arduino. To take the project to the next level, he decided to add a web interface for changing the message displayed on the LCD.

He’s doing things on the cheap (a man after our own hearts), purchasing many of his components off of eBay. Unfortunately that decision came back to bite him when it was time to connect his Arduino to the network. The Ethernet Shield knock-off wasn’t the same as the official version. That one’s got a Wiznet W5100 ethernet chip with does a lot of the heavy lifting for you. Instead, [Sergio] is using a board with an ENC28J60. It took a bit of searching, but eventually he came up with an example to help him get his Arduino serving web pages and listening for updates from them.

The ENC28J60 is actually not a bad piece of hardware. It’s cheap enough, and there are a few hardware/software demos out there that are worth taking a look at.

Adding Ethernet Control For A 5.1 Speaker Set

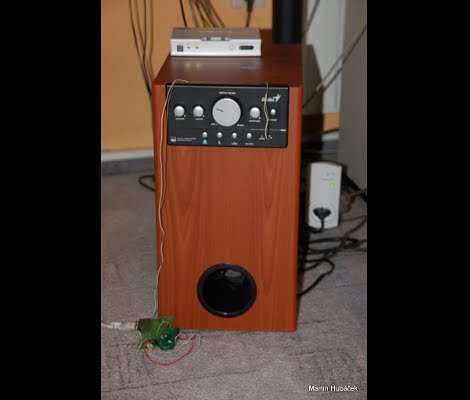
[HuB’s] set of 5.1 surround sound speakers was gobbling up a bunch of electricity when in standby as evidenced by the 50 Hz hum coming from the sub-woofer and the burning hot heat sink on the power supply. He wanted to add a way to automatically control the systems and offer the new feature of disconnecting the power from the mains.

The first part was not too hard, although he used a roundabout method of prototyping. He planned to use the IR receiver on the speakers to control them. At the time, [HuB] didn’t have an oscilloscope on hand that he could use to capture the IR protocol so he ended up using Audacity (the open source audio editing suite) to capture signals connected to the input of a sound card. He used this to establish the timing and encoding that he needed for all eight buttons on the original remote control.

Next, he grabbed a board that he built using an ATmega168 and an ENC28J60 Ethernet chip. This allows you to send commands via the Internet which are then translated into the appropriate IR signals to control the speakers and a few other devices in the room. The last piece of the puzzle was to wrap an RF controlled outlet into the project with lets him cut mains power to the speakers when not in use. You can see the video demonstration embedded after the break.

Continue reading “Adding Ethernet Control For A 5.1 Speaker Set”

Ego Box Monitors Web Hits

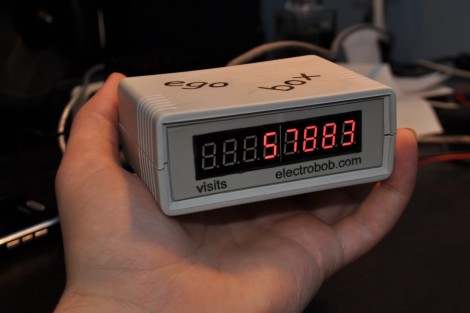
[Bogdan’s] latest project is a box that displays web hits for a chosen site. He calls it the Ego Box because depending on how traffic goes it either bloats or crushes your ego. This provides similar functionality as our Troll Sniffing Rat but the biggest difference is that this is a stand-alone Ethernet device. That’s thanks to the ENC28J60 Ethernet controller chip which manages the stack and has been quite popular in DIY electronic projects. In order to monitor your hits [Bogdan] crafted a bit of code to add to the header of your index page. It increments the counter file each time the page is loaded, and the Ego Box simply monitors that file, displaying the traffic on an eight digit 7 segment display.

[via Adafruit]

Web Controlled Sprinkler Automation

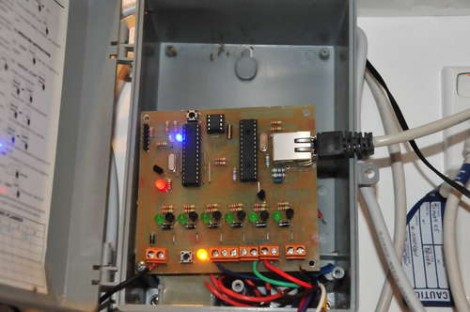
[Doug] needed to update his watering system to comply with his city’s new water saving ordinance. The old system wasn’t capable of being programmed to water only on even or odd calendar days. Rather than purchase a replacement he decided to build his own sprinkler controller. It needed to switch 12V solenoids, a job that’s not too hard to design for. Rather than re-invent the wheel, he modified a previous controller design. It is basically an Arduino and Ethernet shield on a his own etched board. In addition to the ATmega328 and an ENC28J60 (for ethernet connectivity) there is a bank of transistors to drive the watering solenoids. Now he has a web interface that controls the watering schedule and is fully in compliance with the new city code.

If you need another way to save when watering your grass you should take a look at the sidewalk-avoiding sprinkler.