Building An Army Of Faux Cameras In The Name Of Art

After taking mental note of the number of surveillance cameras pointed at him while standing in line at the local Home Depot, [Mac Pierce] was inspired to create A Scanner Darkly. The art installation uses beams of light projected by mock security cameras to create a dot-matrix character display on the opposing wall, which slowly blinks out US surveillance laws and regulations.

[Mac] has put together an extensive behind the scenes look at how he created A Scanner Darkly, which among other things covers the incredible time and effort that went into producing the fifteen identical cameras used to project the 3×5 grid. Early on he decided on 3D printing each one, as it would give him complete control over the final result. But given their considerable size, it ended up taking 230 hours and 12 kilograms of PLA filament to print out all the parts. It took a further 55 hours to sand and paint the camera housings, to make sure they didn’t actually look like they’d been 3D printed.

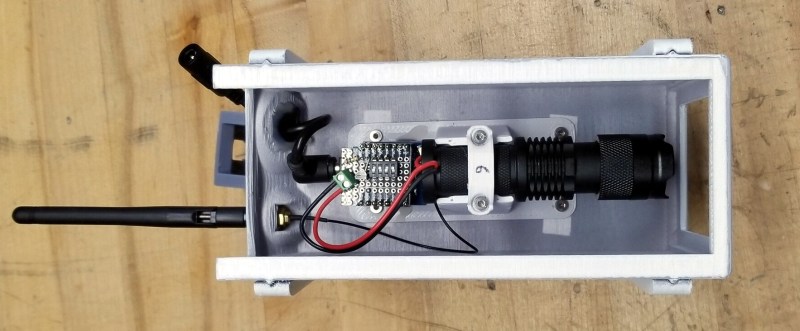
Internally, each camera has an off-the-shelf LED flashlight that’s had its power button rigged up to an ESP8266. Once they’ve been manually pointed to the appropriate spot on the wall, [Mac] can turn each camera’s spotlight on and off over WiFi. Rather than rely on the gallery’s infrastructure, all of the cameras connect to the ESP32 M5Stack that serves as the central controller via ESP-Now.

From there, it was just a matter of writing some code that would load a text document from the SD card, convert the current character into a 3×5 array, and then command the appropriate cameras to turn their lights on or off. [Mac] has not only provided the STL files for the 3D printed camera, but the client and server Arduino code to control the lights. Combined with his excellent documentation, this makes A Scanner Darkly something of a viral art piece; as anyone with the time and appropriate tools can either duplicate the installation or use it as a base for something new.

While some will no doubt argue that [Mac] could have completed this project far faster had he just modified some commercial dummy cameras, it’s important to remember that as an artist, he had a very specific look in mind for A Scanner Darkly. This project is a perfect example of how a creator’s passion can take an idea to new heights, and we think the end result proves it’s worth the time and sweat to put in the extra effort.

Continue reading “Building An Army Of Faux Cameras In The Name Of Art”

AN ESP32 Walkie-Talkie, For Those Spy Radio Moments

One of the most thrilling childhood toys for the adventurous 1970s or 1980s kid was probably the toy walkie-talkie. It didn’t matter that they were a very simple AM low-end-VHF radio with a range of about 500m and a Morse key of debatable utility, you could talk clandestinely with your friends, and be a more convincing spy, or commando, or whatever was the game of the moment. It’s a memory conjured up for grown-ups by [Chris G] with his ESP32 walkie-talkie, which replaces a shaky 49MHz connection with one a bit more robust through the magic of WiFi.

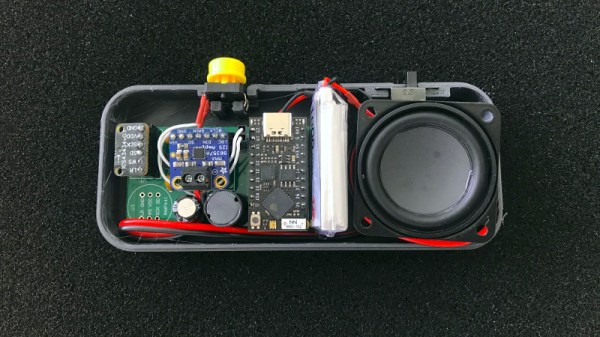
The hardware is a collection of modules on a custom PCB, aside from the ESP32 there’s an I2S microphone and I2S audio amplifier, which along with battery and speaker are housed in a neat 3D printed case. I2S is used for simplicity, but there is no reason why analogue components couldn’t be used with a few code changes. Connection is made via UDP over a WiFi network, or should there be no network via ESP-NOW. We’re not sure the range will be brilliant with those little on-board chip antennas, but with the wide range of 2.4GHz antennas to be had it’s likely a better result could easily be achieved if the stock item disappoints.

We like this project, and it’s one that’s especially pleasing to see given that we saw the potential a few years ago in a less successful walkie-talkie using the ESP8266.

Control A Swarm Of RC Vehicles With ESP8266

Over at RCgroups, user [Cesco] has shared a very interesting project which uses the ever-popular ESP8266 as both a transmitter and receiver for RC vehicles. Interestingly, this code makes use of the ESP-Now protocol, which allows devices to create a mesh network without the overhead of full-blown WiFi. According to the Espressif documentation, this mode is akin to the low-power 2.4GHz communication used in wireless mice and keyboards, and is designed specifically for persistent, peer-to-peer connectivity.

Switching an ESP8266 between being a transmitter or receiver is as easy as commenting out a line in the source code and reflashing the firmware. One transmitter (referred to as the server in the source code) can command eight receiving ESP8266s simultaneously. [Cesco] specifically uses the example of long-range aircraft flying in formation; only coming out of the mesh network when it’s time to manually land each one.

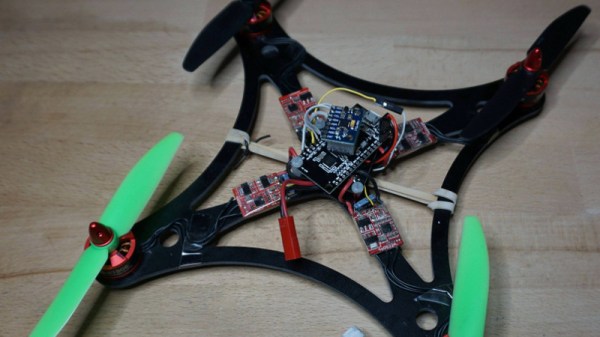
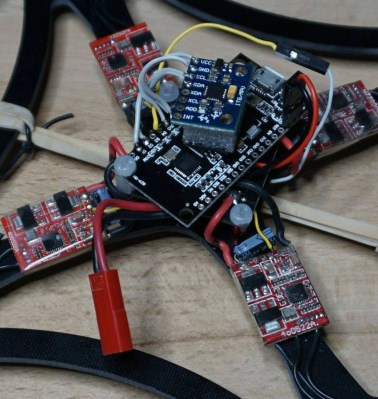
[Cesco] has done experiments using both land and air vehicles. He shows off a very hefty looking tracked rover, as well as a quickly knocked together quadcopter. He warns the quadcopter flies like “a wet sponge”, but it does indeed fly with the ESP’s handling all the over the air communication.

To be clear, you still need a traditional PPM-compatible RC receiver and transmitter pair to use his code. The ESPs are simply handling the over-the-air communication. They aren’t directly responsible for taking user input or running the speed controls, for example.

This isn’t the first time we’ve seen an ESP8266 take the co-pilot’s seat in a quadcopter, but the maniacal excitement we feel when considering the possibility of having our very own swarm of flying robots gives this particular project an interesting twist.