Display Twitter On An Arduino

If you ever wanted your name out on the Internet, now is your time to shine. [Chris] hooked up an Arduino to the Internet and is streaming the results of combing through Twitter live to the entire world.

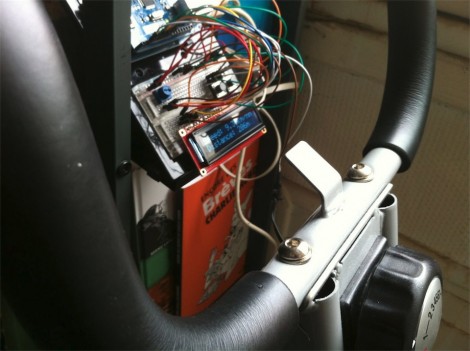
The SocialBot9000, as [Chris] calls his build, is an Arduino Uno connected to an Ethernet shield and an LCD character display. The firmware uses the Twitter API to search for recent posts containing the phrase, ‘socialbot9000.’ A PHP script on the Arduino does all the heavy lifting and with the great Bildr tutorial on getting the Ethernet shield up and running, [Chris] was off to the races.

Because it’s extremely doubtful that everyone on the Internet could manage typing a message into Twitter that would be correctly parsed by the SocialBot9000, [Chris] put a small form up on the build log that will correctly generate the message and take you to your Twitter account for posting. After all that was done, [Chris] decided to have some fun and set up a live feed from a camera in front of the LCD display for the world to watch.

Numerous Quiz Buttons Built On The Cheap

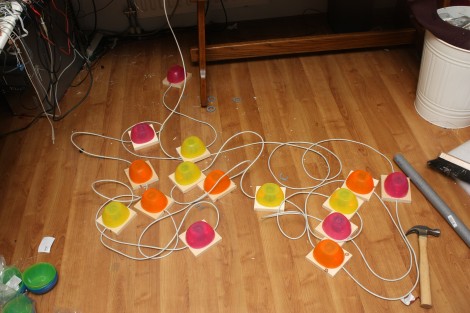
[Sprite_TM] was tapped to build a rather large quiz buzzer system. Judging from his past work we’re not surprised that he seemed to have no trouble fulfilling the request. As the system is not likely to be used again (or rarely if it is) he found a way to finish the project that was both quick and inexpensive.

Each buzzer consists of a base, a button (both mechanical and electrical), and a couple of LEDs to indicate who buzzed in first. The mechanical part of the button uses a plastic bowl from Ikea and a wooden dowel surrounded by some pipe insulation. A momentary push switch is glued on the top of that dowel, and the insulation projects above that just a bit. This way it acts as a spring. The Dowel has been sized so that the bowl lip will hit the wooden base just as it clicks the switch.

As you can see, all of the buzzers are interlinked using Ethernet cable. The real trick here is how to read 14 buttons using just one CAT5 cable. This is done with the clever use of a 4×4 button matrix for a total of 16 buttons. The matrix also includes the LEDs for each buzzer. Since CAT5 has four twisted pairs this works out perfectly.

Looking for a more robust system thank this? Here’s a pretty nice one.

DIY Solution Does PoE On The Cheap

diy-poe

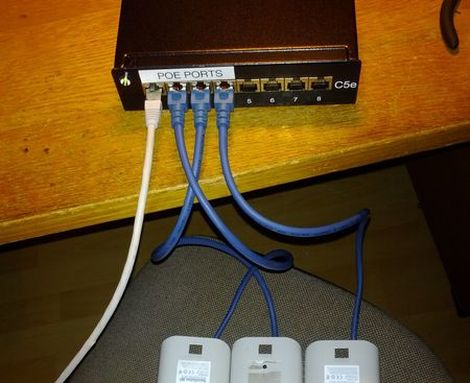
Depending on the scope of your requirements, Power over Ethernet (PoE) components can get pretty pricey. [Fire] wrote in to share a 4-port PoE solution he put together for under 20 euros (Ignore any SSL errors – we’ve checked it out, it’s safe).

The most expensive part of the build was the 8-port patch panel he purchased for 11 euros. He popped it open, wiring the first four ports for power after drilling spots for an indicator LED and the PSU. He wound the power lines through ferrite beads to hoping to dampen any interference that might occur before reassembling the panel.

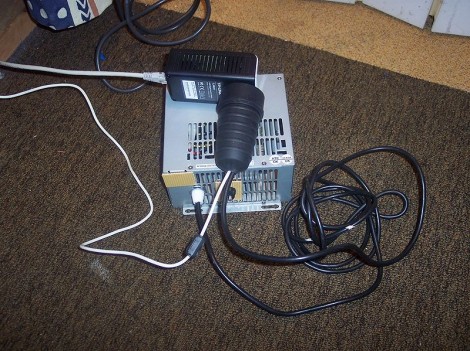
In the picture above, you might notice that the panel is being powered via the first Ethernet port rather than through the barrel jack, which [Fire] said was done for testing purposes. When deployed in his network, he plans on using a regulated power supply from a junked laptop to provide electricity.

If you need to provide PoE to devices on your network, this is a great way to go about it. Using a patch panel like [Fire] has gives you the flexibility to easily wire up as many powered ports as you need without much hassle.

Impromptu Lamp Runs Linux

This LED lamp, which uses a soda cup as a lampshade, is Internet enabled thanks to a Linux board (translated). To say the system is overpowered would be a gross understatement. But at least there’s plenty of room for growth.

The lamp is really just a hardware extension for the Linux board. A half-dozen colored LEDs are driven by an ATmega8 and a few transistors. A Fox LX832 board pushes color instructions to the microcontroller via the i2c protocol. [Gibus] chose this board because it has a built-in Ethernet port which makes it perfect for communicating via a smart phone browser. This is where the majority of the work on the project happened. He coded a Flash application that lets you select color, hue, and saturation data from any device that doesn’t run iOS. These commands are processed by a C application running on the Linux board. See a demo of the web app, and the resulting color changes in the clip after the break.

Continue reading “Impromptu Lamp Runs Linux”

Adding HTTP To Ikea DIODER

[Alex] sent in a neat Ikea DIODER build that controls strings of RGB LEDs with HTTP requests.

We’ve seen Ikea DIODERs controlled wirelessly and over USB, but using the Internet with a DIODER is new to us. For his build, [Alex] used a Nanode, a small Arduino-like board that has built-in web connectivity.

The hardware portion of the build is very simple. A MOSFET controls each LED strip on the DIODER. The stock controller of the DIODER was ditched, meaning [Alex] needed to figure out how to convert an RGB color space to a Hue, Saturation, and Lightness color space “for super-classy fading.” Once that was figured out, [Alex] implemented a 1D Perlin noise function to blend between two colors.

Finally, the great EtherCard library was used to turn HTTP requests into dancing LEDs. [Alex] is thinking about building a JQuery webpage so he won’t have to muck around with entering commands like 192.168.1.25/hsl?i=0&h=135&s=90&l=50 into a browser. Without a nice web interface, it’s not as futuristic as [Alex] would like, but it’s still cool to us.

Web-enabled Coffee Maker Over-complicates Your Break Time

Some think that grinding the beans and filling the coffee maker is part of the coffee-drinking ritual, but [Jamie] isn’t one of them. Instead, he’s been working to make this coffeemaker a web-enabled device. He built it as part of a class project, and has implemented most of what you need to make a cup of Joe automatically.

You can see a small pump attached to the back of the coffee maker. It sucks water from a pitcher (slightly visible to the left of the coffee maker) to fill the reservoir. He experimented with a couple of different water level sensing solutions. His most recent is a PCB with several traces of different length. As those traces are covered by water, a voltage can be read via ADC to establish water level.

He’s using an Arduino and Ethernet shield to add connectivity for the device. The problem is that there aren’t enough ADC pins left on the Arduino to read the water level sensor. Because of this, he added a self-build shield that uses a PIC to do the ADC measurements and push digital data across to the Arduino. A bit complicated, and it doesn’t load the grounds automatically (yet?). But that’s not to say we don’t appreciate complicated coffee hacks.

Ethernet Controlled Garage Door

[Thomas]’ garage door opener is a big old industrial unit, so he doesn’t have the convenience of a remote-controlled garage door opener.  Obviously, this would get annoying after a while, so [Thomas] decided to build an Ethernet enabled relay board so he can open his door with his iPhone.

The build is based around an ATMega328 and a neat little Ethernet controller from Microchip. There are two relays on the board that connect to the Up and Down buttons on the door opener. The board receives UDP packets with instructions like, ‘RELAY 2 ON’ and the door responds accordingly.

Building just one of his boards cost [Thomas] the meager sum of $43. Considering the new Arduino Ethernet board costs around $60, we’re thinking he did a good job here. From the video after the break, we’re seeing that [Thomas] has to hold the button on his iPhone down for the door to go up. We see a few more pins on his AVR, so perhaps v.2 of his board could contain a few headers to attach sensors. Still, it’s a very nice build.

Continue reading “Ethernet Controlled Garage Door”