Computing With The Command Line

Here’s something we thought we would never see: computing with just pipes, /dev/zero, and /dev/null.

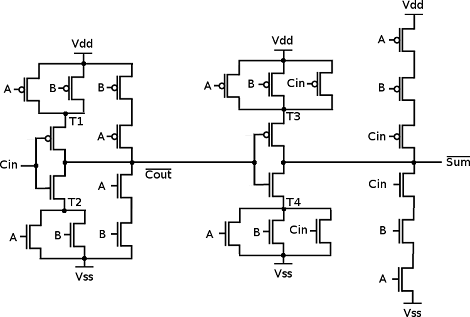
As a thought experiment, [Linus] imagined a null byte represented an electron. /dev/zero would have an infinite supply of electrons and /dev/null would make a wonderful positive power supply. With a very short program (named mosfet.c), [Linus] can use Linux pipes to control the flow of electrons between /zero and /null. [Linus] used mosfet.c with a very short shell script to create a NAND gate. From there all bets were off. He ended up creating a D flip-flop4-bit adder and a counter.

From a bit of cursory research, Linux has a maximum pipe capacity of 1,048,576 bytes and the maximum number of PIDs is 4,194,304 (correct us if we’re wrong). [Linus]  can theoretically build some of the classic CPUs of the 70s and 80s with his pipe logic. An Intel 486 is just out of reach, though. If you give someone a NAND or a NOR they’ll eventually build a computer; we thought we’d never see this, though.

A Talking Reverse Geocache Puzzle Box

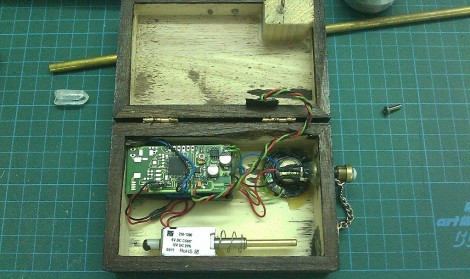
Here’s a talking reverse geocache puzzle box which [Erv Plecter] built as a wedding gift for his friends. The box itself isn’t really the gift, but a surprise delivery system for a collection of cash from the couple’s circle of friends to go toward the honeymoon. We think this is about fifty times more fun that getting a fat envelope of bills. Who would really expect to find cash inside once you finally get to the target location?

Unlike the other geocache box we saw recently, this one has no display to show you clues to the destination. Instead, it plays back audio clips which [Erv] recorded himself. They’re quite tongue-in-cheek which is another nice personal touch. The pin seen protruding out of the right side of the box can be removed to play a clue and check the location. It’s connected by a little chain to a 5 euro-cent piece which conceals an emergency release mechanism for the lid. The device is powered with a Lithium battery and can be recharged without opening the box via a USB port in the side.

We’ve embedded the video demonstration of the box after the break.

Continue reading “A Talking Reverse Geocache Puzzle Box”

Numerous Quiz Buttons Built On The Cheap

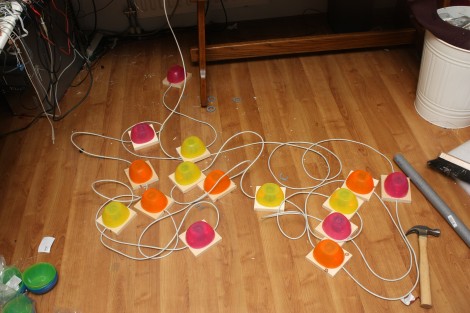
[Sprite_TM] was tapped to build a rather large quiz buzzer system. Judging from his past work we’re not surprised that he seemed to have no trouble fulfilling the request. As the system is not likely to be used again (or rarely if it is) he found a way to finish the project that was both quick and inexpensive.

Each buzzer consists of a base, a button (both mechanical and electrical), and a couple of LEDs to indicate who buzzed in first. The mechanical part of the button uses a plastic bowl from Ikea and a wooden dowel surrounded by some pipe insulation. A momentary push switch is glued on the top of that dowel, and the insulation projects above that just a bit. This way it acts as a spring. The Dowel has been sized so that the bowl lip will hit the wooden base just as it clicks the switch.

As you can see, all of the buzzers are interlinked using Ethernet cable. The real trick here is how to read 14 buttons using just one CAT5 cable. This is done with the clever use of a 4×4 button matrix for a total of 16 buttons. The matrix also includes the LEDs for each buzzer. Since CAT5 has four twisted pairs this works out perfectly.

Looking for a more robust system thank this? Here’s a pretty nice one.

Simple Machining Process Repairs Broken Control Knob

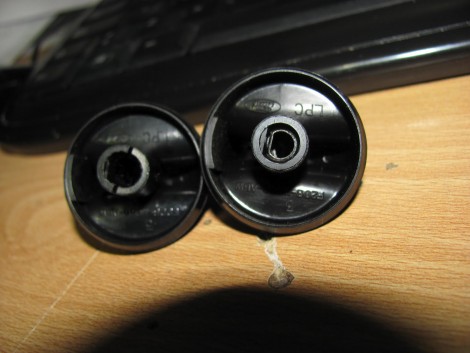
[Francisco] is helping his mother with a repair to the headlight knob on her Ford Ranger. Above you can see the broken knob on the left, and what it is supposed to look like on the right (taken from [Francisco’s] own vehicle for reference). We’ve encountered split shafts on plastic knobs before and decided it was not something that could be fixed. But he didn’t give up so easily. He mentions that you can purchase a replacement for a few bucks, but he has the means to repair the knob by machining a metal bushing.

The idea is that you mill a metal ring whose inner diameter matches what the outer diameter of the plastic shaft should be. By inserting the broken knob in the ring, the plastic is held tightly together as if it had never broken. In the video after the break [Francisco] uses a metal pencil body from his junk box and a mini-lathe to cut the bushing to length, and mill the inner diameter to his specifications.

He talks about the difficulty of getting replacement parts in Chile, where he lives. But we think this kind of thrift is a great example for all hackers. If you’ve got the tools why not use them? And if you don’t have them, here’s a great excuse to procure them!

Continue reading “Simple Machining Process Repairs Broken Control Knob”

FPGA Snake Game Uses No VHDL At All

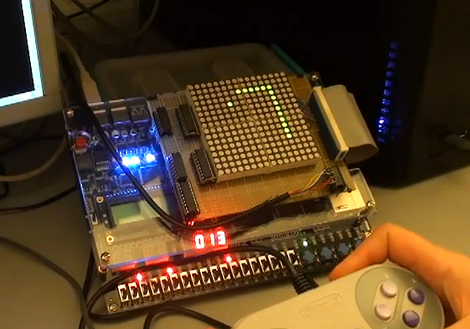
We’re really not supposed to start a feature like this; but this hack is awesome. It’s a game of Snake implemented by an FPGA dev board. It uses a 16×16 LED matrix as the display and an SNES controller for input. So far it sounds like a very normal version of the game. But as you start to hear how it works in the presentation after the break you fall in love with what’s going on here.

First of all, it’s not written in VHDL — the predominant programming language for FPGAs. Instead, [Darrell] used the schematic-only approach to build the logic. Okay, that’s starting to get more interesting. As he continues to explain the circuit we get to see how the control input works (pretty simple since the SNES controller uses a parallel-to-serial shift register) and how the display is multiplexed. But the actual game logic is where things really take off. Each pixel in the display has its own individual logic circuit. Basically every cell is its own processor which reacts both to what is passed into it, as well as to a random seed. That seed system is called the ‘bucket brigade’ and passes a chance to spawn a piece of food from one cell to the next. All of this together makes for one simple game that is eloquently executed. Continue reading “FPGA Snake Game Uses No VHDL At All”

Tubular POV Display

[Ryan]’s cylinder POV display is an amazing piece of work. Right now it’s impressive sitting on his workbench, but we’re sure it would be astonishing hanging above the middle of a dance floor. There are 64 RGB LEDs on this display and they’re certainly bright enough to liven up any space.

Power is provided through a slip ring. The ground is connected to the shaft of the motor [Ryan] picked up at an auto parts store. It’s an efficient way to do things, but the display can only be controlled by whatever image is stored in the ATMega1284’s flash memory. [Ryan] admits this isn’t an ideal setup so he’s working on a ZigBee or Bluetooth connection.

We’ve seen some amazing spinny POV cylinders, but [Ryan]’s build looks amazingly professional. All the board files, schematics and code are uploaded, as well as an image converter for BMPs and PNGs. Check out the demo after the break.
Continue reading “Tubular POV Display”

DIY Ultrasonic Plastic Welding

Here’s something that may be of interest to all the reprappers, vacuum formers, and other plastic fabbers out there: ultrasonic welding of plastics. If you’ve ever wanted to join two pieces of plastic without melting them together with acetone or screwing them together, [circuitguru] is your guy.

Ultrasonic welder setups are usually reserved for companies that don’t mind spending tens of thousands of dollars on a piece equipment. There are smaller versions made for heat staking – melting plastic pillars into rivets on the work piece – and [circuitguru] was lucky enough a somewhat reasonable price.

Because the heat staking gun was a handheld unit, a rotary tool drill press was put to work. The end result is a relatively inexpensive way to join two plastic parts without screws, glue, or solvents. The bond is pretty strong, too. Check out the video after the break to see [circuitguru] join two pieces of a plastic enclosure and try to tear them apart.

Continue reading “DIY Ultrasonic Plastic Welding”