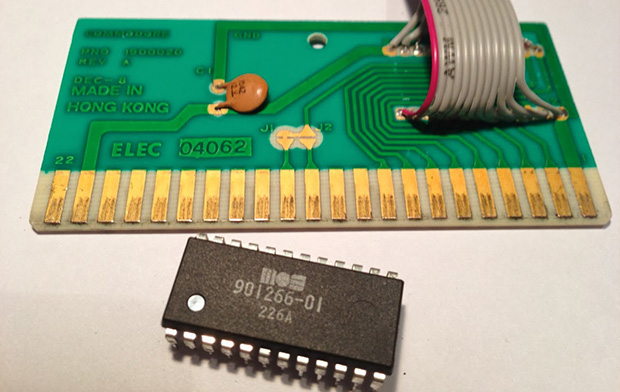
Flash Game Cartridge For The VIC-20

cart

[Petri]’s first computer was the venerable Commodore VIC-20, predecessor to the Commodore 64. With only 5kB of RAM, a very simple graphics chip, and BASIC, it’s a bare-bones system that’s perfect for a 7-year-old future programmer. [Petri] was trying to figure out something to do with this old computer, and realized the simple schematic would allow him to recreate those classic VIC-20 cartridges using modern hardware.

This project began by cracking open a few game cartridges to see what was inside. They’re very simple devices, consisting of a decoupling cap and a ROM chip wired directly to the data and address busses. [Petri] desoldered the ROM and replaced it with a ribbon cable that would give him a clean breadboard to VIC-20 expansion port interface.

Instead of finding a contemporary EEPROM chip to program, [Petri] decided on using a Flash chip. The original cartridge had a 16kB ROM chip, but the smallest parallel Flash chip he could find was 256k. No problem, then; just ignore a few address lines and everything worked out great.

After getting the VIC-20 reading the breadboarded Flash chip, [Petri] started work on a circuit that would program his Flash chip while still attached to the expansion port. With a few buffer chips and an ATMega32a loaded up with Arduino, he’s able to program the Flash chip and turn it over to the VIC-20.

A simple test that toggled the color of the screen as quickly as possible was all that was needed to test the new circuit. Now, [Petri] can finally start on programming some games for his first love.


Continue reading “Flash Game Cartridge For The VIC-20”

Elinchrom EL-Skyport Triggered By Arduino

Screenshot 2013-12-25 08.39.33

[Toby] has an Elinchrom EL-Skyport, which is a wireless flash trigger. He decided to see if he could trigger it using an Arduino, and came up with a nice proof of concept. This little device was not meant to be user serviceable, as can be seen in what [Toby] uncovered while taking it apart. But once he had it disassembled, he cataloged everything inside, and then he awesomely went to the trouble of drawing up a schematic. With that knowledge, he began reverse engineering the SPI protocol used, which almost deserves an article by itself.

It was a long road to get there, but in the end [Toby] built a prototype Arduino shield that houses an nRF24L01+ module. These are very cheap to pick up on eBay. He gives us the details on hooking up the module, though he had to go through extra hoops since he was using the Arduino Leonardo. Still, once you’re up and running, you can make use of one of the existing libraries specifically for this module.

Thanks to his effort, the rest of us have one more device to hack on. Thanks [Toby]!

Continue reading “Elinchrom EL-Skyport Triggered By Arduino”

Repairing Dead USB Flash Drives

Over the last few years, [Tobias] has repaired a number of USB Flash drives. This strikes us as a little odd, given small capacity Flash drives are effectively free in the form of conference handouts and swag, but we’re guessing [Tobias] has had a few too many friends lose their thesis to a broken Flash drive.

In all his repairs, [Tobias] found one thing in common The crystal responsible for communicating with the USB controller is always broken. In a way, this makes a lot of sense; everything else on a Flash drive is silicon encased in an epoxy package, where the crystal is a somewhat fragile piece of quartz. Breaking even a small part of this crystal will drastically change the frequency it resonates at making the USB controller throw a fit.

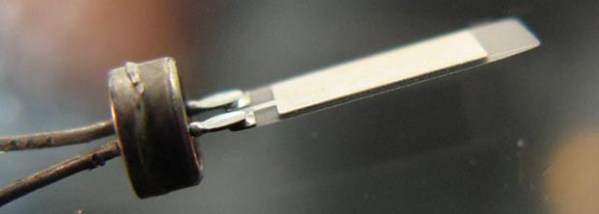
[Tobias]’ solution for all his Flash drive repairs is to desolder and change out the crystal, bringing the drive back to life. Some of the USB Flash drives even have multiple pads for different crystal packages, making it easy to kludge together a solution should you need to repair a Flash drive five minutes ago.

A Much More DYI Air Gap Flash Unit

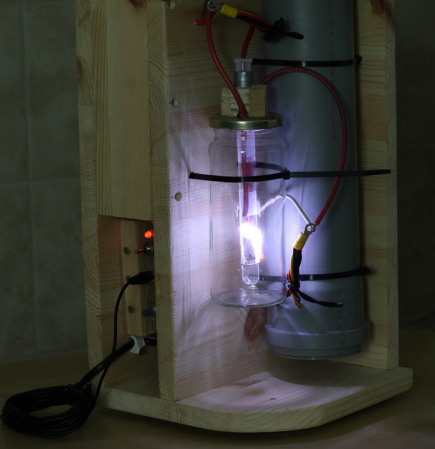
In reaction to the other air gap flash unit we featured a few days ago, [Eirik] sent us a tip about another one he recently made. In his setup, the duration of the flash peak intensity is around 300ns (1/3,333,333 of a second). As a reminder, an air flash unit consists of a circuit charging a high voltage capacitor, a circuit triggering a discharge on demand, a high voltage capacitor and the air flash tube itself. The flash tube contains two wires which are separated just enough to not spark over at max potential. Isolated from the other two, a third wire is placed in the tube. This wire is connected to a trigger/pulse transformer, which will ionize the gap between the two capacitor leads. This causes the gap to breakdown and a spark to form, thereby creating a flash of light.

[Eirik] constructed his flash tube using an olive jar and a glass test tube. As you can see from the (very nice) picture above, the spark travels along the glass test tube, making the quenching much faster than in an open air spark. [Eirik] built his own high voltage capacitor, using seven rolled capacitors of roughly 2nF each made with duct-tape, tin foil and overhead transparencies. For ‘safety’ they are stored in a PP-pipe. A look at the schematics and overall circuit shown on the website reveals how skilled [Eirik] is, making us think that this is more a nice creation than a hack.

Disclaimer: As with the previous airgap flash, high voltages are used here, so don’t do this at home.

Adding A Digital Timer To A Cable Release Camera

slr-cable-release-timer

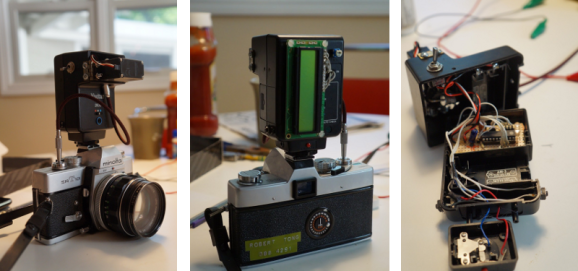
Here’s a completely non-invasive hack for a classic Minolta SLR camera. [Robby] wanted to add to the options available when it comes to remote shutter release. He ended up building a cable release add-on that mounts on the hot shoe.

He drew some of his inspiration from a similar project we saw back in March. He took the engineering example from that project which uses a small servo motor to actuate the cable release. But along the way added his own features.

The system centers around an ATtiny4313 microcontroller. It provides feedback using the character LCD on the back of the auxiliary flash body. That flash body also offers a battery compartment which provides power for the control circuitry as well as the servo motor. Right now it functions as a count-down timer, and also can hold the shutter a specified amount of time. But we could see this extended to work with external sensors to trigger at a set light level, when sensing motion, or from a remote control.

Shocking Operation Makes Sure You Have Skin In The Game

operation-shocks-you

Odds are you played the game of Operation when you were a kid. The classic electronic toy challenges you to use a tethered tweezers to extract plastic pieces without touching the sides of the holes they’re hiding in. This upgrade makes the challenge more interesting for a grown-up audience. If you touch the sides you won’t hear a jarring sound, you’ll get a painful shock!

The modification starts by clipping off the melted plastic portions that hold the paperboard face plate on the game. From there the original electronics are completely removed. We think this a bit of a mistake as we’d still like spectators to hear the sound as the player gets a shock. But we digress. The circuit board from a disposable camera is patched into the game. A wrist band forms an electrical connection with your body, providing a path for the camera’s flash capacitor to discharge if you happen to touch the sides with the tweezers.

This write-up is missing one important thing: video of someone getting shocked. [Psycosisnine] promises to add some soon, but for now you’ll just have to fall back on our absolute favorite Mindflex shock project.

Adapting Modern Cameras To Use Old Flash Units

using-old-time-flash-modules-with-modern-cameras

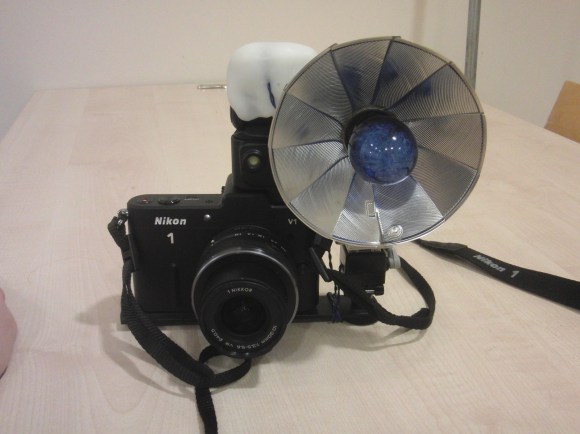
We don’t think this one is going to bring back the days of one-time-use flash bulbs. But for camera enthusiasts who do have old flash units lying around this will be quite interesting. [Sven] worked out a method of interfacing this vintage flash with a modern camera.

The trick is to map the trigger signal from the camera to the flash module. Instead of patching into an electrical signal from the camera he’s using the light from the stock flash. He cut an optocoupler in half, keeping the receiving side of the part. This is molded in plastic that was shaped to surround the original flash unit. When that flash goes off the triac in the remaining half of the IC is activated. This is connected to a hot shoe mounted on an extension arm that is attached to the camera’s tripod mount. The shoe can be used to interface a few different styles of flash modules.

We don’t have an alternative use in mind right now. But chopping an optocoupler in half could come in handy for other applications that use a bright light as a trigger event.

Continue reading “Adapting Modern Cameras To Use Old Flash Units”