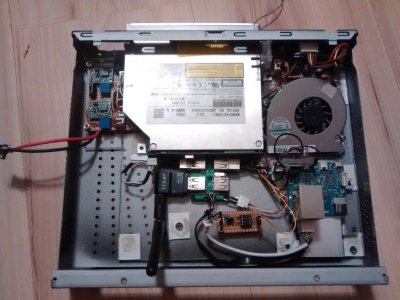
Hacklet 52 – Breakout Board Projects

Starting a design with a new part can be hard. What power supply voltage(s) does it need? Are there any support component requirements? What is the footprint? What about the I/O voltage levels? Breakout boards are designed to answer all those questions for you. Breakouts help when you’re designing with a new part – be it a microcontroller, a sensor, a motor driver, or anything else. They also are a huge help when you’re trying to knock out a quick hack, and just need to get something working quick. Fast to integrate, often breadboard friendly, breakouts just make things easier! This week’s Hacklet is about some of the best breakout board projects on Hackaday.io!
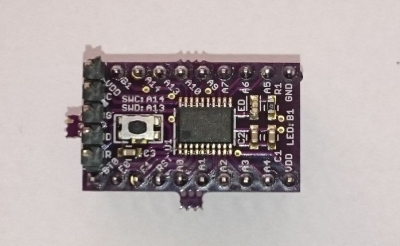
32f4We start with [Christoph] and STM32F030F4P6 breakout board. Inspired by the Teensy 3.0, [Christoph] set out to build a simple, easy to use, and small breakout board for an ARM processor. The STM32F030F4P6 is a great starting point. At only 20 pins, it’s one of the smallest ARM based chips around. He added the basic things needed to bring this chip up: decoupling caps, a reset button, headers for ST’s software debugger, and of course an LED for a blinky hello world program. The resulting board is physically tiny, but this lilliputian ARM board packs Coretex M0 powered punch!
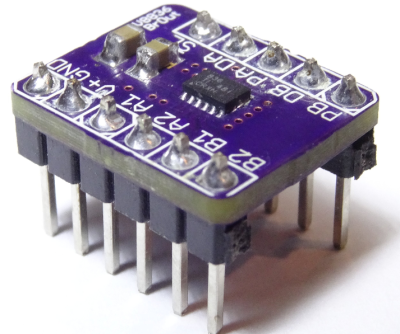
drvNext up is [al1] and DRV8836 Breakout. Sooner or later, everyone wants to drive a motor in one of their projects. It’s a rite of passage, just like blinking an LED. Motors pull a lot of current though, so external transistors or driver chips are almost always necessary. TI’s DRV8836 chip packs two full H-bridges into one package. That’s enough to drive two DC motors or one stepper. Handling 1.5 amps of current per driver in a tiny package means that thermal coupling is important. The DRV8836 has a large thermal pad which has to be soldered to keep the magic smoke in. [al1] dropped the chip, along with the correct thermal footprint and decoupling capacitors onto a simple breakout. The result is easy to use motor drivers for the masses.
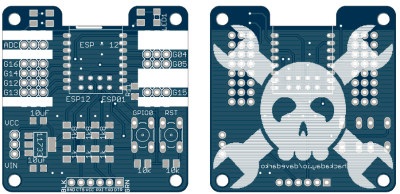
espHackaday.io power user [davedarko] took cues from his favorite designs to create Ignore this ESP8266 board. In [Dave’s] own words, “I stole from every one. The huzza from Adafruit, [Matt’s] breakout board, [Al1s] board, NodeMCUs DevKit.” Hey [Dave] there’s no stealing in open source hardware! There is  only design reuse with attribution, which is exactly what you’re doing. [Dave’s] breakout can use both popular ESP8266 footprints: the ESP-01 and ESP-12. He’s added power, reset/programming buttons, and the all important serial header to talk to the module. Going serial allows dave to keep costs down by not including an expensive serial to USB chip in the BOM. Most of us have FTDI cables (or clones) bouncing hanging around anyway. We definitely like the logo on this one!
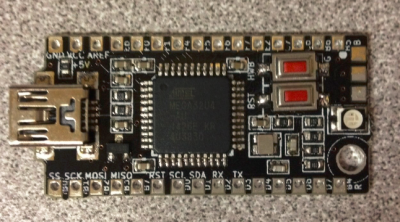
bbbFinally we have [The Big One] with uBBB 32u4. uBBB 32u4 is a bigger brother of µbbb, a Hackaday.io project [Warren] and [The Big One] worked on. µbbb uses an Atmel ATmega32u2 processor. [The Big One] has expanded the faimly to include an ATmega32u4. If you’re wondering, uBBB stands for “Micro Bare Bones Board” At 1.65″ x 0.8″, this is a micro board. It still manages to  include everything you need to get the processor up and running fast. Crystal, buttons, decoupling caps, and LEDs – everything is here. A mini USB connector makes communicating with the ATmega a snap!

If you want to see more breakout boards, check out our new breakout board list! If I’ve forgotten to add you to the list, just drop me a message on Hackaday.io. That’s it for this week’s Hacklet, As always, see you next week. Same hack time, same hack channel, bringing you the best of Hackaday.io!

Hacklet 51 – Crowdfunding Projects

Ah crowdfunding. You might say we have a love/hate relationship with it here at Hackaday. We’ve seen some great projects funded through sites like Kickstarter, IndieGoGo, and the like. We’ve also seen projects where the creators were promising more than they could deliver. While the missed deliveries and outright scams do get a lot of press, we believe that crowdfunding in general is a viable platform for getting a project funded.

Closer to home, Hackaday.io hosts thousands of projects. It’s no surprise that some of these have had crowdfunding campaigns. This week’s Hacklet focuses on those projects which have taken the leap into the crowdfunding arena.

matrixWe start with [Louis Beaudoin] and SmartMatrix. [Louis] has created an awesome Teensy 3.1 based system for displaying images, animated graphics, and random patterns on a 32×32 RGB LED panel. The LED panel is the same type used in commercial LED billboards. SmartMatrix is open source, and includes extra pins for hacking. Our own [Mike Szczys] hacked the SmartMatrix to create a 1-pixel PacMan clone. [Louis’] Kickstarter is almost over, and needs a huge boost for fully-assembled SmartMatrix to make its goal. Even if the campaign isn’t successful, we think its a great project and you can always get a solder-it-yourself kit from The Hackaday Store!

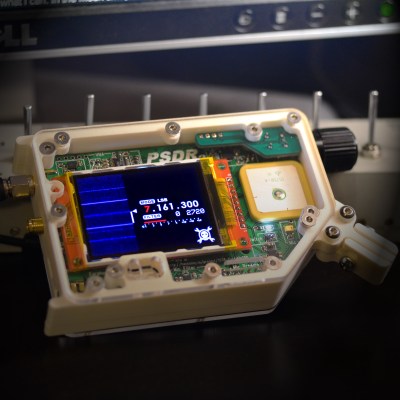
psdrNext up is [Michael R Colton] with PortableSDR. PortableSDR was one of the five finalists in The 2014 Hackaday Prize. This pocket-sized software defined radio transceiver started as a ham radio project: a radio system which would be easy for hams to take with them on backpacking trips. It’s grown into so much more now, with software defined radio reception and transmission, vector network analysis, antenna analysis, GPS, and a host of other features. [Michael] raised a whopping $66,197 in his Kickstarter campaign, and he’s already delivered the hand assembled prototypes to their respective backers! Even the lower level rewards are awesome – [Michael’s] PSDR key chains are actually PCBs which can be turned into maple compatible ARM devboards with just about $10 of additional parts.

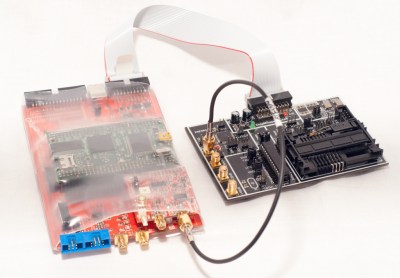
chip whisperNext we have The ChipWhisperer, [Colin Flynn’s] embedded security testing system, which won second place in the 2014 Hackaday Prize. We’ve covered both [Colin] and the ChipWhisperer  several times on the Blog. You can always buy the full ChipWhisperer from [Colin’s] company, NewAE Technology Inc. At $1500 USD, the ChipWhisperer is incredibly affordable for a hardware security tool. That price is still a bit high for the average hacker though. [Colin] created a Kickstarter campaign for a light version of the ChipWhisperer. This version is a great platform for learning hardware security, as well as an instrument for testing embedded systems. The campaign was a huge success, raising $72,079.

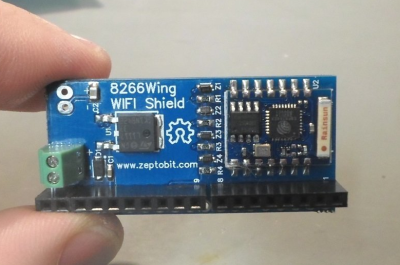
wingboardNot every crowdfunding project has to be a massive megabuck effort though. [ZeptoBit] just wanted to solve a problem, he needed a WiFi shield for Arduino using an ESP8266 module. ESP8266 WiFi modules have been all the rage for months now, but they can be a bit of a pain to wire up to an Arduino Uno. The dual row .100 headers are not bread board friendly. The ESP8266’s 3.3 V power and interface requirements mean that a regulator and level shifters are needed to get the two boards working together. [ZeptoBit] put all that and more on his wingboard. It worked so well that he launched a Kickstarter campaign for a small run of boards – his initial goal was kr3,500, or $425 USD. He ended up raising kr13,705, or $1665 USD. Not bad at all for a hobby project!

If this isn’t enough crowdfunding goodness for you, check out our Crowdfunding list! That’s it for this week’s Hacklet, As always, see you next week. Same hack time, same hack channel, bringing you the best of Hackaday.io!

Hacklet 50 – Hydroponic Projects

Growing plants without soil has been has been amazing people for centuries. First written about in the 1600’s, hydroponics has become an industry with numerous techniques for germinating and sustaining both plant and animal life. It comes as no surprise then that hackers, makers, engineers, and scientists have been working with and improving hydroponic systems for centuries. Hydroponic plant growth is a project you can really sink your teeth into, as there’s nothing sweeter than eating the fruits and vegetables of your labor. This week’s Hacklet is all about the best hydroponic projects on Hackaday.io!

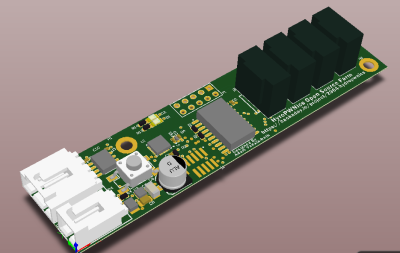
hydropwnWe start with HydroPWNics, [Adam Vadala-Roth’s] entry in The 2015 Hackaday Prize. [Adam] is creating a universal system with will work with both hydroponic and soil based grow systems. The hydroponic setup will consist of plants in a PVC gutter system. Water will be pumped to the top gutter, and flow down via gravity through the plant roots and back to the reservoir. The system will be monitored and controlled by a DyIO controller. Props to [mad.hephaestus] for creating DyIO, a project seeing reuse in the Hackaday.io community!


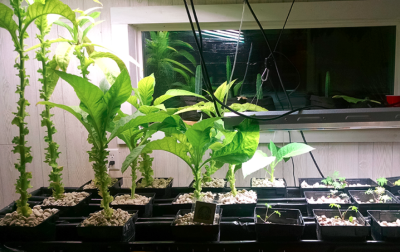
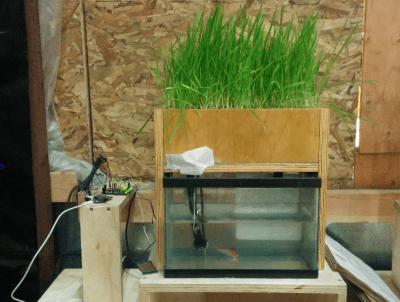
hydro2Next up is [Justin] with AAGriculture, an Automated Aquaponic Garden. AAGriculture is aquaponic system, which means it uses a symbiotic relationship between plants and fish to make more food for humans to eat. The fish in this case are bluegill and bullhead. A Raspberry Pi controls the system, while A Teensy-LC is used to help out with some of the real-time duties, like monitoring a PH probe. [Justin] is even using CO2 tanks to keep dissolved gasses in check. He must be doing something right, as his tomatoes are now over 23″ tall!


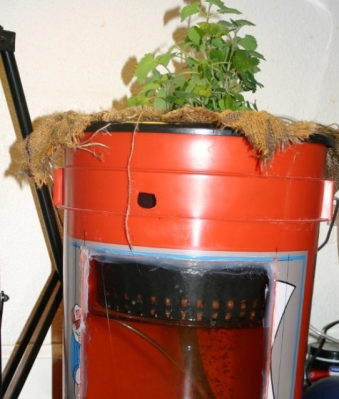
homer[Em] brings us 5g Aquaponics. 5g aquaponics isn’t a next generation cellular system, nor a 5.8 GHz WiFi setup, it’s an aquaponic system in a 5 Gallon bucket. Anyone from the US  will recognize the orange “Homer Bucket” from Home Depot. 5g Aquaponics includes a window, allowing the underwater workings to be monitored. Speaking of monitoring, 5g aquaponics is a manual affair – [Em] hasn’t used any electronics here. The idea is to create a system that is easy to get up and running for those who are new to Hydro/Aquaponic setups. [Em] is using a dual zone root system. The plant grows in dirt within a burlap fabric. The fabric then sits in a water bath which also houses the fish. Air pumped through an airstone keeps everything circulating. [Em’s] initial version of the project worked a bit too well. The tomato plant grew so large that the roots strangled the fish! Hopefully both flora and fauna are happy with this new rev 2.0!


smartAquaFinally we have [Kijani grows] with Smart Aquaponics, which was [Kijani’s] entry in The 2014 Hackaday Prize. One wouldn’t expect fish, plants and Linux to mix, but that is exactly what is going on here. Linux runs on the popular Wr703n router, while a custom ATmega328 Arduino compatible board keeps track of the sensors.  The second version of the system will run on an ATmega2560 and an AR9331 module, all housed on one board. The system does work, and it’s been expanded from a single fish tank to a large flood/drain table complete with grow lights, all kept at [Kijani’s] office. The biggest problems [Kijani] has run into are little things like misplaced resistors masquerading as kernel bugs.

Still haven’t eaten your veggies? Want to see more hydroponic projects? Check out our new hydroponic projects list! That’s it for this week’s Hacklet, As always, see you next week. Same hack time, same hack channel, bringing you the best of Hackaday.io!
Hacklet 49 – Weather Display Projects

Everyone wants to know what the weather is, and what it is going to be. Today’s internet enabled forecasts give us continuous streams of current weather data and predictions from any of several computer models. Couple that with data from an on-site station, and you’ve got a lot of information to display! It makes sense that weather display projects would be popular with hackers, makers and engineers. What do you do after you build the worlds most awesome clock? Build the worlds most awesome weather display (and then incorporate a clock in there as well!).

Last week on The Hacklet I mentioned that there are two basic types  of weather projects on Hackaday.io: Sensing and Display projects. There was a bit of foreshadowing there, as this week’s Hacklet covers some of the best weather display projects on Hackaday.io!

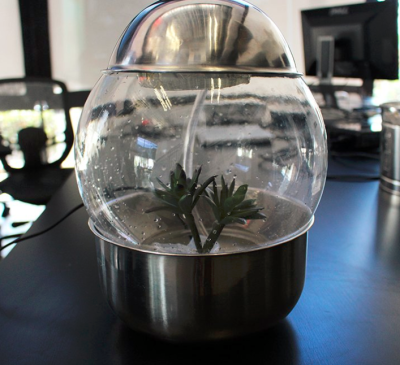
geoWe start with [Ashley Hennefer] and G.E.O, a project which is out of this world – literally. Geological Environment Observer, or G.E.O was created for NASA’s Space Apps Challenge. G.E.O’s mission is to keep astronauts on long-distance space flight missions connected with their home city (and planet). An astronaut programs the device with their home city and G.E.O takes it from there. Inside a glass globe, G.E.O creates weather patterns mirroring the programmed city. It does this with Adafruit NeoPixel LEDs, a water pump, a mist generator, and a wave shield. An Intel Edison controls the system. For now, weather data and programming are completed using a web interface. Once G.E.O launches though, data will be streamed via NASA’s deep space network.

flaps[Sephen DeVos] keeps track of the weather with a glance at his Internet Split Flap Weather Clock. Lots of weather apps use simple icons to display the current conditions. [Sephen] placed those icons on a mechanical split flap display which lets him know the conditions outside. The project’s case came from a donor clock given to [Sephen] by his parents. He then 3D printed an entire split flap mechanism, including the gears! Each 50 mm x 100 mm flap forms half an image.  A small stepper drives the flaps, while an IR detector lets the system know when it has reached a home position. Control is handled by an Arduino Nano and companion Ethernet shield. The Arduino checks the weather every 30 minutes. If conditions have changed, it flips to the right icon. Genius!

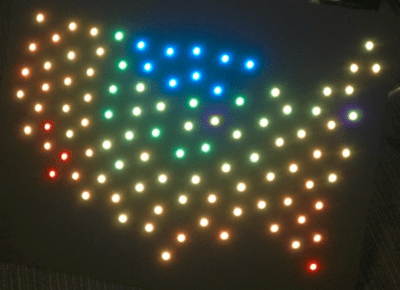
usmap[Dan Fein] is keeping track of the temperature across the entire USA with Weather Map. [Dan] works for Weather Underground, so it’s no surprise that he uses their API (accessed via a node.js script) for weather data. The data is fed into a spark core which then drives a string of 100 WS2812 LEDs. Each LED is mapped to a specific point in the continental USA. Color indicates the current temperature at that location. [Dan] does caution that you’ll have to slow down access to Weather Underground  if you’re using a free API key. Even with slower updates, this is still an awesome project!

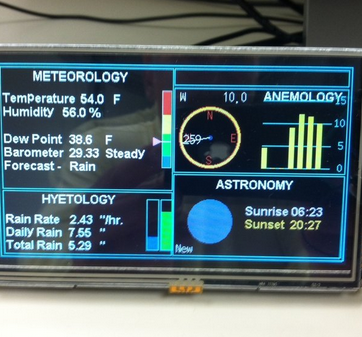
yaws[Jeff Thomas] went the traditional route with YAWS – (Yet Another Weather Station). YAWS uses a 5 inch TFT LCD to display weather data from a number of sensors. [Jeff] got his display and the driver board from buydisplay.com. The driver board uses the venerable RA8875 display driver chip. The RA8875 handles all the hard parts of driving an LCD, like video RAM, refresh, and clocks. This allows a relatively slow Arduino to drive all those pixels. [Jeff] created a very handsome interface to display all his data, but he has a small problem – a memory leak causes the system to freeze up every 18 hours! We’re hoping [Jeff] will share his source code so the Hackaday.io community can help him find that pesky bug!

If you want to see more projects like these, check the Weather Display Projects list on Hackaday.io. That’s it for this week’s Hacklet, As always, see you next week. Same hack time, same hack channel, bringing you the best of Hackaday.io!

Hacklet 48 – Weather Sensing Projects

Throughout history, mankind has been at the mercy of the weather. Planning a major outdoor event like a wedding or a naval battle? Better hope for clear skies! Man doesn’t have the ability to change mother nature at will quite yet, but hackers are working on it! Until then, we can measure  the current conditions and predict the weather in the near future. A bit of help from cloud based computer models and global sensing even allows us to model and predict weather patterns days in advance. It’s no surprise that makers, engineers, and hackers love weather projects. We’ve found there are two basic project groups (with a some overlap between them): Sensing projects and display projects. This week’s hacklet focuses on some of the best weather sensing projects on Hackaday.io!

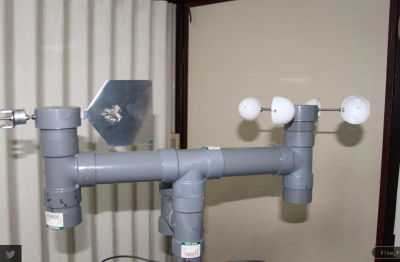
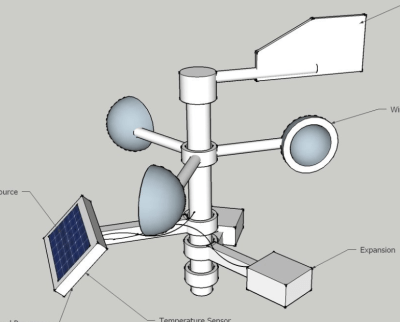
aneWe start with [diysciborg] and Modular Weather Station. This 2014 Hackaday Prize entrant is a DIY outdoor weather station. [diysciborg] went with easily available PVC pipe and sheet metal for most of his mechanical build. His anemometer alone is a work of art. Mounting 8 magnetic reed switches in slots cut in a PCB allows for a thin device which can easily sense the speed of the wind. Other sensors include a TLS230R light to frequency converter for sunlight measurement, CO, wind direction, and more. An Arduino Pro Mini is at the center of it all.

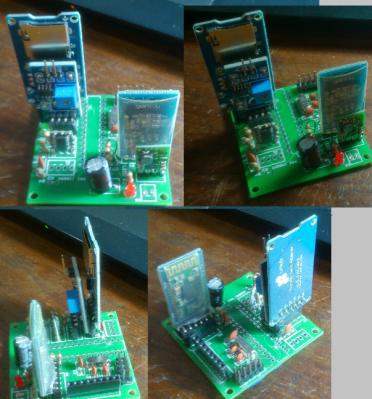
facil[Clovis Fritzen] is saving the planet from global warming with his project FacilTempo. FacilTempo is a weather station, and an entry in the 2015 Hackaday Prize. The idea is to make a simple and low-cost setup which can be built in bulk and placed anywhere on the Earth. [Clovis] plans to measure temperature, humidity, atmospheric pressure, sunlight, and rain. He also hopes to add a Sparkfun sensor to monitor wind speed and direction. All the data will be transmitted via a radio link. [Clovis] is adding the ability for FacilTemp to communicate via 433 MHz, WiFi, or Bluetooth. The entire sensor suite and its on-board ATmega328 will be powered by a LiPo battery. The battery will be charged by solar or wind power, depending upon what is available on site. With 8 project logs already in the can, FacilTempo is well on its way to beating back global warming!

lcw[Ulf Winberg] is building the Low Cost Weather Station, his entry in the 2015 Hackaday Prize. Low Cost Weather Station aims to be a $50 sensor suite for local weather conditions. [Ulf] plans to power the entire device using wind and solar energy. He’s hoping to avoid batteries by storing his power in a supercapacitor. Power calculations have been taking up quite a bit of his design time so far. The $50 bill of materials limit is one that [Ulf] is serious about. He’s keeping careful eye on his component selections to keep that goal attainable. The system will transmit wind speed, wind direction, sun, and other data through a Laird BL600 Bluetooth low energy transceiver.

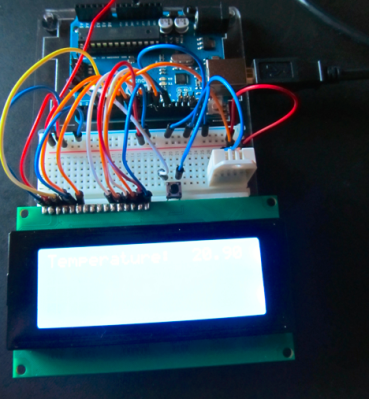
zetaFinally we have [Greg Miller] taking it back to basics with Weather Station Zeta. Zeta is [Greg’s] first big project. He’s only just recently learned to solder, but he’s already squeezing a lot of performance out of a little Arduino. The idea is to create a two station system. The outdoor station will monitor the weather, including temperature, humidity, and barometric pressure. Data will be transmitted to an indoor station with a similar set of sensors. The indoor station will also include a 20 line x 4 column character LCD to display the data.  [Greg] has the indoor section of the system just about done, and he’s working on learning the ins and outs of XBee data radios. He’s also going to include an Adafriut CC3000 breakout board to Web enable the weather station. We love seeing ambitious early projects like this one!

If you want to see more projects like these, check the Weather Sensing Projects list on Hackaday.io. 

That’s it for this week’s Hacklet, As always, see you next week. Same hack time, same hack channel, bringing you the best of Hackaday.io!

Hacklet 47 – Thermal Imaging Projects

Thermal imaging is the science of converting the heat signature of objects to an image visible to humans. Everything above absolute 0 gives off some heat, and thermal imagers allow us to see that – even if there is no visible light in the room. Historically, thermal imaging systems have been large and expensive. Early systems required liquid nitrogen cooling for their bolometer sensors. Recent electronic advances have brought the price of a thermal image system from the stratosphere into the sub $300 range – right about where makers and hackers can jump in. That’s exactly what’s happened with the Flir Lepton module and the Seek Thermal camera. This week’s Hacklet is all about thermal imaging projects on Hackaday.io!

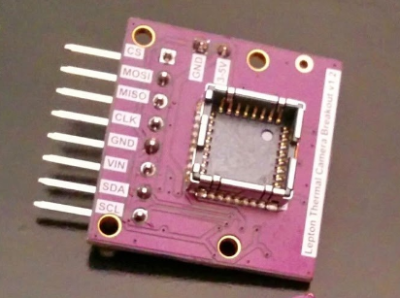
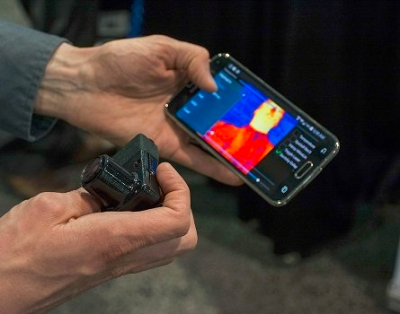
We start with [Pure Engineering] and Flir Lepton Thermal Camera Breakout. Flir’s Lepton thermal camera created quite a stir last year when it debuted in the Flir One thermal iPhone camera. The Lepton module used in the Flir One is a great standalone unit. Interfacing only requires an I2C interface for setup and an SPI interface for image data transfer. Actually using the Lepton is a bit more of a challenge, mainly because of its packaging. [Pure Engineering] made a simple breakout board which makes using the Lepton easy. It’s also breadboard compatible – which is a huge plus in the early phases of any project.


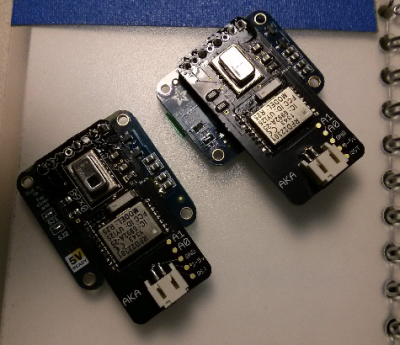
grideyeNext up is [AKA] with GRID-EYE BLE-capable thermal camera. This project is a Bluetooth low energy (BLE) thermal camera using Panasonic’s Grid-EYE 64 pixel thermal sensor. 64 pixels may not sound like much, but an 8×8 grid is enough data to see quite a bit of temperature variation. If you don’t believe it, check the project page for a video of [AKA] using Grid-EYE’s on-board OLED display. Grid-EYE was a Hackaday Prize 2014 semifinalist, and we featured a bio on [AKA] last year. The only hard part with building your own Grid-EYE is getting the sensor itself. Panasonic doesn’t sell them to just anyone, so you might have to jump through a few hoops to get your own.


pylepton[Kurt Kiefer] brought the FLIR Lepton to the Raspberry Pi with pylepton video overlay. This project uses the Lepton to overlay thermal data with images captured by the Raspbery Pi camera module. The Lepton interfaces through the I2C and SPI ports on the Pi’s GPIO pins. The results are some ghostly images of black and white thermal views over color camera images – perfect for your next ghost hunting expedition!  The entire project is implemented in Python, so it’s easy to import and use pylepton in your own projects. [Kurt] even gives an example of capturing an image with just 5 lines of code. Nice work, [Kurt]!


wificamFinally we have [Erik Beall] with WiFi Thermal Camera. [Eric] is using an 82×62 diode array to create thermal images. Unlike microbolometer sensors, diode/thermopile sensors don’t need constant calibration. They also are sturdier than Microelectricomechanical System (MEMS) based devices. This particular project users an array from Heimann Sensor. As the name implies, the sensor is paired with a WiFi radio, which makes using it to capture and display data easy. [Erik] must be doing something right, as WiFi Thermal Camera just finished a very successful Kickstarter, raising $143,126 on a $40,000 initial goal.

Are you inspired? A thermal imager can be used to detect heat loss in buildings, or heat generated by electrical faults – which means it would be a great project for the 2015 Hackaday Prize! If you want to see more thermal imaging projects, check out the thermal imaging projects list!

That’s it for this week’s Hacklet, As always, see you next week. Same hack time, same hack channel, bringing you the best of Hackaday.io!

Hacklet 46 – ODROID Projects

It seems you can’t mention the Raspberry Pi these days without someone bringing up the Odroid. Named after the combination of Open and Android, the current Odroid brand covers several boards – the U3, the UX3 with its 2 Ghz Samsung quad-core processor, and the C1, which is directly aimed at our favorite fruit pie computer. With all this popularity, one would expect a few awesome projects based around the Odroid machines, and you’d be right! This week’s Hacklet is all about projects using the Odroid on Hackaday.io!

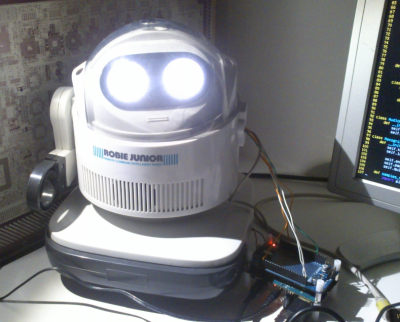
Robbie jrWe start with [herrkami] and CRONUS. Cronus started life as a Robbie Junior, Radio Shack’s re-branded version of Takara Tomy’s Omnibot Jr.  [herrkami] has upgraded Cronus’ brain with an Odroid U3. Cronus can now reliably respond to voice commands thanks to a little help from Google’s speech recognition engine and the accompanying Python API. Cronus is rather conversational as well, all due to the AIML framework. [herrkami] hopes to cut the cord (or WiFi link) once he gets CMU sphinx up and running. Some of [herrkami’s] best work is in his cardboard templates to create a mechanism for turning Cronus’ head. These are some pretty sweet updates for a 1986 vintage robot!


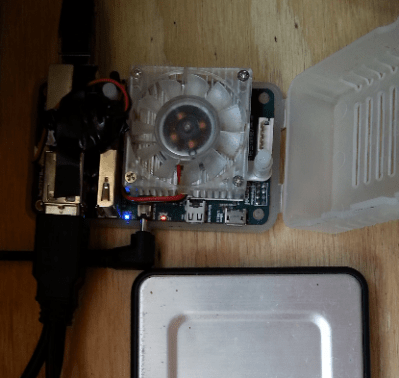
serverNext up is [tlankford01] with Linux Tutorial: Odroid U3 Server w/ Seafile Cloud. [tlankford01] walks us through setting up a file server using the Odroid, a 16 Gigabyte EMMC card, and a hard drive to hold the files. As one might expect, this tutorial covers a LAMP (Linux, Apache, MySQL, PHP) server stack. The 9 project logs take us from a bare microSD card to a full server. The Odroid’s 2 Gigabytes of ram are put to good use running the open source Seafile cloud server package. Tutorials like this deserve lots of love from the Hackaday.io community. Sometimes you just need to get a solid file server up and running. When that happens, this type of project is often just what the doctor ordered! So don’t be a lurker, head over to [tlankford01]’s page and give him a skull!


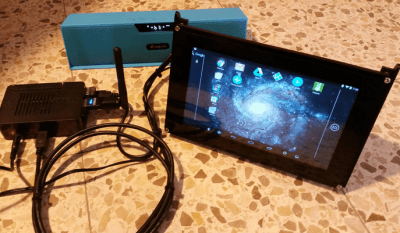
touch[Victor] gets us one step closer to an Odroid tablet with the HDMI touchscreen. HDMI touchscreen is a project to connect a 7″ 1024 x 600 LCD with a capacitive touchscreen to HDMI based computers. The heart of the project is Texas Instrument’s TFP401 panelbus DVI receiver chip. This chip makes interfacing LCD screens to HDMI or DVI video cards (almost) painless. There still is a bit of X configuration to do to get things running. [Victor] even got his Odroid running in Android with his custom screen setup. Those of us who have spent time in display an input configuration file limbo know that this is no small feat!

htpcFinally we have [darth_llamah] with Odroid-U3 HTPC. [Darth] raided his junkbox and parts drawers to build a solid home theater PC using the Odroid-U2. The U2 is a bit older than the current U3 models, but all [Darth’s] work should apply to any of the Odroid series. An old Itona case provided the frame for this hack, but it took a lot of custom work with plastic and epoxy to make everything fit. [Darth’s] software stack is the popular OpenELEC Linux build. [Darth] even setup a real “soft” power button using an ATtiny85 connected to USB and s Adafruit’s TrinketHidCombo library.

If you want to see all the Odroid projects in one place, check out our new Odroid projects list!

That’s it for this Hacklet, As always, see you next week. Same hack time, same hack channel, bringing you the best of Hackaday.io!