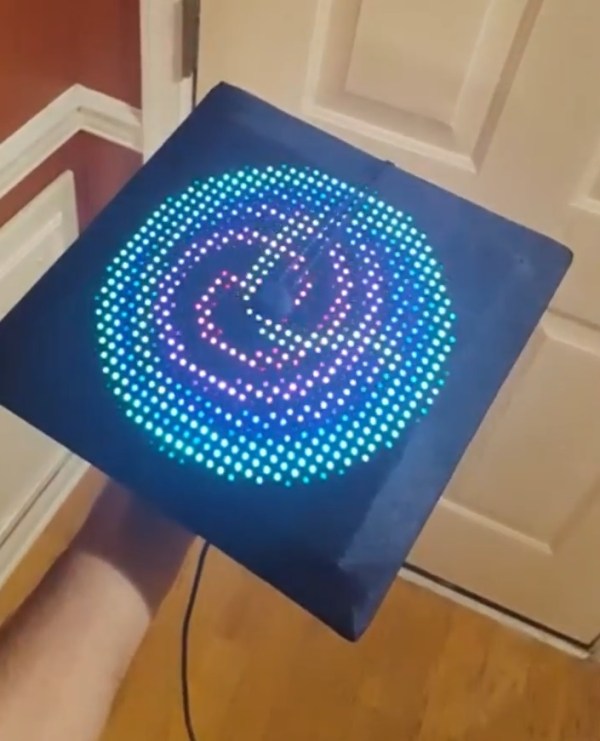
A high school graduation ceremony is well due the pomp and circumstance for making it through one of life’s many milestones. To commemorate the event with their own flair, redditor [PM_(cough)_FOR_KITTENS] hid a 32 x 32 GIF-playing LED matrix in their graduation cap!
The board is controlled by a Teensy hosting a SmartMatrix shield. With the shield’s assistance, the matrix enables scrolling text and GIFs to play across the LEDs, as well as an SD card slot to load up your favourites. Currently, it’s set to a 50-50 chance of playing a gif — one of sixty — or one of the twenty scrolling text lines loaded onto the SD card. [PM_(ahem)_FOR_KITTENS] co-opted his friend’s expertise to write the code — available here — while he designed the circuit and handled the assembly.
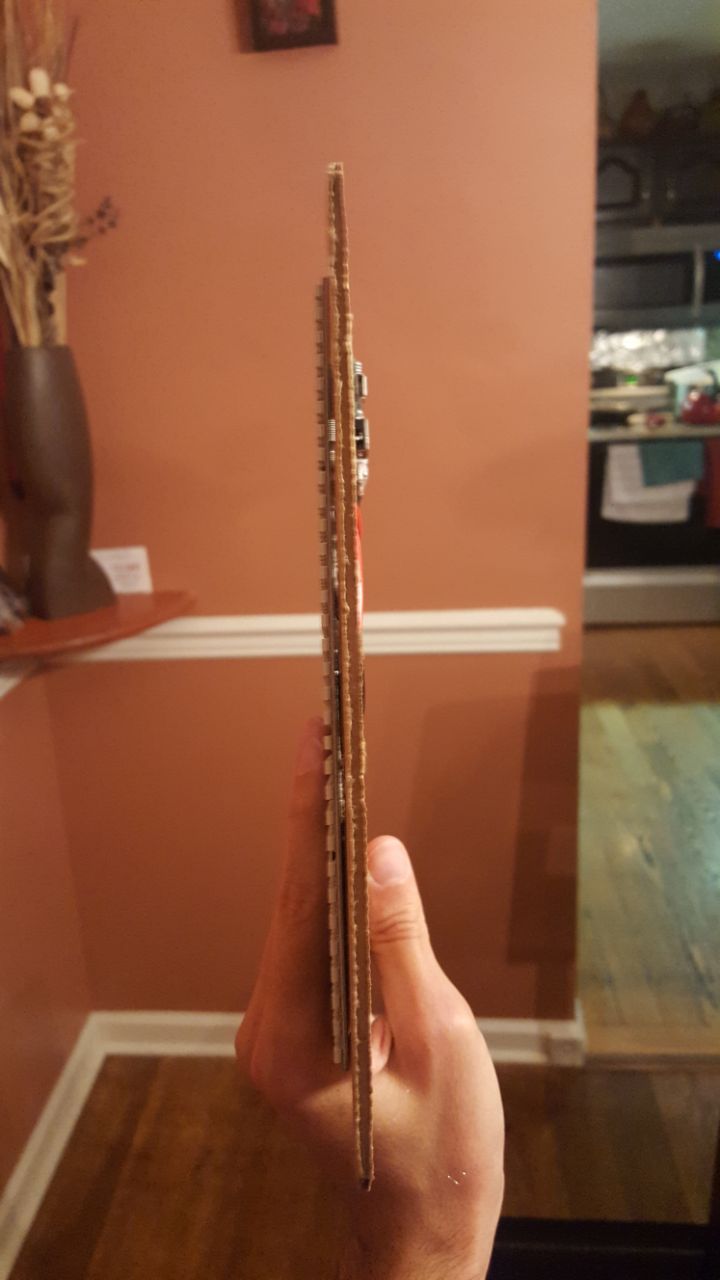
Carefully unwrapping his cap, [PM_(yep)_FOR_KITTENS] reinforced it with thinner and stronger cardboard, cutting slots into it, allowing the boards and wires to — barely — fit inside. A hole in the side of the cap is enough for a barely noticeable USB cable to run down his neck to a 2000 mAh battery which can power the cap for over five hours at 5V and 2A. Check out a demo video after the break!
Ah crowdfunding. You might say we have a love/hate relationship with it here at Hackaday. We’ve seen some great projects funded through sites like Kickstarter, IndieGoGo, and the like. We’ve also seen projects where the creators were promising more than they could deliver. While the missed deliveries and outright scams do get a lot of press, we believe that crowdfunding in general is a viable platform for getting a project funded.
Closer to home, Hackaday.io hosts thousands of projects. It’s no surprise that some of these have had crowdfunding campaigns. This week’s Hacklet focuses on those projects which have taken the leap into the crowdfunding arena.
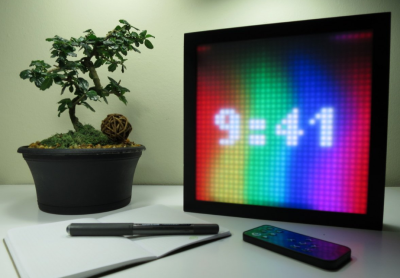
We start with [Louis Beaudoin] and SmartMatrix. [Louis] has created an awesome Teensy 3.1 based system for displaying images, animated graphics, and random patterns on a 32×32 RGB LED panel. The LED panel is the same type used in commercial LED billboards. SmartMatrix is open source, and includes extra pins for hacking. Our own [Mike Szczys] hacked the SmartMatrix to create a 1-pixel PacMan clone. [Louis’] Kickstarter is almost over, and needs a huge boost for fully-assembled SmartMatrix to make its goal. Even if the campaign isn’t successful, we think its a great project and you can always get a solder-it-yourself kit from The Hackaday Store!
Next up is [Michael R Colton] with PortableSDR. PortableSDR was one of the five finalists in The 2014 Hackaday Prize. This pocket-sized software defined radio transceiver started as a ham radio project: a radio system which would be easy for hams to take with them on backpacking trips. It’s grown into so much more now, with software defined radio reception and transmission, vector network analysis, antenna analysis, GPS, and a host of other features. [Michael] raised a whopping $66,197 in his Kickstarter campaign, and he’s already delivered the hand assembled prototypes to their respective backers! Even the lower level rewards are awesome – [Michael’s] PSDR key chains are actually PCBs which can be turned into maple compatible ARM devboards with just about $10 of additional parts.
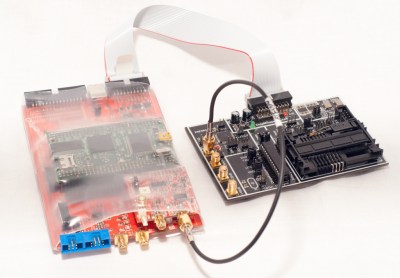
Next we have The ChipWhisperer, [Colin Flynn’s] embedded security testing system, which won second place in the 2014 Hackaday Prize. We’ve covered both [Colin] and the ChipWhisperer several times on the Blog. You can always buy the full ChipWhisperer from [Colin’s] company, NewAE Technology Inc. At $1500 USD, the ChipWhisperer is incredibly affordable for a hardware security tool. That price is still a bit high for the average hacker though. [Colin] created a Kickstarter campaign for a light version of the ChipWhisperer. This version is a great platform for learning hardware security, as well as an instrument for testing embedded systems. The campaign was a huge success, raising $72,079.
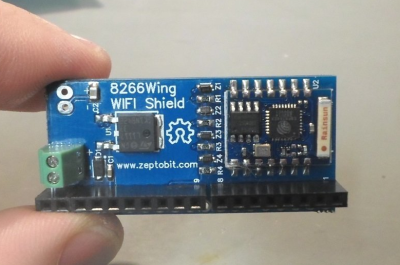
Not every crowdfunding project has to be a massive megabuck effort though. [ZeptoBit] just wanted to solve a problem, he needed a WiFi shield for Arduino using an ESP8266 module. ESP8266 WiFi modules have been all the rage for months now, but they can be a bit of a pain to wire up to an Arduino Uno. The dual row .100 headers are not bread board friendly. The ESP8266’s 3.3 V power and interface requirements mean that a regulator and level shifters are needed to get the two boards working together. [ZeptoBit] put all that and more on his wingboard. It worked so well that he launched a Kickstarter campaign for a small run of boards – his initial goal was kr3,500, or $425 USD. He ended up raising kr13,705, or $1665 USD. Not bad at all for a hobby project!
If this isn’t enough crowdfunding goodness for you, check out our Crowdfunding list! That’s it for this week’s Hacklet, As always, see you next week. Same hack time, same hack channel, bringing you the best of Hackaday.io!
I usually see retro-gaming projects using tiny screens with a fair number of pixels (64×64) but what I really like is the look of making every pixel count. With this in mind I built 1-Pixel Pac-Man, the classic coin-op experience but with characters that consist of just one pixel. Playing a throw-back like this wouldn’t be the same without some vintage controls so I picked up an Atari joystick, patched it into a microcontroller, and started coding. Check it out:
Smartmatrix Bundle
32×32 RGB panel with acrylic diffuser
Back of the Smartmatrix
This piece of hardware made the project build really easy: the Smartmatrix. [Louis Beaudioin] developed the Smartmatrix and it’s been in the Hackaday Store for a while now. The display module itself is a commodity item that is used in LED billboards. There are shrouded headers on the back of the panels, to the left and right sides, which allow them to be daisy chained. The Smartmatrix PCB plugs into one of these shields, provides a soldering footprint for the Teensy 3.1 which drives the display, and gives you the wiring to connect screw terminals from the PCB to the power terminals on the module. Why the need for beefy power jumpers? At full white the thing can draw about 3.5A — don’t worry there’s a power supply included in the bundle.
Also integral to making this look good is the diffuser panel which is frosted acrylic. The Smartmatrix is designed to be housed in a shadowbox frame; it even includes a frame backer board with a cut-out for the Teensy 3.1 so it can be programmed without opening the thing up. I like looking at the guts so I’m leaving my free floating until I come up with an interesting way to mount everything as one unit.
Programming Pac-Man from the Ground Up
If you haven’t looked into it before, the ghost AI and gameplay details for Pac-Man are absolutely brilliant. [Toru Iwatani] did a masterful job with the original, and you should take a look at all of the analysis that has been done over the years. The best collection I could find was the Pac-Man Dossier and I based most of my code on the rules described there.
Basically the ghosts have two modes, chase and scatter. The modes set the enemy targets differently; to points at the four corners of the board in scatter, and to points relative to the player in chase. The relative part is key; only the red enemy actually chases you. Another one of them looks at the red enemy’s distance and angle, and targets the reflection of that vector. Really easy, really clever, and results in enemy behavior that’s believable. It isn’t just the enemy movement, little touches like a speed penalty (1/60 of a second) for each dot the player gobbles up means the enemies can catch up if you continuously eat, but you can escape by taking the path already-eaten.
Library, DMA, and Extra Hardware
Teensy 3.1
DB9 Connector for Joystick
Extras in the Bundle
Kickstarter remote and RTC Module
The hardware and software running the Smartmatrix made the display portions of the project really simple. First off, the Teensy 3.1 is fast, running at 96MHz in this case. Second, it has Direct Memory Access (DMA) which [Louis] used in the Smartmatrix library. This means that driving the display takes almost no CPU time at all, leaving the rest for your own use. This example of a game is under-utilizing this power… it’s totally capable of full-motion video and calculating amazing visualizations on the fly.
The PCB hosting the Teensy 3.1 breaks out several pins to one side. I’m not sure what I’ll add in the future so I actually used the extra surface-mount IO pins on the bottom of the Teensy to connect the Atari joystick (which is simply a set of switches). The are enough pads for two joysticks so I used pin sockets to interface the Teensy to the PCB so that I can get to it again later.
The kit also includes an IR receiver and remote, and also a microSD card to loading animations (there’s an SD socket on the PCB). The bundle in the Hackaday Store is a kit you solder yourself, but [Louis’] company, Pixelmatix, has a Kickstarter running for fully-assembled versions that come with a black remote and sound-visualization hardware.
Future Improvements
The game is fully working, but there are a few key things that I really want to add. The Teensy 3.1 has a single DAC pin available. I’m fairly certain the original coin-op game had mono audio. It should be possible to reproduce the sound quite accurately with this board. That would really make the project pop.
There are also a bunch of touch-ups that need to happen. I’d like to add an animation when the player is eaten by an enemy, and a countdown before the level restarts. The score, shown in binary on the right column, should be scrolled out in decimal when the game ends, and what’s a coin-op recreation without a high-score screen?

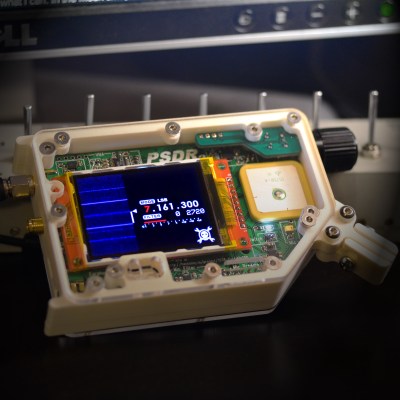 Next up is [Michael R Colton] with PortableSDR. PortableSDR was one of the five finalists in The 2014 Hackaday Prize. This pocket-sized software defined radio transceiver started as a ham radio project: a radio system which would be easy for hams to take with them on backpacking trips. It’s grown into so much more now, with software defined radio reception and transmission, vector network analysis, antenna analysis, GPS, and a host of other features. [Michael] raised a whopping $66,197 in his