Incubating Resin Prints Through The Chilly Months

FormLabs resins operate best between the comfortable temperature range of 18 – 28°C (64 – 82°F). For many of us experiencing the chillier weather these days, our garage workshops can easily drop below those temperatures and cause our prints to fail. Rather than hunker down for the freeze and wait for the world outside to defrost, [MarkStrohbehn] has discovered a budget heating technique that heats the print chamber from the inside instead.

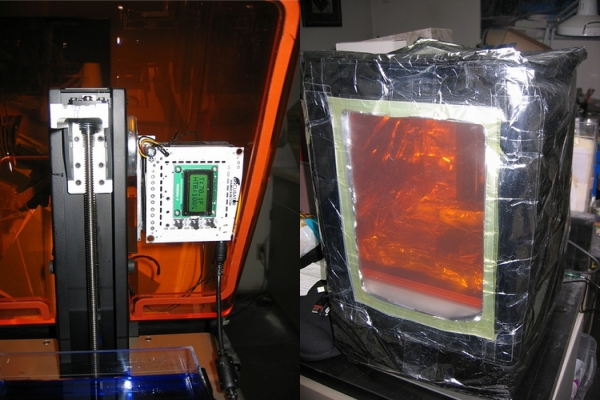
This trick comes in two parts. First, to bring the temperature up, [Mark] installed an egg incubator inside the chamber using a powerful magnet attached to the fixture containing the lead screw. Next, to maintain the warm temperature, he’s taped together an insulating jacket composed of several layers of off-the-shelf mylar emergency blankets. Finally, he’s managed to slip the egg incubator power cable cleanly under the FormLabs lid without triggering the open-lid sensor. This hack is staggeringly simple but effective at reducing the odds of failed prints through the cold weather. Best of all, the modifications are far less invasive than other upgrades made to 3D printers, as it requires no modification of the Form1+. For those of us who haven’t seen the sun in a few months, rest assured that you can still churn out parts.

Using Vacuum Tubes As Immersion Heaters

Fellow Hackaday writer [Ethan Zonca] was doing a little bit of woodworking recently and decided to test ammonia fuming on a small piece of oak. Yes, this means discoloring wood with ammonia vapor, and it’s a real technique. [Ethan] wanted to increase the rate of evaporation of his ammonia solution and decided to make an immersion heater. Out of a vacuum tube.

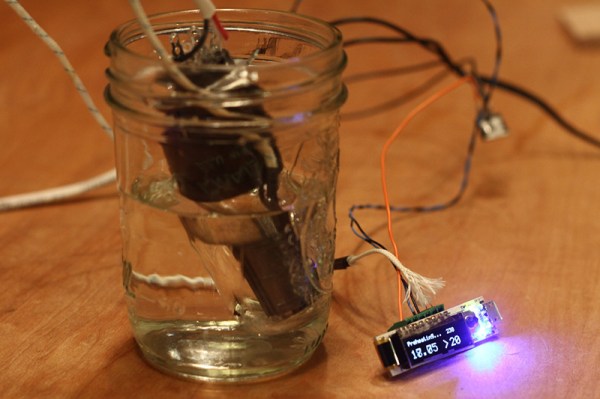
This is a non-optimal solution to the problem of heating a solution of ammonia – already a bad idea unless you have a fume hood – but it gets better. The vacuum tube was slightly cracked, something easily fixed with a bit of silicone sealant. This was then immersed in an ammonia solution, wired up to a driver board and controlled by a homebrew PID controller. If it’s stupid and it works, it’s not stupid.

After getting the ammonia solution up to 30° C, a noxious cloud of ammonia seeped into a piece of oak. This was left overnight, and the result is something that looks like old barn wood, and looks great after some linseed oil is rubbed into it. This is only a test run for fuming an entire desktop this spring, and while that’s a project that will require a real heater (and doing it outside), it’s still a great demonstration of lateral thinking and great woodworking techniques.

A Simple Induction Heater

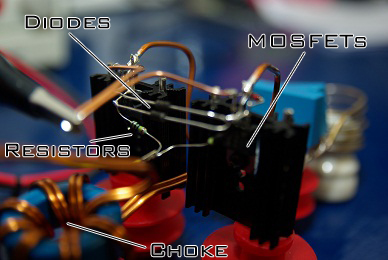
For those of you not familiar, an induction heater is a device capable of heating something up very rapidly using a changing magnetic field. [RMC Cybernetics] decided to build one and was nice enough to write up the project for the Internet’s learning and amusement. A full explanation as well as a schematic and build instructions are provided on their website.

This heater works using a principle involved in most transformers. When there is a change in the magnetic field near a conductive object, a current will be induced in it and it will generate heat. Interestingly enough, while transformers are designed to minimize this heat, an induction heater instead aims to maximize this heat in whatever object is placed within the coils.

[RMC] Has provided a video of how to build the heater as well as it in action after the break! Skip to to 1:42 to see the heating in action. Or watch the whole thing to see how it’s built.

Continue reading “A Simple Induction Heater”

Retrofitting A 60-year Old Electric Heater

electric_heater_retrofit

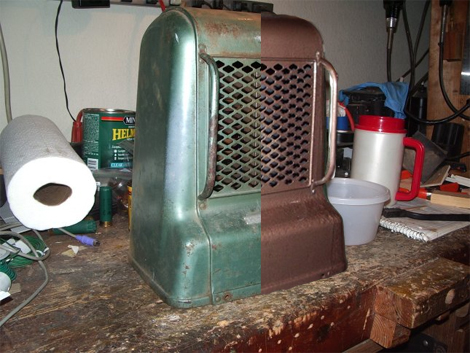
[John] found an old Kenmore electric heater at a junk store one day, and thought it would look great in his bathroom. The only problem with the unit is that it was built back in the 1940s/1950s, so it lacked any sort of modern safeguards that you would expect from an indoor heater. There was no on/off switch, no fuse, no thermostat, and no tip switch – though it did have a nice, flammable cloth-covered power cord.

Since [John] wasn’t too keen on burning his house down in the name of staying warm, he decided to retrofit the old unit’s shell with a new ceramic heater. He found a $20 unit that looked like it would fit, so he disassembled both heaters and got to work. The Kenmore’s innards were scrapped, then he gave the unit a nice fresh coat of high-temp paint. The new heater was cut to fit inside the old unit’s shell, controls and safety features intact.

He says that it works very well, and that it looks great in his bathroom. If you’re considering doing something similar, be sure to check out his writeup – it is very thorough and has plenty of details that will help you along the way.

Wood Burning House Heater

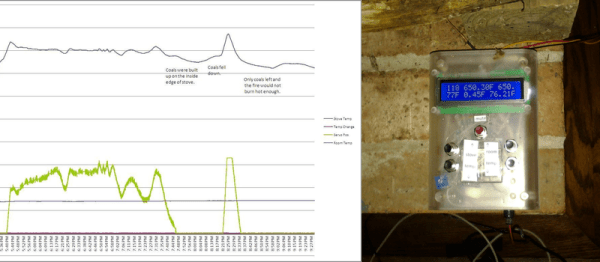
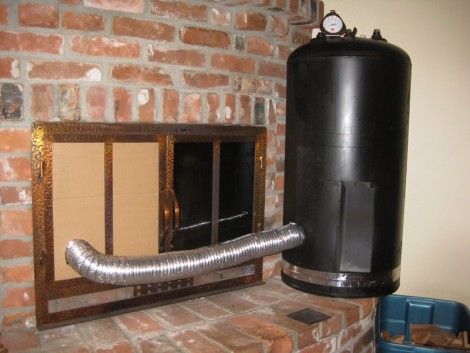
Dabbling in alternative heating technology, [Rob Steves] built a wood stove to dispose of his scrap wood while negating his home’s fire insurance at the same time. As the leftover bits from his wood projects started to stack up he wondered how he would dispose of them. Burning the bits for heat means he’s using every last bit of the lumber. The internal tank from an electric water heater was repurposed as a combustion chamber, with exhaust gases escaping through some high-temperature flexible tubing. The glass panes were removed from one of the fireplace doors to give the off-gases a place to go. The result is a rocket stove that burns very hot and does a great job of warming his house.

It’s not the safest way to heat a home, and there may be coding issues with your municipality. But this might go well in a remote location, like that cabin where you have to generate your own electricity.

[Thanks HybridBlue]

1000W Induction Heater

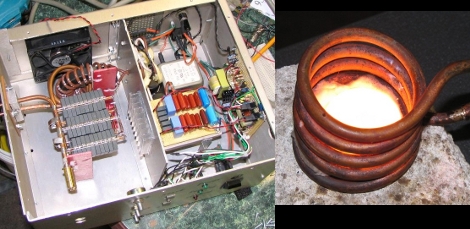
[Tim Williams] likes to heat things up with this induction heater he built. At peak it can use 1000W and as you can see in the video, that’s more than enough power to heat, burn, and melt a plethora of different objects. The case design uses a center divider to isolate switching noise from the magnetic field with the whole unit housed in aluminum because it won’t heat up from stray magnetic fields. He’s selling plans and kits in case you want one, but we just don’t know what we’d use it for.

Continue reading “1000W Induction Heater”

Heated MakerBot Build Stage

This heated build stage seeks to make 3D printing with the MakerBot a little easier. When hot ABS or PLA meet the cold, cruel world they have a tendency to warp. This was concern for [Devlin Thyne] when he was developing our Hackaday badges. What you see above is 10 Ohm nichrome embedded in clear silicone, then sandwiched in between two plates of glass. The device is made to interface with the MakerBot and includes a thermister for temperature sensing. With a small firmware upgrade you can now set the build stage temperature which should make larger printed objects a bit easier to deal with. A while back we saw a hotbed for the RepRap, but this implementation should be cheaper and easier for the smaller MakerBot applications.