Rebuilt Batteries For The Cutest Clamshell At The Cafe

Keeping retrocomputers going can be tricky enough, but when you’re talking retro laptops, the battery packs add an extra challenge. While one could simply live without the battery, that’s not going to give you the full retro experience. Replacement batteries are long out of stock, so what can one do? Well, one can check out this excellent tutorial by [lazd] on rebuilding an iBook G3 Clamshell battery.

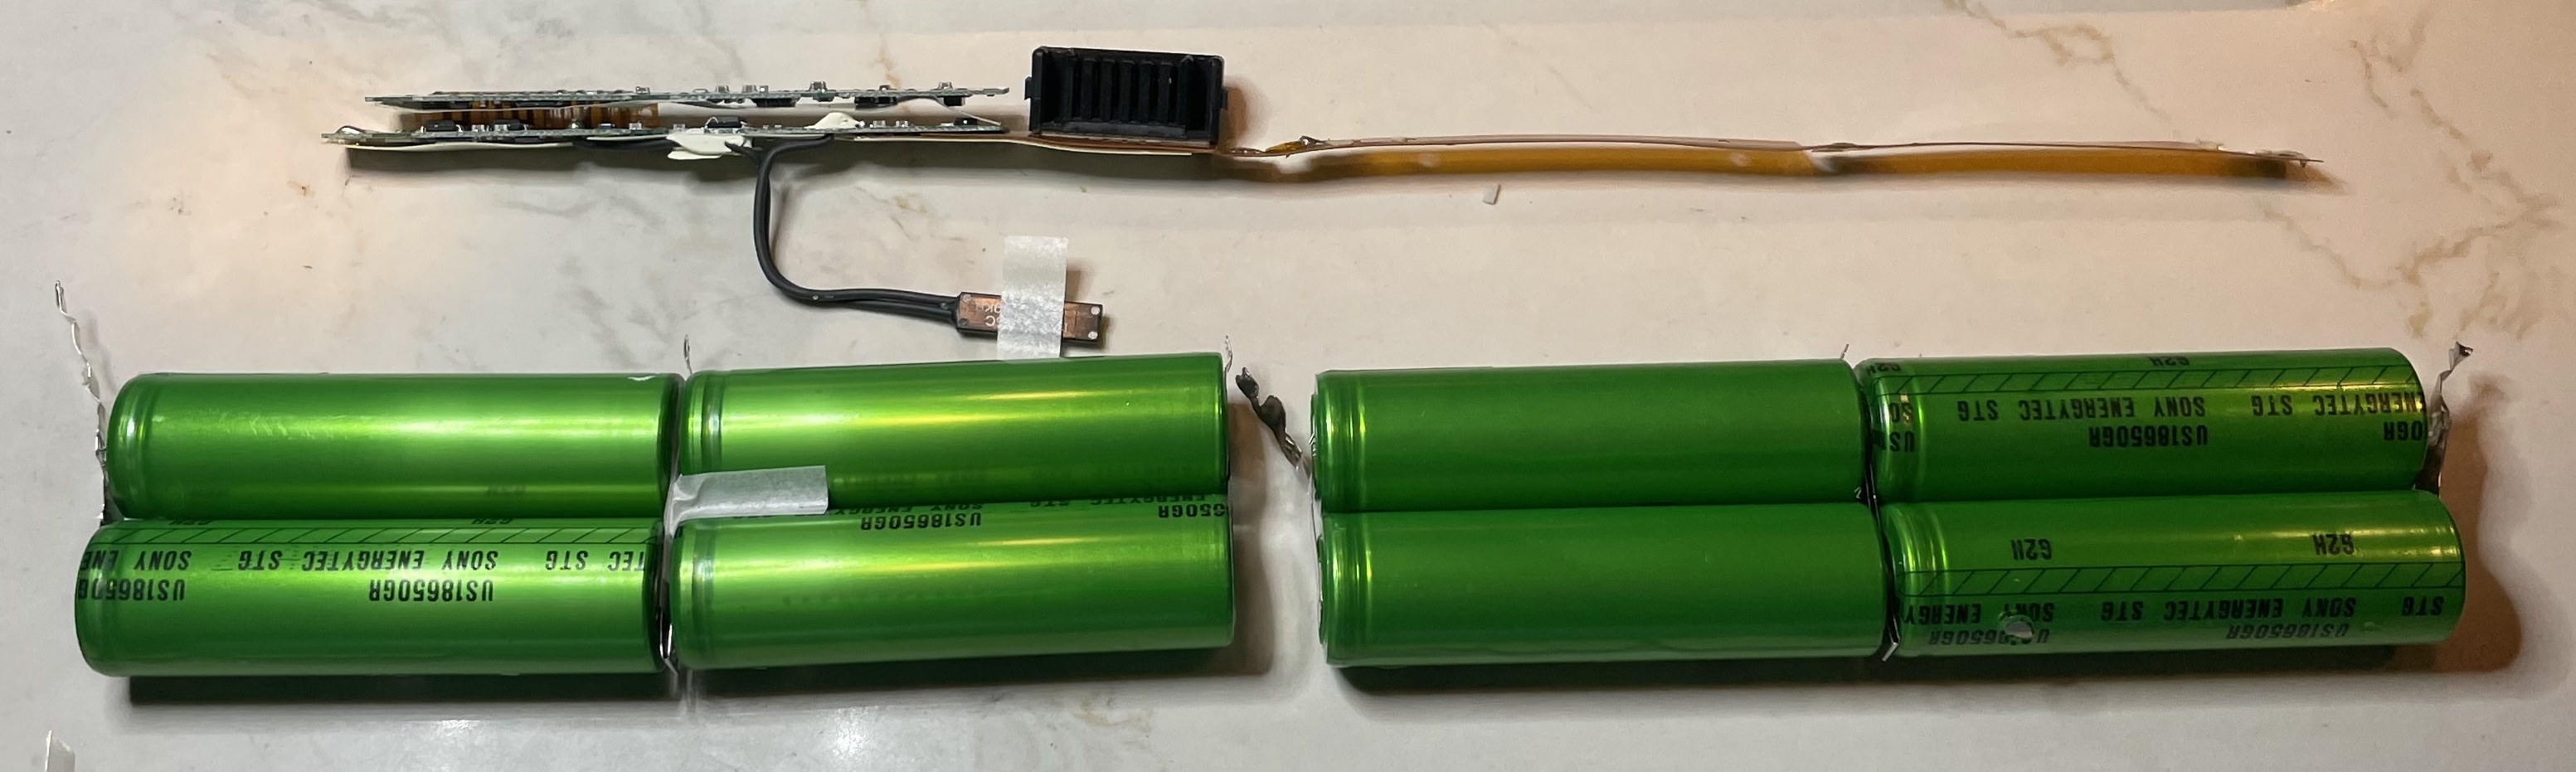
Even if you don’t have this particular laptop, the general process is likely to be similar for PC laptops of similar vintage. (Which we still can’t believe is a whole quarter-century ago.) Luckily for retrocomputer enthusiasts, even Apple used standard 18650 cells in those bygone, halcyon days when computers were allowed to be more than a few atoms thick. They do need to be unprotected, flat-top cells, but that’s easy enough to source.

So it’s really a matter of carefully prying apart the casing (apparently it needs to be Apple-branded; aftermarket cases can’t survive being opened), removing the old batteries, and welding nickel tabs onto the new cells in the proper configuration. One thing that surprised us is that, apparently, Apple did not go in for balancing in those days — so make sure your cells are all in perfect condition and all equally charged before you start, or things won’t end nicely.

As always, battery orientation matters! The cells are welded into two sets in this Clamshell iBook battery.

Assuming you can pull it off (and your battery pack’s control chip has lasted the 300 moons since its manufacture), you’ll get a not-insignificant 5-hour battery run out of what’s sure to be the cutest clamshell computer at the cafe.

If you are repairing an iBook, while you’re at it, why not upgrade the RAM? You might even be able to fix the screen if it’s succumbing to the sadly-too-common vinegar syndrome.

Repurposed Laptop Batteries With A Twist

Arduino with lithium ion battery

Lithium ion batteries are becoming more and more common these days, but some of the larger capacity batteries can still carry a pretty hefty price tag. After finding Acer’s motherboard schematics online and doing a little reverse-engineering, [Tiziano] has found a way to reuse batteries from his dead laptop, not only saving the batteries from the landfill but also cutting costs on future projects.

These types of batteries have been used for many things in the past, but what makes this project different is that [Tiziano] is able to monitor the status of the batteries and charge them using I2C with an Arduino and a separate power supply, freeing the batteries from the bonds of the now-useless laptop.

With this level of communication between the microcontroller and the battery pack, there is little chance of the batteries catching on fire when they’re used in another project. Since the Arduino can also monitor the current amount of charge in the batteries, there is also a reduced risk that they will be damaged from under- or over-charging.

This wasn’t just as simple as hooking up the positive and negative leads of a power supply to the battery. [Tiziano] also had to model the internal resistance of the motherboard that the battery expects to see, and get the supply voltage just right so the battery’s safety protocols wouldn’t kick in to prevent them from charging. After a few other hurdles were jumped, [Tiziano] now has a large capacity lithium ion battery at his disposal for any future projects.

Reviving A Stubborn Laptop Battery

We’ve all gotten bored of certain toys and left them on the shelf for months on end. But what do you do when this prolonged period kills the batteries? Well if you’re [Andrew] you take apart the battery pack and bring it back to life!

[Andrew] picked up one of those Panasonic Toughbooks awhile back and although it’s hardly a top of the line laptop specs-wise, it does have some pretty cool features: it’s shock-proof, splash-proof, and extreme-temperature-proof. It even had a touch screen before touchscreens were cool. Despite its durability, however, the laptop was left to sit for a bit too long, and the battery pack no longer accepted a charge.

[Andrew] quickly disassembled the battery pack and began measuring the cells with his trusty multimeter, assuming just one cell had gone bad. Curiously though, no cells reported 0V. What he did find was that each cell and sub-pack reported 2.95V, which is 0.05V below the “safe operating limits” of typical lithium ion cells. Continue reading “Reviving A Stubborn Laptop Battery”