Retrofitting LCD Projectors With High-powered LEDs

highpower_led

[Devon] recently repaired a handful of Phillips LCD projectors which he was quite excited to use. The only problem is that he didn’t want to mess with replacing the bulbs after every 2000 hours of use at $100 apiece. He was pretty confident that he could find a better way to drive the projectors, so he disassembled them once more and started looking around for bulb replacements.

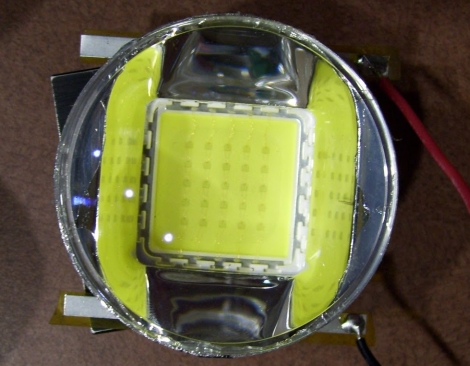
He figured that a high-powered LED would do the trick, so he ordered a handful of parts and went about his first retrofit. Using his oscilloscope, he found that the control board pulses the high voltage board when the projector is powered on, and continues to pulse a signal until the machine is turned off. At this point, the HV board powers down the bulb.

He created a small circuit using a PIC that is used to interpret the initial pulse from the control board as well as watch for the steady “heartbeat” pulses that occur while the projector is powered on. This board is used to control the driver board for the high-powered LED he purchased.

His bulb replacement works well as far as color fidelity is concerned, but is not nearly as bright as he hoped for. He has plans to source some far brighter LEDs or automobile HID lighting in the very near future, and we look forward to seeing if he can match the brightness of the original bulbs.

Magic 8 Thing Answers All Of Your Burning Questions

magic_8_thing

[Pete] was hard at work putting off a repair job for a friend, and wondered how much longer he could possibly procrastinate. With no fellow humans in earshot to which he could propose this question, he thought it would be great if he could ask a Magic 8-ball for an answer. Alas, he doesn’t have a Magic 8-ball, so he would have to build one if he wanted his answer.

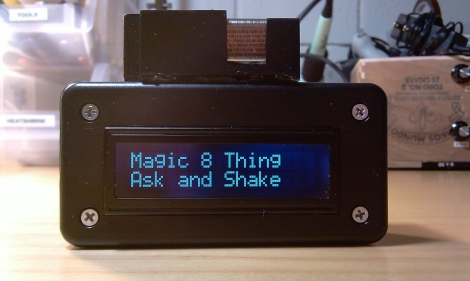
Continuing to delay the repair job, he scrounged around his house and dug up an ATmega328 to control the 8-ball and a LCD panel to display the sage-like responses. He wanted the 8-ball to be as authentic in operation as he could, so he had to locate some sort of sensor that would register if the device had been shaken. With no accelerometer at hand, he opted to use a mercury tilt switch that he scavenged from an old thermostat. He wrote some software to display the responses from the original Magic 8-ball when shaken, then he threw the components together in a small plastic case.

As you can see in the video below, his Magic 8-thing works just like the original, sans the dark fluid and icosahedron. If you were wondering, he did finally ask the 8-thing whether he had procrastinated long enough on his initial task – the response: “Yes”

If you’re in the mood for more Magic 8-ball shenanigans, check out these posts!

Continue reading “Magic 8 Thing Answers All Of Your Burning Questions”

Bill Hammack Explains How LED Backlit LCD Monitors Work

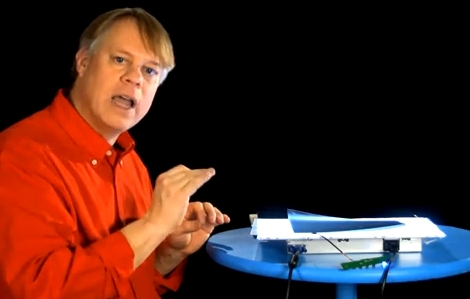
We had a basic understanding of how LCD monitors worked, and you may too. But the thing is, [Bill Hammack] doesn’t just explain the basics. Since he’s the Engineer Guy he explains the engineering principles behind how LED backlit LCD screens operate. But he does it in a way that everyone can understand.

After the break we’ve embedded his five-minute video. In it you’ll see him strip down a monitor to the back plate and then build it up piece-by-piece. We enjoyed his discussion of how the diffuser panels work together to even out and distribute the light. Theses are made of several layers and, although we knew they were there from working with salvaged LCD screens, we never knew quite what they were doing. He also covers how each liquid crystal cell works along with polarizing sheets to either block or allow light passage. And he’ll bring it on home by show how thin-film transistors in each subpixel of the screen work to multiplex the display, just like we did with that pumpkin back in October.

Continue reading “Bill Hammack Explains How LED Backlit LCD Monitors Work”

LCD Twofer

Inexpensive character LCDs are a popular choice for outputting data on many projects. Easily controlled , often back lit, and compact. If you have not found a reason to get one yet, here are a couple.

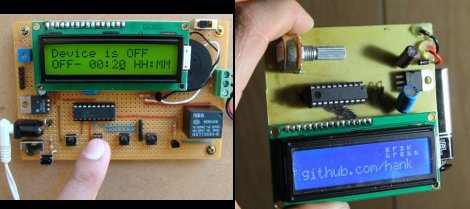
First up is a Programmable digital timer switch. Based around a PIC15f628A micro controller this handy little device allows you to set both on and off times to switch (light duty) devices through its relay. A standard 16×2 LCD , piezo buzzer, and 4 push buttons offer the device’s I / O. The four buttons are assigned to on / off time, select, enter, and start / stop making it easy for anyone to use. All this and sporting a clean perf-board layout which often goes out the window when using jumper wire.

Next for the AVR crowd is a LCD Name badge. Powered by a Attiny 2313 and using another 16×2 LCD, this time in blue this large, but functional name badge is ready to give out all the information people need on you while boasting your nerd credit.

Source and schematics are available for both, and yes we know these little gadgets are not exactly earth shattering so that is why we invite you to share your LCD projects on quite possibly the most awesome forum ever, the Hack A Day forums, we even have a little spot setup just for project logs.

But first join us after the break for a couple quick videos.

Continue reading “LCD Twofer”

DIY Digital Pinball Console Plays Hundreds Of Games

pinball_console

Pinball machines, while likely considered pretty retro technology by most, are still a fun and engaging way to waste a little time. The problem with pinball machines is that they take up a lot of space, making the hobby of collecting them pretty prohibitive unless you have tons of spare room in your house.

[tbarklay] loves pinball machines but doesn’t have to room for an elaborate collection. Rather than purchase one machine, he opted to build his own pinball table that can be used to play any number of games. He repurposed an old PC to power his table, connecting it to a 24″ LCD panel for the main display board. A custom cabinet was built to contain the large LCD panel as well as the computer. A 19″ LCD screen was mounted on top of the cabinet to serve as the backglass display. A set of arcade buttons were also added to the console to provide realistic paddle control.

While we don’t have a video of his particular table in action, check out this video we found of  a pinball machine that uses the same setup.

Continue reading “DIY Digital Pinball Console Plays Hundreds Of Games”

Video Projector From An Old Single-slide Unit

Here’s a video projector that [Matt] hacked together. He needed a small and inexpensive solution to use with his R2D2 build. As you can see in the video after the break, it has no problem playing back the Princess’ distress call. But even if R2D2 is not one of the droids you’re looking for, we think this can be useful in other ways. One use that pops into mind is for projector-based Halloween displays.

As with past projector hacks, all you really need to pull this off is a light source, an LCD screen on which you can playback video, and a lens to focus the light onto a screen. Usually the LCD is the most expensive part of the project and building an enclosure to the correct dimensions can be a bit difficult. [Matt’s] solution was to use an MP4 knockoff media player. The rest of the setup is a ’50s era slide projector. The screen from the media player is about the same size as a single film slide, so he removed the screen from the case and put it where the slides go.

Continue reading “Video Projector From An Old Single-slide Unit”

Interfacing An Arduino With A TFT LCD

tft_lcd

Seven-segment displays and monochrome LCDs are fine for most projects, but some things simply look better in color. [John] over at the Little Bird Electronics blog recently wrote up a tutorial demonstrating the use of a TFT LCD panel with an Arduino. The specific panel he chose was a 4D Systems 1.44” TFT LCD that happened to feature a dedicated graphics processor, which should allow for some fantastic visuals when used to its fullest potential.

The LCD takes its commands over a serial interface, making it a simple five-wire display solution for your projects. The display can be programmed manually by sending hex commands over the serial interface, but there are also some user-developed libraries available that will allow you to use the majority of the most popular functions without the learning curve. One thing to note is that the LCD must be flashed with a particular flavor of firmware before it can communicate over the serial interface, a process for which [John] provides a walk through.

The LCD panel can be used with any Arduino-compatible board, so it can be useful in a whole host of projects.

Stick around to see a simple demo of the board in use.

Continue reading “Interfacing An Arduino With A TFT LCD”