Electronic Demon Costume Is Surprisingly Unnerving

[Phil] over at Adafruit crashed last Sunday’s Show and Tell with an amazing demon costume that includes a voice changer and animated LED matrices for The Eyes and mouth. He just posted how he built this costume, but you’ve really got to Watch the video to see how awesome this build is.

Every demon needs a scary voice, so [Phil] repurposed his Arduino-based voice changer for this build. By being able to adjust the pitch of the demon’s voice with the turn of a knob, [Phil] goes from growling from the pits of hell to a demon with just a slightly annoying voice.

The Eyes make use of the Adafruit I2C LED matrix backpack. The eyes are wired to the same I2C address to prevent derping, but the three red mouth LED matrices are capable of displaying anything that fits on an 8×24 LED matrix.

The electronic portion of this build is mounted to a piece of plexiglas, which is in turn mounted to a mask [Phil] picked up from a craft store. Not really the best option considering the Halloween stores are now open for the year, but it does its job.

A Morphsuit – a spandex bodysuit – completes the build along with a few demon wings and horns. During Adafruit’s Show and Tell, [Phil] had electronic parts scattered all over his desk. To turn this into a costume, he’ll be mounting a small battery-powered speaker in a chest piece and stuffing all the electronics in a fanny pack.

It’s a very, very cool build that really steps up the game for Arduino-powered costumes. Check out the video after the break.

Continue reading “Electronic Demon Costume Is Surprisingly Unnerving”

Graphing The Efficiencies Of LED Light Strips

After adding a few LED light strips above his desk, [Bogdan] was impressed with the results. They’re bright, look awesome, and exude a hacker aesthetic. Wanting to expand his LED strip installation, [Bogdan] decided to see if these inexpensive LED strips were actually less expensive in the long run than regular incandescent bulbs. The results were surprising, and we’ve got to give [Bogdan] a hand for his testing methodology.

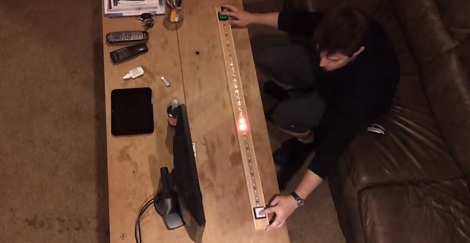
[Bogdan]’s test rig consists of a 15 cm piece of the LED strip left over from his previous installation. A Taos TSL2550 ambient light sensor is installed in a light-proof box along with the LED strip, and an AVR microcontroller writes the light level from the sensor and an ADC count (to get the current draw) of the rig every 6 hours.

After 700 hours, [Bogdan]’s testing rig shows some surprising results. The light level has decreased about 12%, meaning the efficiency of his LED strip is decreasing. As for projecting when his LEDs will reach the end of their useful life, [Bogdan] predicts after 2200 hours (about 3 months), the LED strip will have dropped to 70% of their original brightness.

Comparing his LED strip against traditional incandescent bulbs – including the price paid for the LED strip, the cost of powering both the bulb and the strip, the cost of the power supply, and the time involved in changing out a LED strip, [Bogdan] calculates it will take 2800 hours before cheap LEDs are a cost-effective replacement for bulbs. With a useful life 600 hours less than that, [Bogdan] figures replacing your workshop lighting with LED strips – inexpensive though they are – isn’t an efficient way to spend money.

Of course with any study in the efficiency of new technology there are bound to be some conflating factors. We’re thinking [Bogdan] did a pretty good job at gauging the efficiency of LED strips here, but we would like to see some data from some more expensive and hopefully more efficient LED strips.

4096 LEDs Means The Biggest LED Cube Ever

Adaptive Computing, a cloud management and high performance computing outfit in Utah, needed something really cool to bring to their trade shows. Something that makes order out of chaos, and demonstrates their attention to detail in the midst of miles of wiring. They decided building the largest non-commercial LED cube would be a good project, and thus the 16x16x16 All Spark Cube was born.

The All Spark Cube was constructed using 10 mm RGB LEDs wired together with three-foot lengths of 16 ga pre-tinned copper wire. In this video, [Kevin] shows off the process of constructing a single row; first the LEDs are placed in a jig, the leads are bent down, and a bus wire is soldered to 16 individual anodes per row.

The hardware for the build uses 16 Arduino Megas with a custom-made shield powering a 16×16 LED grid. The custom shields provide the 24V for the LEDs, 5V for the ‘duino, The Arduino boards communicate to each other through an RS485 connection, and the entire cube is connected to a computer through an RS232 serial connection.

The software is, admittedly, still a little janky. [Spencer] and [Thomas], the Adaptive Computing volunteers that are working on the control system, are still having a few problems getting logos and animations to display. They have managed to create a control app to draw individual pixels, as seen after the break.

Not bad for nearly a mile of wire and a summer’s worth of work, huh?

Continue reading “4096 LEDs Means The Biggest LED Cube Ever”

Stare Deep Into This Well-lit Interactive Infinity Mirror

infinity-mirror

[acorv] recently sent us a link to a cool, interactive infinity mirror (Translation) he built. He was originally a bit gun-shy about sending the project our way, but our recent Reddit AMA inspired [acorv] to submit it via our tip line, and we’re glad he did.

Having been lucky enough to score $100 of gear from Sparkfun’s 2012 Free Day, he picked up a pair of addressable LED strips and a Teensy++. He built an LED ring from reflective foil, sandwiching the strips between a mirror and a piece of mirror glass. The resulting infinity mirror looked nice enough, but [acorv] wanted to make the static display a bit more interesting.

He added an IR receiver and ultrasonic rangefinder to the mirror’s frame, allowing him to both control the display remotely and detect when people were standing nearby. As you can see in the video below, [acorv] can change the patterns on a whim, and the mirror speeds up the display when someone stops to take a closer look.

Continue reading “Stare Deep Into This Well-lit Interactive Infinity Mirror”

Edge-lit Musical Birthday Card

[Monirul Pathan] decided to make the card as unique as this gift when getting ready for a birthday. He designed and built his own musical card with LED edge-lit acrylic to display the message.

The electronic design seeks to keep things as flat as possible. The card-shaped acrylic panel has a void to fit the PCB exactly, and the components are relatively flat. One thing we found quite interesting is that the ATtiny85 which drives the device is surface mounted, but it is not a surface mount component. The layout includes though-hole pads, but instead of drilling holes [Monirul] clipped off the excess of the DIP legs and soldered the remainder directly to the copper. We suppose this isn’t going to get a lot of use so it just needs to hold together for one day.

As you can see in the video after the break, the speaker plays ‘Happy Birthday’ followed by ‘Under the Sea’. At the same time, four blue LEDs pulse to the music, lighting up the words that are engraved in the plastic.

Continue reading “Edge-lit Musical Birthday Card”

Flashing LEDs Protect Livestock From Lion Attacks

When we think of defense against lion attacks, the first thought is usually guns. Lots and lots of guns.  [Richard Turere], a 13 year old Kenyan tinkerer with neither books nor any technical education, has come up with something entirely different – He’s keeping the lions at bay with a solar powered system of flashing LEDs. Yup. Flashing LEDs.

Since he and his family live next to Nairobi National Park, lion attacks are an ever present danger. The only defense systems available were far too expensive for his family to afford, so he decided to build his own. He utilized the basic resources he had readily available: LED bulbs removed from broken flashlights, some switches, an old car battery, wire, and a solar panel that also operates his family’s TV.

The results speak for themselves. His family has had no lion attacks in over two years, and at least five of his neighbors believe in the system enough to have had him install it on their fences too. With the cost for this set up at less than ten dollars, and all the parts being readily available, this rather basic electrical system is an amazing breakthrough for the Kenyan pastoralists.

We look forward to seeing more of [Richard’s] inventions. Way to go!

LED Cyber Eyes; More Nerdy Than Just Taping Your Glasses

Regular glasses are okay, but these light up and respond to your movement. [Dr. Iguana] is at it again, designing a very interestingly shaped PCB to augment your visual augmentation devices.

The circuit board has two thin curving wings which conform to the shape of a pair of glasses. In the middle there’s a larger area that holds most of the components but it’s still smaller than a common coin cell battery that powers the device. Over each eye there are a half dozen red LEDs which are driven by a PIC 12F1840. It can flash a bunch of patterns the but the interactivity is the real gem of the project. The doctor included an MMA8450 3-axis accelerometer. As you can see in the clip after the break, shaking your head this way and that will be reflected in the pattern of lights.

Continue reading “LED Cyber Eyes; More Nerdy Than Just Taping Your Glasses”