Goal Zero Bolt Hack Lets Your Flashlight Use Non-proprietary Batteries

goal-zero-bolt-modification

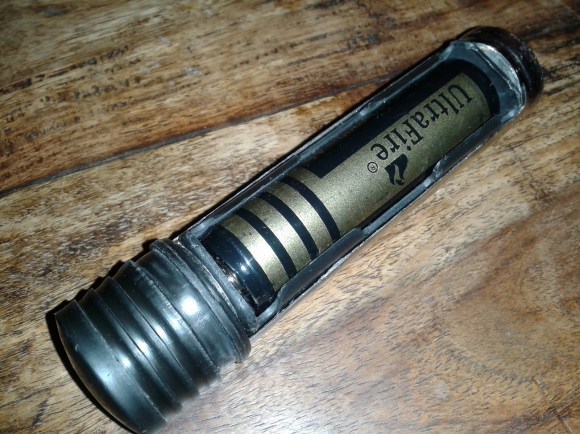
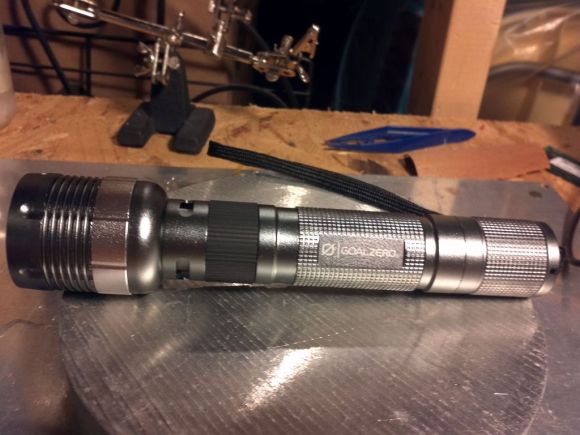
[Harrson] was really excited to get a deal on this Goal Zero Bolt flashlight. It’s and LED flashlight that uses Lithium batteries that are recharged via USB. That’s really handy. But when he cracked it open, like any good hacker does with new toys, he found that it won’t charge standard 18650 Lithium cells. That’s the form factor it’s using, but the proprietary cell that comes with it has both conductors at the top.

So where did [Harrson] start with the project? He called the company to ask about the setup. They were able to confirm that the proprietary cells just have a conductor which brings the bottom contact of the cell up to the top. We’d bet this is to make the flashlight itself easier to manufacture.

He got to work by scavenging a flat Kapton covered conductor from an old laptop battery. This thin strip is manufactured for connecting the cells of a battery, and it’s quite flat so it will be able to bypass the 18650 cell housing inside of the battery compartment. He made a solder connection for the strip inside the recharging compartment, leaving a tail which makes contact with the base of a standard cell.

If you’ve ever cracked open a dead laptop battery you probably found round Lithium cells. These are most commonly the 18650 variant we’ve been talking about. The battery dies when just one cell goes bad, so [Harrson] has a supplies of the good cells which he’ll be able to substitute into his flashlight as needed.

Make Your Own Electronic Children’s Toys

diy-childrens-toys

[Miria Grunick’s] son nephew is two years old. If you’ve ever looked at that age range in the toy aisle we sure you’ve noticed that there’s a mountain of cheap electronic stuff for sale. Manufactures are cramming LEDs and noise makers into just about all kids stuff these days. But [Miria] thought why not just make him something myself? She calls this the Blinky Box. It’s an acrylic enclosure stuffed with pretty LEDs that is controlled with a few buttons.

It’s driven by a Teensy 3 board which monitors a half dozen colorful buttons, a mode selector on the side, and an on/off switch. The device is powered by a Lithium battery that recharges via USB. And of course there’s a strip of individually addressable RGB LEDs inside.

The demo shows that one mode allows you to press a button color and have the LEDs change to it. But there are other features like fade and scroll. She also mentions that since it can be reprogrammed the toy can grow with hime. Maybe it’ll be a Simon Says game. But eventually she hopes he’ll use it to learn the basics of programming for himself.

Continue reading “Make Your Own Electronic Children’s Toys”

Salvaging Lithium Cells And Circuits

Lithium cells outperform Nickel Cadmium and Nickel Metal Hydride in almost every way. But they also need a little bit more babysitting to get the most out of them. That comes in the form of control circuitry that charges them correctly and won’t let them get below a certain voltage threshold during discharge. We enjoyed reading about [Carlos’] Lithium cell salvage efforts as it discusses these concerns.

He wanted to salvage a Lithium power source for his projects. He had the three cell pack from a dead Macbook Pro seen in the upper left, as well as the single blown cell from a digital picture frame shown on the right. The three-pack didn’t monitor each cell individually, so the death of one borked the entire battery. He desoldered them and probed their voltage level to find one that was still usable. To prevent his project from draining the source below the 2.7V mark he scavenged that circuit board from the digital picture frame. A bit of testing and the system is up and running in a different piece of hardware.

Don’t be afraid of this stuff. If you learn the basics it’ll be easy to use these powerful batteries in your projects. For more background check out this charging tutorial.

Welding With Over A Hundred A123 Lithium Cells

a123-cell-powered-welder

[Doctor Bass] needed to do some welding on his electric bicycle. The problem is that he’s never welded before and doesn’t have any tools for it. As you can see, that didn’t stop him. He used a bicycle battery made from reclaimed DeWalt A123 cells to power his diy welding rig.

He has a huge adjustable resistor which is responsible for limiting the current. 80 Amps seems to work the best with the welding rods he’s chosen. It is worth noting that when he shows off each part of the welder (see the clip after the break) the color of the wire used for positive and negative leads is opposite of convention. His positive wiring is black while his ground connection is red.

To get the welding under way he connects a jumper-cable-like clamp to his work piece which serves as the positive electrode. To hold the welding rod he drilled a hole in a pair of vice grip pliers and bolted on the negative lead. This way the end of the welding rod can be clamped in the vice grips while his other hand guides the tip. So far he’s still practicing, but it looks like he’s nearly ready to take on the job at hand.

Continue reading “Welding With Over A Hundred A123 Lithium Cells”

Open Source Capactive Charger Resurrects An Electric Skateboard

mikey-sklar-on-electric-skateboard

Here’s [Mikey Sklar] posing on his new electric skateboard. Well, it’s new to him at any rate. He bought it used on eBay for $250. That may not sound like much of a deal, but these will run more like $800 retail. The savings comes because the thing would no longer charge. But it took him just an hour and a half with his capacitive charger to resurrect the flat lithium cells.

The first thing he did in trouble shooting the situation was to measure the voltage of the battery pack. It registered 5V, which is a far cry from the 36V it should supply. The built-in charger does nothing, as it’s circuitry isn’t designed to work in a situation like this one. But [Mikey] has a tool perfect for this purpose. Da Pimp is a capacitive charger which we’ve seen before. It succeeds where the other failed because it is able to adapt itself to the internal resistance of the battery, no matter what voltage level it starts at.

[Mikey] shows off the use of his charger in the clip after the break. His first test run was more than two miles without issue.

Continue reading “Open Source Capactive Charger Resurrects An Electric Skateboard”

Testing 30 Brands Of Batteries

Batteries come packaged in bright blister packs emblazoned with vague guarantees such as “45% more pictures” and “five times longer lasting.” During his internship at BitBox this summer, [Thomas] decided to put those statements to the test. He tested thirty brands of batteries on a homebrew rig to find the batteries with the most power and the most bang for your buck.

The hardware [Thomas] used an STM32 microcontroller to perform two different tests: a high drain and a low drain condition. For the high drain, 1000 mA were sucked out of the batteries until the voltage reached 0.8 V. For the low drain, 200 mA were used. Data including milliwatt-hours, milliamp-hours, joules, voltage, current, power, and effective load resistance were all logged for both conditions for all 30 batteries.

Generalizing the results for both low and high drain conditions, lithium batteries were better than alkaline, which were both better than zinc AA cells. Perhaps unsurprisingly, batteries marketed as ‘long life’ and ‘extended power’ were the worst batteries for the money, but a brand-name battery – the Kodak Xtralife cells – were actually the best value for the money.

Testing Lithium Cells For Use With A Hybrid Car

[Mikey] got a real deal on some A123 Pouch Cells. These are large Lithium cells that tolerate 100A discharge and 50A recharge currents, with 20 AH of life off of one charge. He’s been doing a bunch of testing to find out if the cells can go into an expandable battery pack and be made for use with hybrid cars.

We just looked in on a battery tester used for solar power car arrays. This is a similar situation except [Mikey] is focusing on the test data, rather than the apparatus. The link above is a collection of his notes from testing. Start reading at the bottom of the page up to get the chronology right. He starts to zero in on the most efficient charging methods. Immediately he’s hit with a big need for cooling as the cells take no time to pass 100 degree Fahrenheit. He continues testing with heat sink and fan, and even brings a thermal imaging camera to help with the design.

[Thanks Chris]