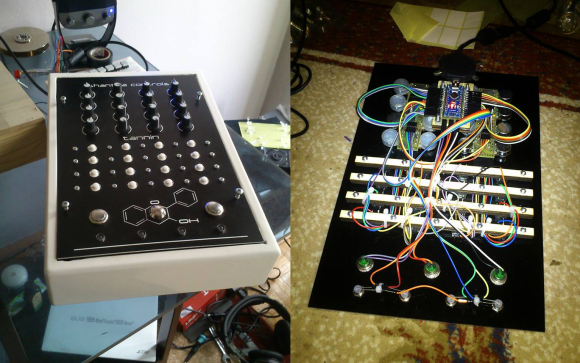
LED-Guided Piano Instruction

LEDpianoGuide

[Kay Choe] can’t play the piano. Rather, he couldn’t, until he converted his keyboard to include LED-guided instruction. [Kay] is a microbial engineering graduate student, and the last thing a grad student can afford is private music lessons. With $70 in components and a cell phone, however, he may have found a temporary alternative.

The build works like a slimmed-down, real-world Guitar Hero, lighting up each note in turn. We’ve seen a project like this before, with the LEDs mounted above the keys. [Kay]’s design, however, is much easier to interpret. He embedded the LEDs directly into the keys, including ones above each black key to indicate the sharps/flats. An Android app takes a MIDI file of your choice and parses the data, sending the resulting bits into an IOIO board via USB OTG. A collection of shift registers then drives the LEDs.

For a complete novice, [Kay] seems to benefit from these lights. We are unsure whether the LEDs give any indication of which note to anticipate, however, as it seems he is pressing the keys after each one lights up. Take a look at his video demonstration below and help us speculate as to what the red lights signify. If you’re an electronics savant who wants to make music without practicing a day in your life, we recommend that you check out [Vladimir’s] Robot Guitar.

Continue reading “LED-Guided Piano Instruction”

OneTesla Electrifies Maker Faire NY 2013

onetesla

Throughout the maker pavilion, the siren song of a musical Tesla coil could be heard. Those who followed their ears found themselves at the oneTesla booth. OneTesla is a hobby Tesla coil, with the added twist of polyphonic MIDI input.

Started by three MIT students, oneTesla had a successful Kickstarter campaign last year. Like many kickstarters, they are a bit behind in the shipping department. They are shipping out their third run of kits to backers now. The group had a small number of oneTesla coils for sale at the show, which appeared to have sold out by midday Sunday.

The actual process of generating sound with a Tesla coil is fascinating. All Tesla coils are resonant at high frequency. In oneTesla’s case, this is 220kHz. Human hearing ends around 20kHz, so this is well beyond the range of perception. Since the coil is locked in at this frequency, the power to the coil is modulated at the desired sound frequency. Playing an A note for example, would mean modulating the coil at 440Hz.

Continue reading “OneTesla Electrifies Maker Faire NY 2013”

Pair Of MIDI Dongles To Inspire Some Weekend Music Hacking

pair-of-midi-dongles

This pair of dongles is a fun way to get your feet wet working with MIDI hardware. They’re called MIDIvampire-I and MIDIvampire-II. Just plug one end into your MIDI-ready instrument and the other into a pair of speakers and you’re off and running. Mark I is a polyphonic synth, and Mark II is a drum machine, but both use basically the same hardware which you may already have on hand.

The single chip on each board is an ATmega328 often found anchoring Arduino boards. The other silicon component is an S1112B30MC voltage regulator. The rest of the components are passives, with MIDI and headphone jacks for connectivity. They’re selling these if you want the easy way out, but we thought we’d bring them to your attention in case you needed a breadboarding project this weekend. The firmware, BOM, schematic, and board artwork are all available on the Wiki pages linked in the articles above. After the break you can see a couple of demo videos which walk through all of the features.

Continue reading “Pair Of MIDI Dongles To Inspire Some Weekend Music Hacking”

The RPC: A Stand-alone MIDI Workstation

raspiMidiRPC

Not just another pretty enclosure, this shiny little red box is [Lauri’s] stand-alone MIDI workstation. The build uses an Arduino Mega 2560 to handle the MIDI inputs and outputs. It communicates via serial with a Raspberry Pi that acts as a sequencer and oversees all user interactions. The Pi’s SD card offers convenient storage for your work, though we wish it was easily ejectable from the front of the box and not trapped under the hood. [Lauri’s] RPC also squeezes in the necessary USB hub for the RasPi and an HDMI-to-VGA converter. As an all-in-one solution, this is a sleek little box that–once paired with some software for arpeggiators, chord harmonies, and scales–will be a handy MIDI sequencer with robust control ready to be conveniently mounted on your rack.

Now all you’ll need is something to plug in. Why not check out the custom MIDI recorder we featured last week, or the organ-to-MIDI keyboard conversion for inspiration.

[Thanks Teemu]

Hackaday Links: August 11, 2013

While we’re not much for fashion hacks, we’re reasonably impressed with [Karolina]’s faux Chanel bag made of chips. Apparently a grid of black squares is one of Chanel’s trademark looks, and a thousand or so QFP chips makes for a reasonable substitution.

News of the death of our retro edition has been greatly exaggerated. [Brandon] got an old Apple IIe up on the Internet and loaded up our retro edition, so we’re sort of obliged to mention him. He’s using a Super Serial Card connected to an OS X box running lynx. With getty running, he can shoot the output of lynx over to the Apple. Awesome.

Take an old Yamaha organ, convert the keyboard to MIDI, throw in a few Arduinos, thousands of LEDs, and a handful of bubble machines. What you end up with is the bubble organ, as seen at the Bass Coast Festival last weekend. If you want a hands on, you can also check it out at the Rifflandia festival in BC, Canada this September.

Some guy over on reddit created the smallest Arduino in the world. We’re looking at a rank amateur here, though. I’ve been working on this little guy for the last 18 months and have even created an open source cloud based github design for the production model. It’s less than half the size of a Digispark, and also Internet of Things 3D interactive education buzzword buzzword.

[Moogle] found an old Super 8 camera at an estate sale. No big deal right? Well, this one is clear, and it uses light-sensitive film. Your guess is as good as ours on this one, but if you know what’s up, drop a note in the comments.

One day [John] decided he would put a PC inside an old G3 iMac. After a year, it’s finally done. He took out the CRT and replaced it with a 15″ Dell monitor. The G3 was discarded for an AMD, and the internal speakers and slot-load CD drive still work. It’s a really, really cool piece of work.

Custom Made MIDI Recorder For An 8 Year Old Girl

recorder

[KDM] over at The Controller Project forums let us know about a cool project he’s been working on: a MIDI recorder for an 8-year-old girl born with two digits per hand.

The recorder – a simple woodwind instrument usually made of plastic – is a staple of grade school music classes the world over. It’s an excellent introduction to the performing arts, but for those with two fingers per hand, the fingering is a little difficult.

[KDM] contacted a manufacturer of these instruments and they were kind enough to send over a half-dozen for his experimentations. He drilled out these recorders on a lathe and started work on a simple circuit to turn this recorder into a MIDI instrument. A simple PIC micro and a few buttons were used, with a DIN 5 port on the horn of the instrument.

The build works, but we’re thinking with a small electronic wind sensor, this instrument could easily become a full-fledged MIDI wind controller that could be easily and cheaply reproduced for other budding musicians with special needs.

Oh, one more thing. We’d like to give a big shout out to the giant dork who started The Controller Project. A lot of Hackaday readers know how to work a microcontroller and a soldering iron, so how about heading over to their forums and doing some good with your skills?

Building A Hard Drive Scratch Controller

hard-disk-scratch-controller

If you’re reading this blog then chances are you have a dead hard drive hanging out somewhere in your house. Here’s a weekend project that will put it back into use. [Andreas] took on the popular project which combines a hard drive and optical mouse to build a scratch controller.

The gist of the build is that you use an optical mouse sensor to track the movement of the platter. But [Andreas] made things harder on himself by not using the USB capability of the mouse and mapping it in software for his needs. Instead he plucked the sensor from the mouse, reading it using an Arduino. After much trial and error with the best way to coat the underside of the platter to play nicely with the sensor he managed to get it up and running. The controller issues commands using the MIDI protocol, forming a strong foundation for future upgrades which could lead to a full-blown DJ console hack.

Continue reading “Building A Hard Drive Scratch Controller”