A Game That Does More With Less

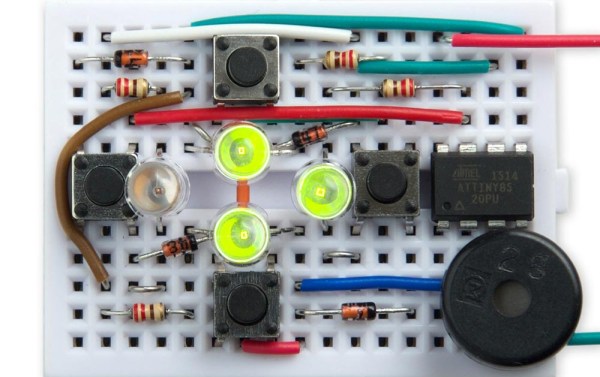
[David Johnson-Davies] created a minimal Secret Maze Game using a single ATTiny85 and a few common components. This simple game uses four buttons, four LEDs, and a small speaker. The player moves in the four cardinal directions using buttons, and the LEDs show walls and corridors. If an LED is lit, it means the path in that direction is blocked by a wall, and attempting to move in that direction will make a beep. When the player reaches the exit, a short victory tune chirps from the speaker.
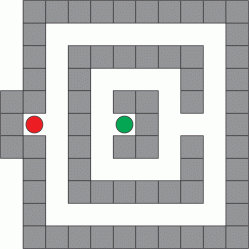
Sample maze. A 16×16 matrix is allocated for maze designs.

Since the ATTiny85 has only five I/O lines, [David] had to get a bit clever to read four buttons, display output on four LEDs, and drive a little speaker. The solution was to dedicate one pin to the speaker and the other four to charlieplexing, which is a method of driving more LEDs than you have pins. It takes advantage of the fact that most microcontroller pins can easily switch state between output high, output low, or low-impedance high-impedance input.

As for the buttons, [David] charlieplexed them as well. Instead of putting an LED in a charlieplexed “cell”, the cell contains a diode and an SPST switch in series with the diode. To read the state of the switch, one I/O line is first driven low and the other I/O line is made an input with a pullup. A closed switch reads low on the input, and an open switch reads high. With charlieplexing, four pins is sufficient for up to twelve LEDs (or buttons) in any combination, which is more than enough for the Secret Maze.

Charlieplexing is also what’s behind this 110 LED micro-marquee display, or this elegant 7-segment display concept that takes advantage of modern PCB manufacturing options.

Office Supplies Hexapod Tramples Your Excuses

We all have reasons why we’re not building cool robots. “I don’t have a lasercutter.” “I don’t have a 3D printer.” [JAC_101]’s hexapod robot dances all over your excuses with its tongue-depressor body and pencil-eraser feet!

Some folks like to agonize over designs, optimizing this and tweaking that on the blackboard. Other folks just build stuff and see what works. If you’re in the mood for some of the latter, check out some of the techniques at work here. Tongue depressors make a simple frame, and servos are lashed on with zip ties in place of fancy servo mounts (or hot glue). Photoresistors are soldered directly to their load resistors, making a simple light sensor. It’s all very accessible and brutally minimalistic, but it seems to walk. (Check out the video, below.)

Arduino code is available for you to play with, naturally.

Continue reading “Office Supplies Hexapod Tramples Your Excuses”

minimalist desk

Sliding Minimalist Computer Desk Starts Life As Ikea Shelf

Where are you right now? You’re probably sitting at a desk staring at a computer screen. Us tinkerers/makers/hackers/diyers use computers all the time… they are a great tool and an easy way to spread and gather information. Since we spend so much time sitting at a computer, why shouldn’t the computer’s desk be made to enhance the experience?

Self-proclaimed web guru [Ellis] admits to being a minimalist and wanted a super sleek computer desk. He couldn’t find a commercially available model that he liked so he built his own.

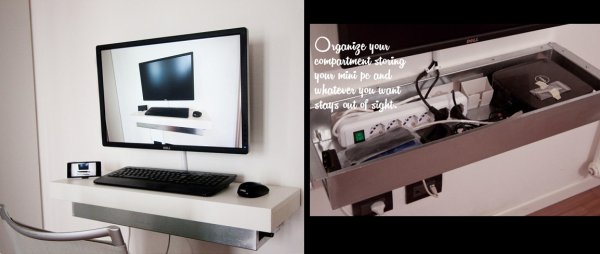
The desk started as an Ikea floating shelf. The shelf comes with a metal bracket that secures to a wall, then the shelf completely slides over the bracket so that the shelf looks as if it is floating in air. Once the u-shaped bracket was installed to the wall, a custom compartment was made to fit in between the bracket’s arms. This compartment will hold a power strip, mini Dell computer and other accessories. On the outside of each bracket arm, [Ellis] mounted drawer slides. The stock shelf was then modified to mount to the newly added drawer slides allowing it to be pulled forward for typing or to expose the hidden compartment. When closed, the shelf-desk looks clean and blends into the wall color.

A wide screen monitor is mounted directly on the wall just above the desk and a wireless keyboard/mouse combo supports the clean look. [Ellis] now has the minimalist computer desk he’s always wanted that doesn’t distract him from his work (or ‘net browsing).

AVR Programmer

Inexpensive AVR Programmer Made From Five Components

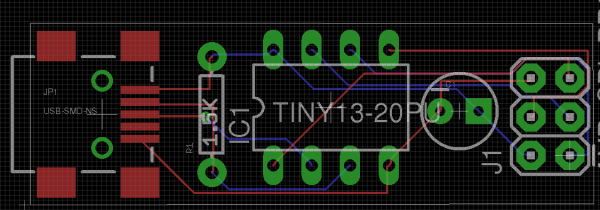
If you want to program an AVR chip as inexpensively as possible, then [Ian’s] solution might just be for you. He built an AVR programmer using only four components. This design is based on the vusbtiny AVR programmer design, with a few components left out.

[Ian’s] design leaves out two of the resistors and two diodes, leaving just four components. These include a 1.5k resistor, a small capacitor, a USB connector, a six pin header, and an ATtiny45. He admits that this may not be exactly up to USB spec, but it does work.

This is one of those projects that is really an exercise in “will it work?” more than anything else. The fact that you need to first program an AVR chip means that this wouldn’t be useful in a pinch, because you would already have to have a working programmer. Nonetheless, it’s always fun to see what can be done with as little as possible.