Lost Foam Aluminium Alloy Casting

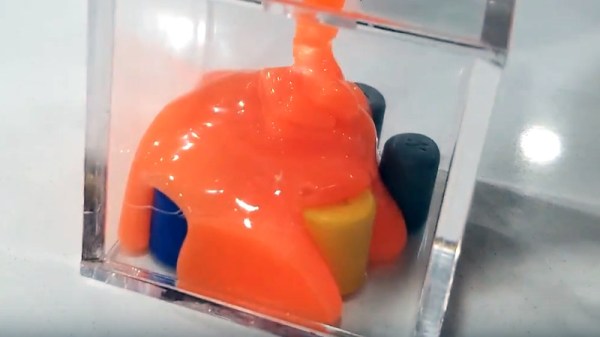
[Kelly Coffield] makes intake manifolds for old Ford throttle bodies for fun, demonstrating an excellent technique for making such things in the small shop. The mould patterns are CNC machined from a solid polystyrene block, with all the necessary gates to feed the aluminium into the mould. The principle is to introduce aluminium from a large central runner into the mould structure, which feeds the gates into the mould parts. The various foam mould components are then glued with an extra brace bar at the bottom to strengthen it.

Dip coating with a refractory slurry

The complete structure is then sprayed with surfactant (just plain old soapy water) and dip-coated in a refractory slurry. The surfactant adjusts the coating’s surface tension, preventing bubbles from forming and ruining the surface quality produced by this critical coating step.

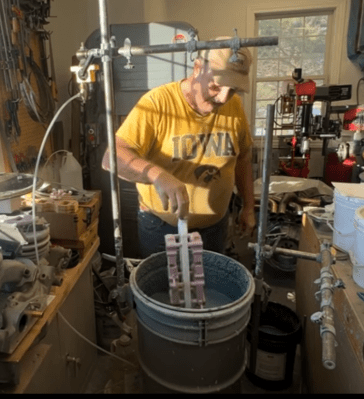
Once a satisfactory coating has been applied and hardened, the structure is placed inside a moulding pan fitted with a pneumatic turbine vibrator, to allow sand to be introduced. The vibrations ease the flow of sand into all the nooks and crannies, fully supporting the delicate mould structure against the weight of the metal, and gases produced as the foam burns away. A neat offset pouring cup is then added to the top of the structure and packed in with more sand to stabilise it. It’s a simple setup that can easily be replicated in any hackerspace or backyard for those motivated enough. [Kelly] is using A356 aluminium alloy, but there’s no reason this technique won’t work for other metals.

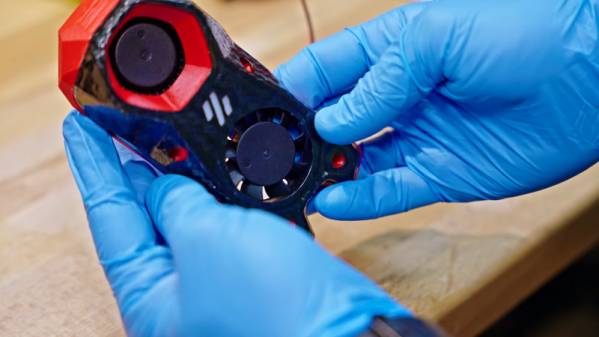
It was amusing to see [Kelly] demould by just dumping out the whole stack onto the drive and throwing the extracted casting into a snow bank after quenching. We might as well use all that free Midwest winter cooling capacity! After returning to the shop, [Kelly] would typically perform any needed adjustments, such as improving flatness in the press, while the part was in the ‘as cast temper’ condition. We’ll gloss over the admission of cutting the gates off on the table saw! After these adjustments, the part is artificially aged to a T5-like specification, to give it its final strength and machinability properties. There are plenty more videos on this process on the channel, which is well worth a look.

Aluminium casting is nothing new here, here’s a simple way to cast using a 3D printed pattern. But beware, casting aluminum can be hazardous, it does like to burn.

Continue reading “Lost Foam Aluminium Alloy Casting”

Carbon Fiber With 3D Printing

[Thomas Sanladerer] wanted to make 3D prints using carbon fiber and was surprised that it was fairly inexpensive and worked well, although he mentions that the process is a bit intense. You can learn what he found out in the video below.

He used an advanced PLA that can endure more temperature than normal PLA. That’s important because the process uses heat and the carbon fiber resin will produce heat as it cures. The first step was to print a mold and, other than the material, that was pretty straightforward.

Continue reading “Carbon Fiber With 3D Printing”

Custom Buttons For Your Game Controller

Console gamers have relatively few options when it comes to hardware hacking, unless they wish to partake of some extreme modifications that threaten the very integrity of their machines. So without reaching for a Dremel, how can you insert a little individuality into the same standard components all your friends have?

It seems one answer is to customise your controller with some different buttons. There are commercial outfits that will supply your needs in this direction, but they aren’t always cheap, and plenty of older machines have no products available. This isn’t  a problem for [RockerGaming] though, who shows us how to cast your own set of custom buttons using a silicone mold taken from the originals.

The video is a step-by-step walkthrough of the molding process that could just as easily be applied to any other small plastic parts and is not unique to console buttons. The subjects come from a Sega Saturn controller, in the video a beige model, which raises a passing interest among European Hackaday scribes who remember the Saturn as a black console.

We see the preparation of the original buttons and mold. An acrylic golf ball trophy display case is pressed into service. (Who knew those were even a thing!) A dye is added to the two-part silicone to provide a visual mixing aid, and once the cast mold is separated from the buttons the final resin is poured into it. The cloned buttons are tidied up underneath with a Dremel, and the controller is reassembled.

A set of custom buttons will not improve your gaming, but underlying this is the fact that resin casting is a useful skill. It’s somewhere we’ve been before in depth, so it’s worth reading our guide from back in 2016.

Continue reading “Custom Buttons For Your Game Controller”