Exploring The Sega Saturn’s Wacky Architecture

Sega Saturn mainboard with main components labelled. More RAM is found on the bottom, as well. (Credit: Rodrigo Copetti)

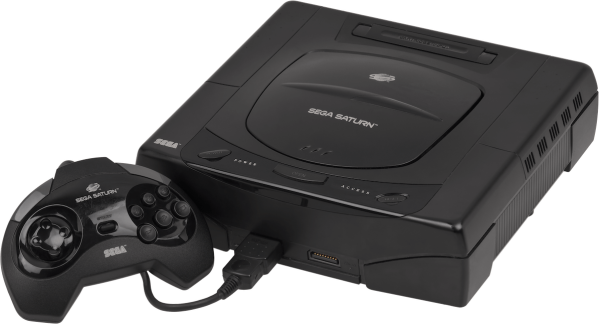
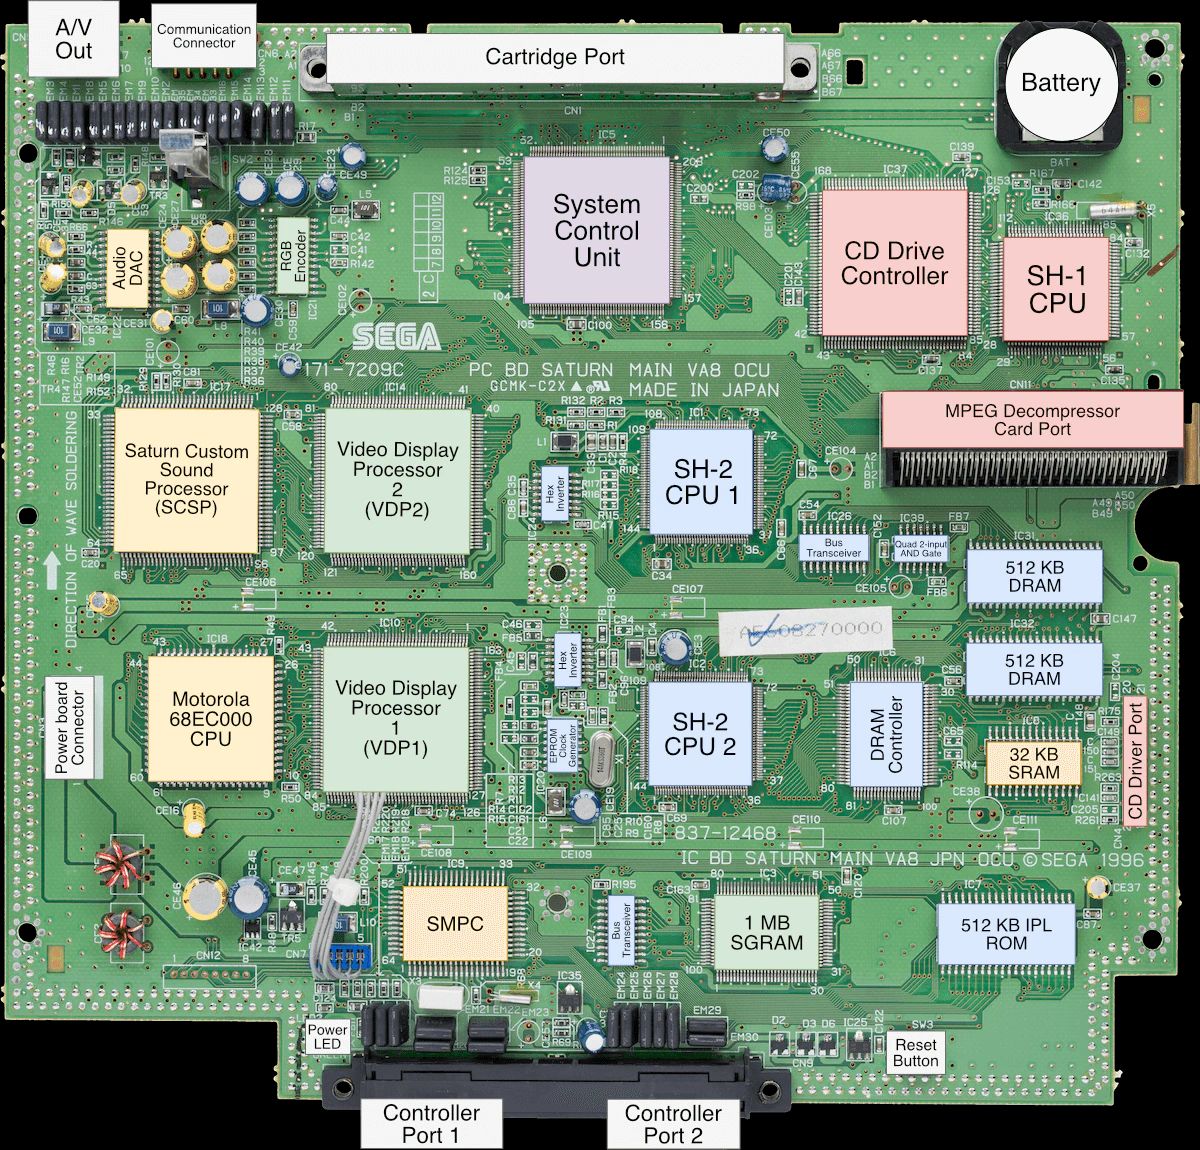
In the annals of game console history, the Sega Saturn is probably the most convoluted system of all time, even giving the Playstation 3 a run for its rings. Also known as the system on which Sega beached itself before its Dreamcast swansong, it featured an incredible four CPUs, two video processors, multiple levels and types of RAM, all pushed onto game studios with virtually no software tools or plan how to use the thing. An introduction to this console’s architecture is provided by [Rodrigo Copetti], which gives a good idea of the harrowing task of developing for this system.

Launched in Japan in 1994 and North America and Europe in 1995, it featured a double-speed CD-ROM drive, Hitachi’s zippy new SH-2 CPU (times two) and some 3D processing grunt that was intended to let it compete with Sony’s Playstation. The video and sound solutions were all proprietary to Sega, with the two video processors (VDP1 & 2) handling parts of the rendering process which complicated its use for 3D tasks, along with its use of quadrilaterals instead of triangles as with the Playstation and Nintendo 64.

Although a lot of performance could be extracted from the Saturn’s idiosyncratic architecture, its high price and ultimately the competition with the Sony Playstation and the 1996 release of the Nintendo 64 would spell the end for the Saturn. Although the Dreamcast did not repeat the Saturn’s mistakes, it seems one commercial failure was enough to ruin Sega’s chances as a hardware developer.

Show That Sega Saturn Save Battery Who’s Boss

Breaking out the Sega Saturn out of the closet for a hit of 90’s nostalgia comes with its own set of compromises: the wired controllers, the composite video, and worst of all that dead CR2032 battery behind the backdoor. Along with the death of that battery went your clock and all those precious hours put into your game save files. While the bulk of us kept feeding the insatiable SRAM, a friendly Canadian engineer named [René] decided to fix the problem for good with FRAM.

The issue with the battery-backed memory in the Saturn stems from the particularly power-hungry factory installed SRAM chip. Normally when the console is plugged-in to a main power source the CR2032 battery is not in use, though after several weeks in storage the battery slowly discharges. [René’s] proposed solution was to use a non-volatile form of RAM chip that would match the pinout of the factory SRAM as close as possible. This would allow for easier install with the minimum number of jumper wires.

Enter the FM1808 FRAM chip complete with a whopping 256 kb of addressable memory. The ferroelectric chip operates at the same voltage as the Saturn’s factory SRAM, and has the added benefit of being able to use a read/write mode similar to that of the Saturn’s original memory chip. Both chips conform to a DIP-28 footprint, and only a single jumper wire on pin 22 was required to hold the FM1808 chip’s output-enable signal active-low as opposed to the active-high enable signal on the Saturn’s factory memory chip. The before and after motherboard photos are below:

After a quick test run of multiple successful read and writes to memory, [René] unplugged his Saturn for a couple days and found that his save files had been maintained. According to the FM1808 datasheet, they should be there for the next 45 years or so. The only downside to the upgrade is that the clock & calendar settings were not maintained upon boot-up and reset to the year 1996. But that’s nothing a bit of button-mashing through couldn’t solve, because after all wasn’t the point of all this to relive a piece of the 90s?

For more Sega Saturn goodness, check out how the Sega Saturn was finally cracked after 20 years.

Custom Buttons For Your Game Controller

Console gamers have relatively few options when it comes to hardware hacking, unless they wish to partake of some extreme modifications that threaten the very integrity of their machines. So without reaching for a Dremel, how can you insert a little individuality into the same standard components all your friends have?

It seems one answer is to customise your controller with some different buttons. There are commercial outfits that will supply your needs in this direction, but they aren’t always cheap, and plenty of older machines have no products available. This isn’t  a problem for [RockerGaming] though, who shows us how to cast your own set of custom buttons using a silicone mold taken from the originals.

The video is a step-by-step walkthrough of the molding process that could just as easily be applied to any other small plastic parts and is not unique to console buttons. The subjects come from a Sega Saturn controller, in the video a beige model, which raises a passing interest among European Hackaday scribes who remember the Saturn as a black console.

We see the preparation of the original buttons and mold. An acrylic golf ball trophy display case is pressed into service. (Who knew those were even a thing!) A dye is added to the two-part silicone to provide a visual mixing aid, and once the cast mold is separated from the buttons the final resin is poured into it. The cloned buttons are tidied up underneath with a Dremel, and the controller is reassembled.

A set of custom buttons will not improve your gaming, but underlying this is the fact that resin casting is a useful skill. It’s somewhere we’ve been before in depth, so it’s worth reading our guide from back in 2016.

Continue reading “Custom Buttons For Your Game Controller”

Cracking The Sega Saturn After 20 Years

When it was released 20 years ago, the Sega Saturn was by far the most powerful video game console available. It was a revolutionary device, had incredible (for the time) graphics, and a huge library of IP Sega could draw from. The Saturn was quickly overshadowed by the Sony Playstation, and soon these devices found themselves unused, unloved, and fetching high prices on the collectors market.

After finding a Sega Saturn on a trip to Japan, [jhl] decided he would like to write some code for this machine. Unlike earlier consoles, where Flash cartridges are readily available, or later consoles, where writing directly to the on-board storage is easy, bringing up a development environment for the Saturn isn’t easy. The best method is installing a mod chip and working off of burned CDs. Instead of writing a game or two for the Saturn, [jhl] got distracted for a few years and developed an optical drive emulator.

cracking-the-sega-saturn-thumb
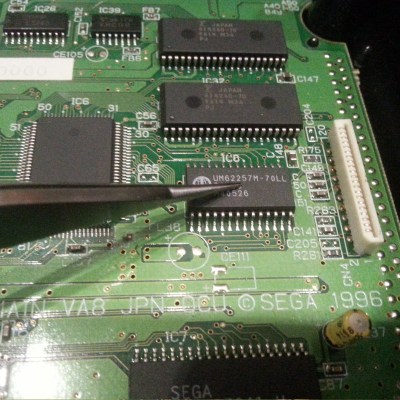
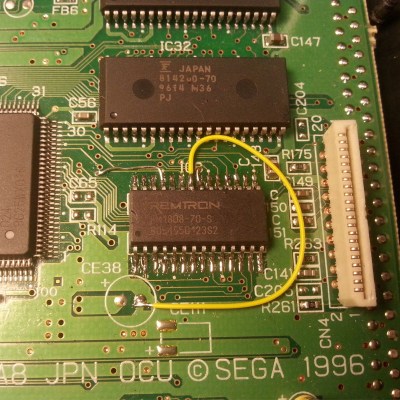
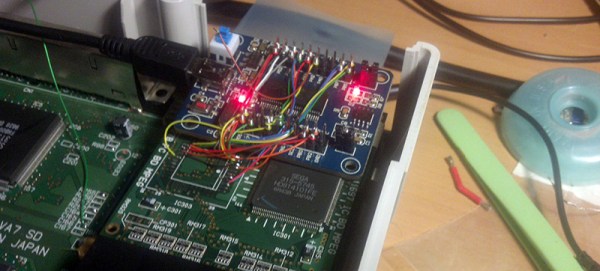
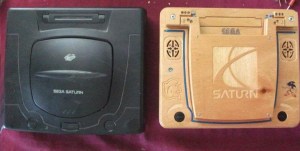
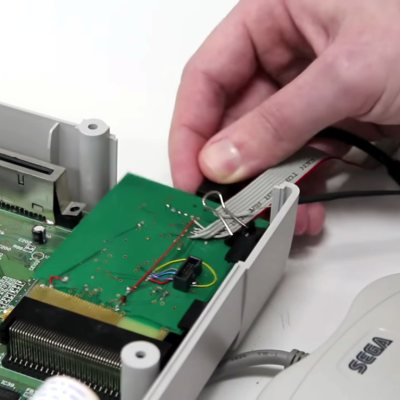
According to [jhl], the design of the Sega Saturn is tremendously complicated. There’s an entire chip dedicated to controlling the CD drive, and after some serious reverse engineering work, [jhl] had it pretty much figured out. The question then was how to load data onto the Saturn. For that. [jhl] turned to the internal expansion port on the Saturn. This internal expansion port was designed to accept an MPEG decoder card for playing video CDs on the Saturn, but the connector presents the entire bus. By attaching a Game Boy Flash cartridge, [jhl] was able to dump the ROM on the CD controller.

With a little bit of work, a fast ARM microcontroller, and a CPLD for all the logic glue, [jhl] was built an adapter to push CD data to the Saturn through this internal expansion port. Not only is this a boon for homebrew Saturn development, but this build also completely replaces the CD drive in the Saturn – a common failure point in this 20-year-old machine.

The formal release for this ultimate Saturn crack isn’t out yet, but it’s coming shortly, allowing anyone who still has a Saturn to enjoy all those very blocky games and develop their own games. You can check out a short, amateur documentary made on [jhl]’s efforts below.

Continue reading “Cracking The Sega Saturn After 20 Years”

Wooden Case Sega Saturn Laptop

CNC'ed Wooden Case for Sega Saturn

Remember the Sega Saturn? You know, that short-lived game system of the mid 90’s. Well, [c_mon] is still a fan and decided to make a portable version with a built in screen.

As you can see from the photos, the main case is made from wood, plywood to be exact. Several pieces of the plywood were cut out using a CNC Router and laminated together to achieve the full height needed to enclose the internal electronics. The finished case takes up a little less real estate than the original, however it is slightly taller.

You may recognize the screen as an old PSOne unit. The screen was taken part and housed in it’s own wooden enclosure which is hinged to the main case. The video is supplied to the screen by a composite output from the Saturn. There is no unique CD lid either, the screen functions as one when it is folded down. For sound there are a couple built in powered speakers that tap into the stock audio output.

To ad a little pizzazz, [c_mon] routed in a groove in the top to accept some EL wire. There are also some cool engravings in the wooden case, including the Saturn Automobile Manufacturer logo on the top of the screen lid…. whoops!

CNC'ed Wooden Case for Sega Saturn


Hackaday Links: April 11, 2012

This hurts our head

You know you can ‘freeze’ drops of water in mid-air by flashing a LED at the right time, right? Well, according to this video you don’t even need a strobing light; just use the frame rate of the camera. Much cooler if you don’t know how it works, in our humble opinion.

Now do Junkyard Wars!

[James Cameron] and [Mark Burnett] (the guy who created Survivor) are bringing Battlebots back to the Discovery Channel. The new show is called Robogeddon and calls upon the current talent in the fighting robot world. Our prediction? Someone is going to build an amazing piece of art that will be completely destroyed in the first round; a wedge with wheels will take the championship.

A steam engine made out of rocks

[Hansmeevis] just spent 230 hours hand carving a steam engine out of gems. It’s called “Dragon’s Breath” and it’s an amazing piece of work: the cylinder is carved out of quartz, while the flywheel, mount, and base are carved out of jasper, onyx, zugalite, and other semi precious gems. Amazing artistry and it works.

Don’t lose a finger on all that science over there

[Dr. W] is a science teacher in Saint-Louis, France. Next year, his students will be learning about reaction propulsion and impulse conservation. To demonstrate these properties, [Dr. W] hacked up an old vacuum cleaner in to a jet engine and built a Pitot tube to measure the 140 km/h wind speed. Google translation.

Circuit bending a Sega Saturn

Making cool glitched-up graphics from Ataris and Nintendos is old hat, but not much has been done with circuit bending slightly more modern consoles. [big pauper] found his old Sega Saturn in his grandma’s attic and wondered what secrets this forgotten box held. It turns out he can make some pretty cool sounds and even cooler glitched out graphics. The pic above is from Virtua Fighter; done correctly these glitched low-polygon graphics could easily find themselves in a very stylistic indie game.

Wireless Controllers For All Your Retro Systems

Remember those old wireless controllers made for the consoles of our youth like the NES and Super Nintendo? They didn’t work well, mostly owing to the fact they were built using the same infrared technology that is found in a remote control. Now that all the modern consoles are wireless, [micro] over at the nftgames forum decided to update his classic systems for wireless control.

The transmitters and receivers are built around an nRF24L01+ radio module that operates in the 2.4 GHz band. [micro] has the process of converting his controllers down to a science. He cuts the cord and wires the controller up to an AVR running at 16 MHz. The AVR sends this to the receiver where the button presses are sent through the original controller port. Basically, [micro] recreated a WaveBird controller for his NES, SNES, Saturn and N64.

The controllers are powered by internal lithium batteries, but the charging ICs are too expensive to put in each controller. To solve this problem, [micro] crafted a small external charging circuit that plugs into a 3.5mm jack on each controller. Check out [micro]’s controller demo after the break.

Continue reading “Wireless Controllers For All Your Retro Systems”