While it might seem quaint these days, we’ve met many makers and hackers who reach for a pen and a pad when learning something new or working their way through some technical problem. But even if you’re the type of person who thinks best when writing something out on paper, there’s still a good chance that you’ll eventually want to bring those notes and sketches into the digital realm. That’s where things can get a little tricky.
[Spencer Adams-Rand] recently wrote in with his clever solution for capturing written notes and pushing them into Notion, but the hardware design and digitization workflow is flexible enough that it could be adapted to your specific needs — especially since he was good enough to release all the files required to build your own version.
 Whether they are hand-written notes, old photographs, or legal documents, digitization boils down to taking a high resolution digital photo of the object and running it through the appropriate software. But getting good and consistent photos is the key, especially when you’re working your way through a lot of pages. [Spencer] started out just snapping pictures with his phone, but quickly found the process was less than ideal.
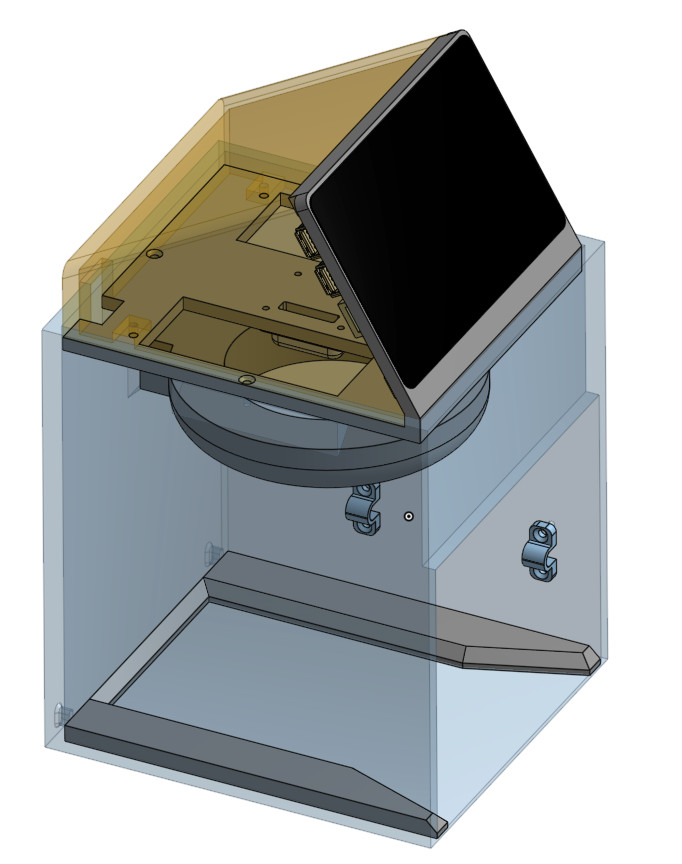
His custom scanning station addresses that first part of the problem: getting consistent shots. The images are captured using a Raspberry Pi 5 with attached Camera Module 3, while the 3D printed structure of the device makes sure that the camera and integrated lighting system are always in the same position. All he needs to do is place his notepad inside the cavity, hit the button, and it produces a perfect shot of the page.
Using a dedicated digitizing station like this would already provide better results than trying to freehand it with your phone or camera, but [Spencer] took things quite a bit farther. The software side of the project puts a handy user interface on the 5 inch touch screen built into the top of the scanner, while also providing niceties like a REST API and integration with the OpenAI Vision API for optical character recognition (OCR).
Those with an aversion to AI could certainly swap this out for something open source like Tesseract, but [Spencer] notes that not only is OpenAI’s OCR better at reading his handwriting, it spits out structured markdown-like data that’s easier to parse. From there it goes into the Notion API, but again, this could be replaced with whatever you use to collect your digital thoughts.
A device like this would go a long way towards answering a question we posed to the community back in January about the best way to digitize your documents.