Ceiling Tiles Give It Up For Christmas LED Ornaments

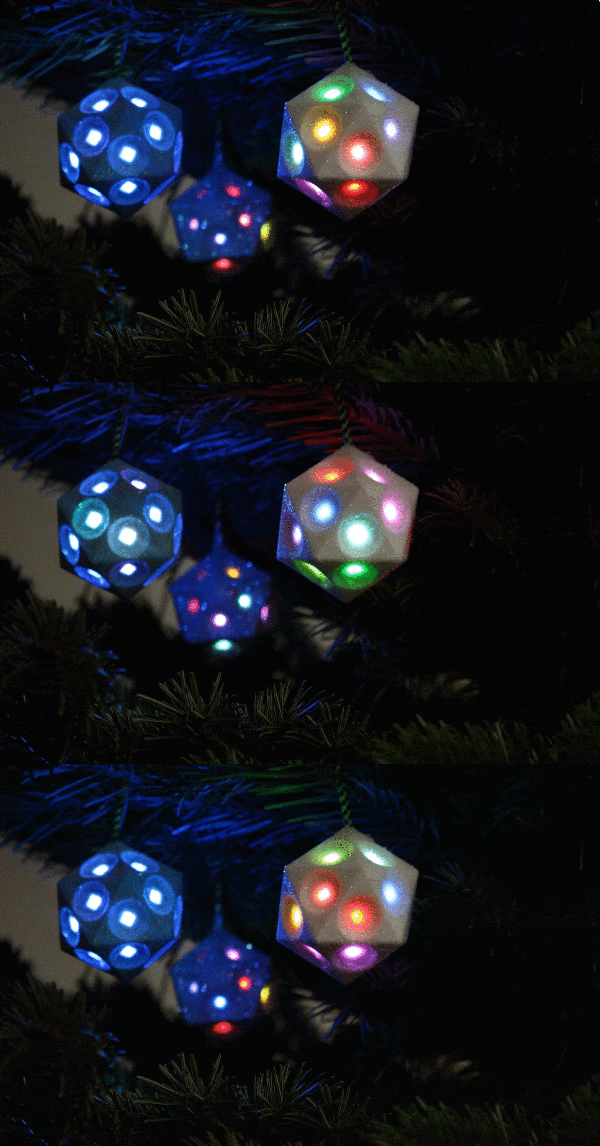
The great thing about holidays is that they always seem to require some shiny things. The modern version of shiny things seems to be LEDs and advances in technology being what they are, we now have amazing programmable LEDs. And programmable LEDs mean animated shiny things! Years ago, [wpqrek] made an LED ornament using discrete components. This year he revisited his ornament and decided to make a new, animated, RGB ornament.

[Wpqrek]’s build is based around five WS2812b strips connected to an Arduino Pro Mini. The ornament itself is a thick styrofoam ceiling tile cut into a star shape with a red-painted wooden frame. Decorated with baubles and stars, the LED strips start in the center and end up at each point in the star. With each strip connected in parallel to the Pro Mini, [wpqrek] used the Arduino Light Animation library to handle the animations.

[Wpqrek] says the result is too big for his tree, so he uses it as a stand-alone ornament. Perhaps using lighter materials would help — or getting a bigger tree! Check out the Arduino lighting controller or the Trompe-l’oeil Menorah for more holiday hacks.

Continue reading “Ceiling Tiles Give It Up For Christmas LED Ornaments”

What’s The Weather Like For The Next Six Hours?

The magic glowing orb that tells the future has been a popular thing to make ever since we realized we had the technology to bring it out of the fortune teller’s tent. We really like [jarek319]’s interpretation of the concept.

Sitting mystically above his umbrella stand, with a single black cord providing the needed pixies for fortune telling, a white cube plays an animation simulating the weather outside for the next six hours. If he sees falling drops, he knows to grab an umbrella before leaving the house. If he sees a thunderstorm, he knows to get the umbrella with the fiberglass core in order to prevent an intimate repeat of Mr. Franklin’s early work.
Continue reading “What’s The Weather Like For The Next Six Hours?”

Christmas Bauble Is Neither Spherical Nor Runs Arduino

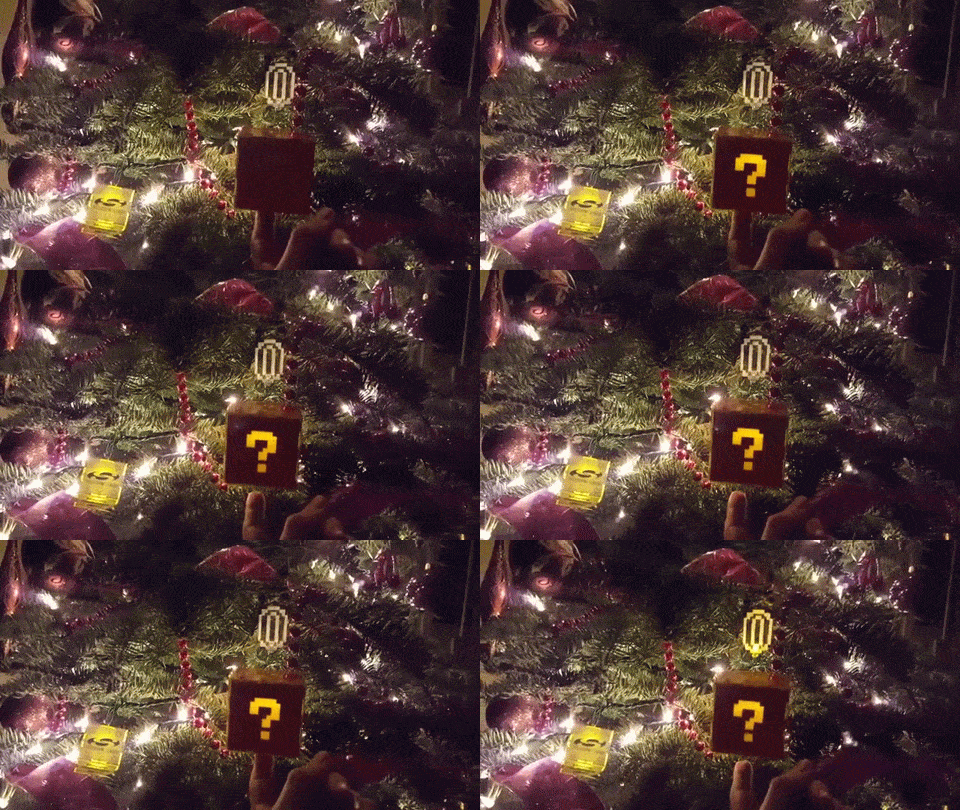
[Jordan Wills] was tasked by his company, Silicon Labs, to build some Christmas Baubles to give away to co-workers. While the commissioned units were designed to be simple battery and LED affairs, he decided to make one of his own with bells and whistles. His Mario themed Christmas Ornament uses a Silicon Labs FM972 micro controller, capacitive sensing, PWM controlled 8 bit audio, and blinky lights.

The interesting part is some of the construction techniques that he used. The finger-joint style cube is built from circuit boards. Electrical connections between panels were routed using solder wicking copper braid. That’s a interesting trick which we’ll keep in mind along with some of our favorite creative structural uses of PCB.

The top of the cube has four LED’s which light up the Mario “Question Mark” symbols on the four sides of the cube while the base contains all of the electronics. The outside of the base piece was a large copper plane to act as the capacitive sensing element. This meant all electronics needed to be surface mounted with tracks laid out on one side – which posed some layout challenges. Adding the Capacitive sense function was a cinch thanks to support from the in-house design team. PWM output from the micro controller takes care of audio, and the output is routed through a buffer to boost the signal. A bandpass filter then cleans up the PWM output before feeding it to the speaker.

Continue reading “Christmas Bauble Is Neither Spherical Nor Runs Arduino”

Hackaday Links: December 25, 2011

Ah, Christmas. That wonderful time of year when you can roll out of bed to the screams and wails of children, grab a hot cocoa, and spend several hours arguing with an 8-year-old about which LEGO set to build first. Simply magical. While you’re waiting for the Doctor Who Christmas special to come on, settle down with these wonderful Christmas-themed builds that came in over the last few weeks.

One step closer to Robot Santa

Here’s an interesting way to spice up your seasonal headwear. [Mark] took a Santa hat and added a string of multicolored LEDs to the brim. The lights were picked up at a drug store for a dollar. Control is through a simple push button connected to an ATtiny13. Press the button, the lights cycle in a different pattern. Very cool, so check out the video.

A holographic holiday tree

[Auger] posted this very cool light up Christmas tree decoration on Instructables. This tree is made up of three pieces of acrylic. Different designs were laser cut into each piece of plastic – candy canes for the ‘red’ piece, stars and tinsel for the ‘yellow’ piece, and the tree for the ‘green’ piece. LEDs of the respective colors are cemented to the bottom of each bit of plastic. It’s called light piping and is used everywhere. This is the first time we’ve seen three colors, though.

This is what nerds do, and it’s awesome

[Rickard Dahlstrand] was playing around with his phone trying to take deliberately fuzzy pictures of his tree. He noticed the dashes produced from the LED Christmas lights must be produced from PCM dimming. Going through the EXIF data in the picture, he found the exposure time was 1/17th of a second. 1/17 of a second = ~ 58 ms / 5 (cycles on the picture) = ~11 ms per cycle = ~100 Hz frequency on the PCM dimming. Of course this is just about 2 times the line frequency in [Rickard]’s native Sweden, so we’ll call this confirmed. There’s no blog post for this, but we’ve never seen a clearer example of applied geekery. Simply awesome.

Yeah, we measured [Rickard] on a nerd meter

In the spirit of giving, [Johannes] decided to tell the entire world exactly how nerdy he is. He built a ‘Nerd Alert’ meter out of an old 1950s Japanese multimeter. The old guts of the meter were chucked, and a simple amp made out of a transistor amplifies the current flowing through the user’s fingers. A neat scale ([Johannes] measures somewhere between Amiga Workbench and Space invaders) replaces the old, boring, number-based one. Again, no write-up, but here’s some awesome build pictures.

Finally a use for all those old radio tubes

[AUTUIN] took apart a vacuum tube with a blow torch and a diamond cutting wheel. Surprisingly, he was able to put it back together, but not before making a wonderful Christmas ornament. There are two copper wires inside the envelope that are the leads to a single orange-red LED. The whole thing is powered by a watch battery. We’ll be sure to reference [AUTUIN] next time we have to take apart a glass bulb, because he managed not to burn, cut or blind himself.

Six things in a links post? It’s a Christmas miracle!

[Darryl] sent in a nice tool to select and display all of the hacker/maker merit badges available from Adafruit. Oh, we’re still trying to figure out who to give 10 badges to. We’re giving away skull ‘n wrench badges to the top ten hacks ever featured here. Leave a note in the comments, or tell us who should win.

Holiday wishes

Now put the computer down and go spend some time with your families, or failing that, strangers. Of course there’s an all day Doctor Who marathon, and that thing isn’t going to watch itself…


Electronic Ornament Will Definitely Put [Dave] On Santa’s “naughty” List

mischievous-xmas-ornament

[Dave Vandenbout] says that his sister has gotten big on Christmas traditions, and decided that the whole family should start making ornaments for the tree each year. Not one to let a chance to tinker with electronics pass him by, [Dave] started brainstorming the perfect electronic ornament for their tree.

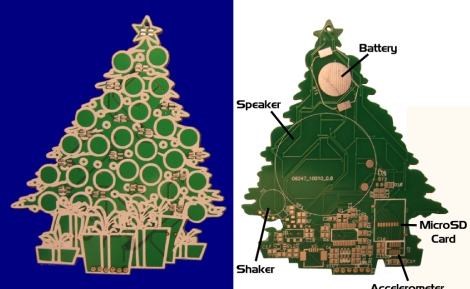
He settled on the Christmas tree design you see above, which will eventually hold 15 RGB LEDs. On the back of the board, he is planning on mounting a PIC 18F27J53 microcontroller, which will take care of the LED display along with his other more mischievous components.

You see, undeterred by his sister’s holiday spirit, [Dave] wants to arm the ornament with a foul mouth, and have it attempt to shake other ornaments off the tree. To do this, he’s installing a vibrating motor on the back of the PCB, along with a speaker and MicroSD card to provide the ornament’s sound bites.

To be honest, we think his idea is pretty entertaining, we can only imagine the look grandma will give when the cute, light up Christmas tree ornament blurts out, “Eat me Santa!”

We just hope he sends some video our way once he wraps up the project.

Lighted Acrylic Christmas Ornaments

If you’ve gone to the trouble of building your own CNC mill we know you’re always on the lookout for things to use it for. [Boris Landoni] wrote in with just the thing for the holiday season; a set of lighted acrylic Christmas ornaments.

One of the interesting properties of acrylic is how it reacts when edge-lit. The material pipes the light, until it bounces off of a disturbance in the surface. The first step is to design the outline of the ornament as all cut edges will glow. Next, [Boris] uses artCAM to design the internal parts to be cut. This application translates the relief cuts necessary to really make your design shine (sorry, we couldn’t resist). The best examples of this are the angel and candle seen above.

Each of these acrylic pieces has a slot cut on the bottom to hug an LED. [Boris] used small project boxes with a PCB for that diode, as well as a button battery for power.

360 Degree Photography Uses Very Easy Post-processing

[Pixel_Outlaw] has been working on a method to capture 360 images with his camera. He’s using a shiny Christmas ball ornament to reflect the entire room into the lens of the camera. In the unwrapped image you can make out the three legs of his tripod. In that snapshot he laid the ornament on the floor and pointed the camera straight down from above.

What catches our attention is the post processing he used to unwrap the image. He loaded up The Gimp, an open source image manipulation program, and used just three steps to unwrap the image. First he cropped the picture so that it was square and the spherical ornament was perfectly centered. Then he ran the polar coordinates filter. Finally he scaled the image, setting the width to be Pi times the height. Works pretty darned well for something that doesn’t take much fiddling.

The ornament wasn’t perfectly smooth (or maybe it was a bit dirty) but you can get a much better starting image if you use a bulb with a silver reflector like we saw in this older hack.