Old TV Vacuum Tube Turned DIY X-Ray Machine

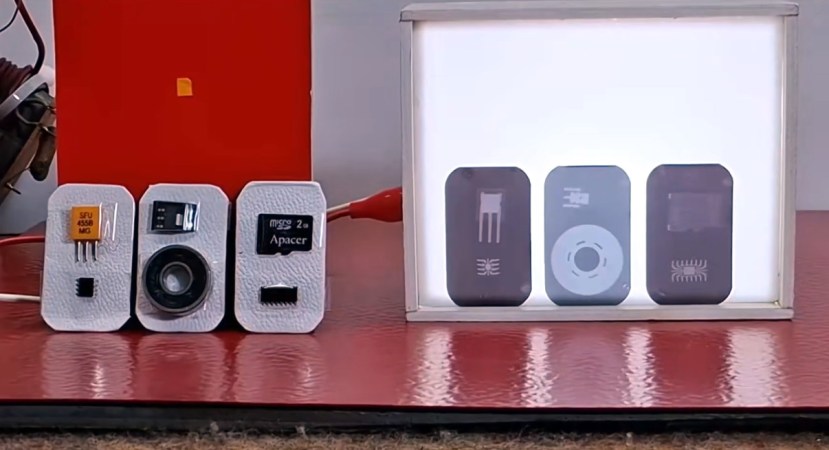
Just because you probably shouldn’t make a DIY X-ray machine, doesn’t mean nobody would. [mircemk] shows off his DIY unit, how it works, how to use it safely and of course, some pretty X-ray photos of household objects.

The machine repurposes a DY86 vacuum tube from old CRT TVs to emit X-ray radiation. To drive the tube without blowing it up, a rather specialized series of power supplies is needed; a low-voltage DC power supply powers a high-voltage AC inverter, which is then sent through first a transformer, and then a Crockfort-Walton voltage multiplier, to reach the incredibly high voltages needed for such a vacuum tube’s radiation emission to reach X-rays. Naturally, this didn’t go to plan first try, leading to the unfortunate demise of three vacuum tubes (as well as another three which had already lost their vacuums).

Now how do you capture an image with X-rays for a light source? With dental X-ray photo films of course! The dental film is placed behind the object to be scanned, the transmitted X-rays making up the resulting image. After going through the standard process of developing for about 30s, washing, fixing for about half an hour, and washing again, the photos become clearly visible. The best results were obtained at a distance of 10-15 cm an an exposure time varying from 15 minutes to an hour depending on material hardness.

Continue reading “Old TV Vacuum Tube Turned DIY X-Ray Machine”

The Problem Of Making A Good Metal-To-Glass Seal

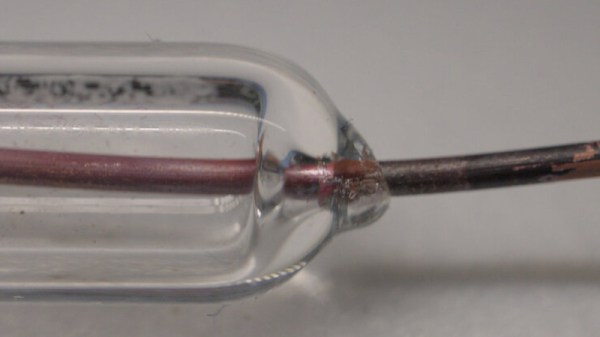
If you’ve ever taken a close look at a vacuum tube, you’ll have seen the seals around the pins that keep everything air-tight while providing the the device’s electrical contacts. As [maurycyz] finds out, it’s not an easy process to get right.

The problem is one of both chemistry and thermal expansion, as while a good seal can be made between glass and red copper oxide, it remains very difficult indeed to stop the glass cracking on cooldown due to differing thermal expansion properties. We’re led through a variety of experiments including surface treatments and flattening the metal to a sheet, with varying pros and cons. The most successful seal on the page comes from very thin tungsten wire, though hardly the most practical conductor for a vacuum tube.

It’s a fascinating investigation for the casual reader, taking them into the properties of metal-glass bonds and the difficulties involved in making them. We have even more respect for the people who make their own tubes after reading it.

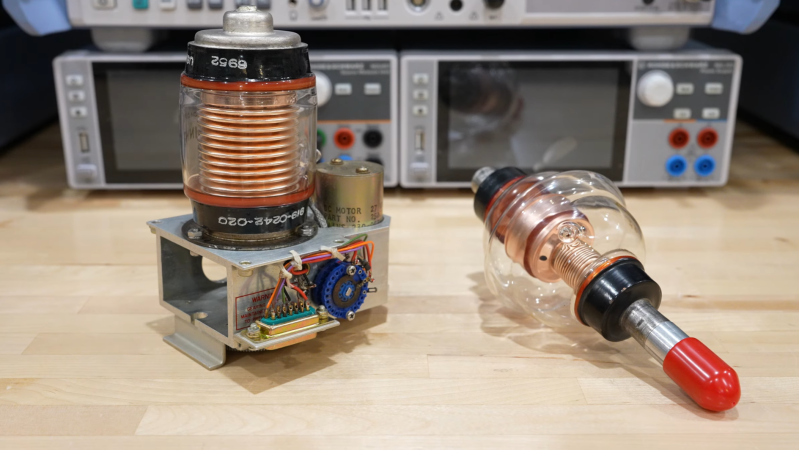
A pair of glass vacuum tubes can be seen on a workbench, each with complex copper structures inside. One is mounted on top of a metal chassis with a motor and some other circuitry visible.

Taking A Look At Variable Vacuum Capacitors

Variable capacitors may be useful, but the air gap that provides their capacitance is their greatest weakness. Rather than deal with the poor dielectric properties of air, some high-end variable capacitors replace it with a vacuum, which presents some obvious mechanical difficulties, but does give the resulting capacitor a remarkable quality factor, high-voltage performance, and higher capacitance for plate area than their air-gapped brethren. [Shahriar] of [The Signal Path] managed to acquire a pair of these and took a detailed look at their construction and performance in a recent video.

Continue reading “Taking A Look At Variable Vacuum Capacitors”

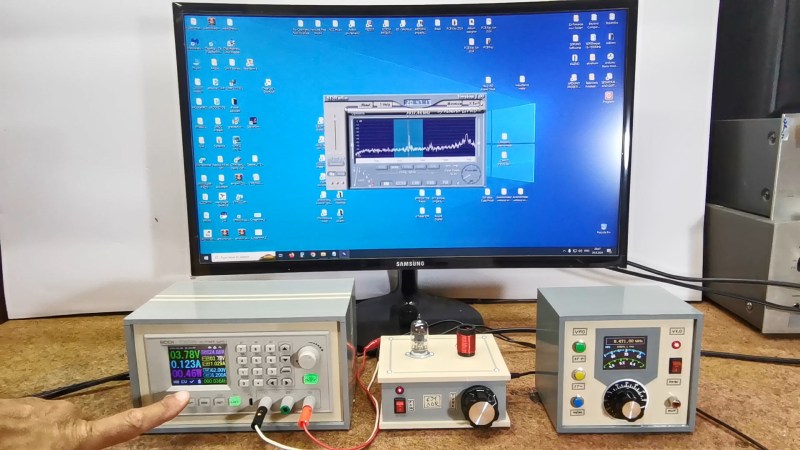
The one-tube radio setup, in front of a PC monitor

Single Tube SDR Is A Delightful Mix Of Old And New

Software Defined Radio (SDR) is the big thing these days, and why not? A single computer can get rid of a room full of boat anchors, and give you better signal discrimination than all but the best kit. Any SDR project needs an RF receiver, and in this project [mircemk] used a single 6J1 vaccum tube to produce an SSB SDR that combines the best of old and new. 

Single-tube radios are a classic hack, and where a lot of hams got started back in the day, but there is a reason more complicated circuits tend to be used. On the other hand, if you can throw a PC worth of signal processing at the output, it looks like you can get a very sensitive and selective single-sideband (SSB) receiver. 

The 6J1 tube is convenient, since it can run on only 6 V (or down to 3.7 as [mircemk] demonstrates). Here it is used as a mixer, with the oscillator signal injected via the screen grid. Aside from that, the simple circuit consists of a receiving coil, a few resistors and a variable capacitor. How well does it work? Quite well, when paired with a PC; you can judge for yourself in the video embedded below.

We’ve featured a lot of [mircemk]’s projects over the years, like this handsome OLED VU meter, or this frequency analyzer with a VFD  and even a virtual pinball cabinet made from scraps, among many others.

Continue reading “Single Tube SDR Is A Delightful Mix Of Old And New”

[Usagi Electric’s] Bendix G15 Gets DC Power

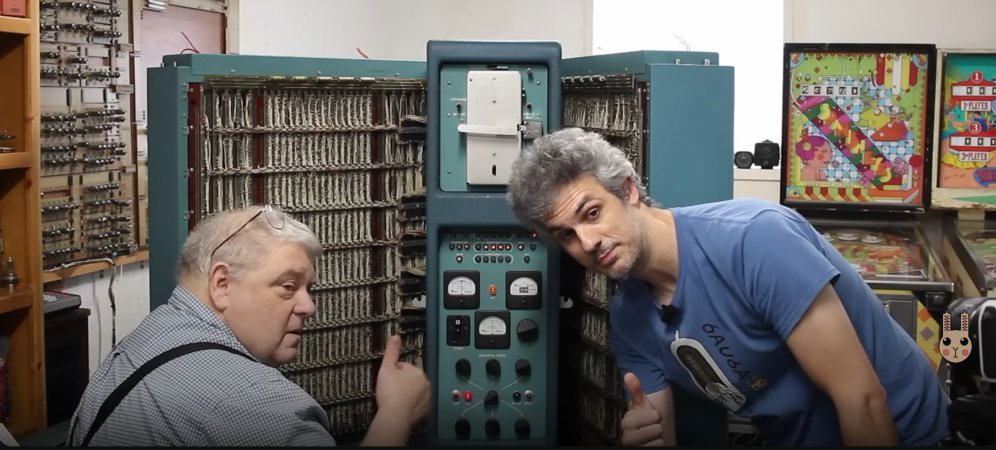
[Usagi Electric] is breathtakingly close to having his Bendix G15 vacuum tube computer up and running. This week he is joined by a new friend, [Lloyd] who is restoring a G15 as well. [Lloyd] used to repair the Bendix Computers back in the 1970s, so he’s privy to lots of practical knowledge you can’t find in the manuals.

The goal this week was to apply DC power to the G15.  The AC power spins the fans and makes the tubes start glowing. But DC makes the magic happen.  That’s when the boot sequencers start running, sending data to the drum, testing various parts of the machine, and finally, loading software from the paper tape reader.

Since this was a computer from the 1950’s, powering up DC might work, or could let the magic smoke out.  The only way to find out was to push the big green “Reset” button.

The first attempt was stymied by a blown fuse. The second attempt resulted in real live blinkenlights. The data and status lights on the Bendix lit up for the first time in decades. The only thing missing was the sound of the tape drive.  A bit of digging proved that the problem wasn’t in the computer, but in the typewriter user console. The typewriter is supposed to connect the SA line to the -20 volt DC rail. That wasn’t happening though. Since that expected voltage wasn’t present on the SA line at the Bendinx, the boot process halted.

Unfortunately, the typewriter has “somebody’s been here before” syndrome – in addition to age, there are a number of odd modifications.  It’s going to take [Usagi] a bit of time to dig into it and figure out what’s wrong.

The good news is that the computer is using its massive spinning drum drive. [Usagi] was able to verify this with the test panel inside the machine. One button will write a pulse to the drum, and another will erase it. Manipulating these buttons, [Usagi] could see the results on an oscilloscope.  This may sound simple – but just getting to this point means an incredibly complex chain of tube, relay, and mechanical logic has to work.  Bravo [Dave] and [Lloyd]!

Continue reading “[Usagi Electric’s] Bendix G15 Gets DC Power”

Plight Of The Lowly Numitron Tube

In the 60’s and 70’s there were many ways to display numeric data. Nixie tubes, Vacuum Florescent Displays (VFD), micro projection systems, you name it. All of them had advantages and drawbacks. One of the simplest ways to display data was the RCA Numitron. [Alec] at Technology Connections has a bit of a love/hate relationship with these displays.

The Numitron is simply a seven-segment display built from light bulb filaments. The filaments run at 5 V, and by their nature are current limited.  Seven elements versus the usual ten seen in Nixie tubes reduced the number of switching elements (transistors, relays, or tubes) needed to drive them, and the single low-voltage supply was also much simpler than Nixie or even VFD systems.

Sounds perfect, right? Well, [Alec] has a bone to pick with this technology. The displays were quite dim, poorly assembled, and not very pleasing to look at. RCA didn’t bother tilting the “8” to fit the decimal point in! Even the display background was gray, causing the numbers to wash out in ambient light. Black would have been much better. In [Alec]’s words, the best way to describe the display would be “Janky,” yet he still enjoys them. In fact, he built a fancy retro-industrial-themed clock with them.

The Numitron was not a failure, though — we know variants of this display ended up in everything from gas pumps to aircraft cockpit gauges. You can even build an LED-based replica clock — no glowing filaments necessary.

Continue reading “Plight Of The Lowly Numitron Tube”

A Tube Tester Laid Bare

There’s still a mystique around vacuum tubes long after they were rendered obsolete by solid state devices, and many continue to experiment with them. They can be bought new, but most of us still come to them through the countless old tubes that still litter our junk boxes. But how to know whether your find is any good? [Rob’s Fixit Shop] took a look at a tube tester, once a fairly ubiquitous item, but now a rare sight.

To look at it’s a box with an array of tube sockets, a meter, and a set of switches to set the pinout for the tube under test. We expected it to use a common-cathode circuit, but instead it measures leakage between the grid and the other electrodes, a measure of how good the vacuum in the device is. In a worrying turn this instrument can deliver an electric shock, something he traces to a faulty indicator light leading to the chassis. We are however still inclined to see it as anything but safe, because the lack of mains isolation still exposes the grid to unwary fingers.

All in all though it’s an interesting introduction to an unusual instrument, and given a suitable isolating transformer we wouldn’t mind the chance to have one ourselves. If you need to test a tube and don’t have one of these, don’t worry. It’s possible to roll your own.

Continue reading “A Tube Tester Laid Bare”