Building A Motor Feed For The UE1 Vacuum Tube Computer’s Paper Tape Reader

Building a paper tape reader by itself isn’t super complicated: you need a source of light, some photoreceptors behind the tape to register the presence of holes and some way to pull the tape through the reader at a reasonable rate. This latter part can get somewhat tricky, as Usagi Electric‘s [David Lovett] discovered while adding this feature to his vacuum tube-era DIY reader. This follows on what now seems like a fairly simple aspect of the photosensors and building a way to position said photosensors near the paper tape.

As the feed rate of the paper tape is tied to the reading speed, and in the case of [David]’s also contains the clock for the custom tube-based UE1 computer, it determines many of the requirements. With 8 bits per line, the tape forms the ROM for the system, all of which has to be executed and used immediately when read, as there is no RAM to load instructions into. This also necessitates the need to run the tape as an endless loop, to enable ‘jumping’ between parts of this paper-based ROM by simple masking off parts of the code until the desired address is reached.

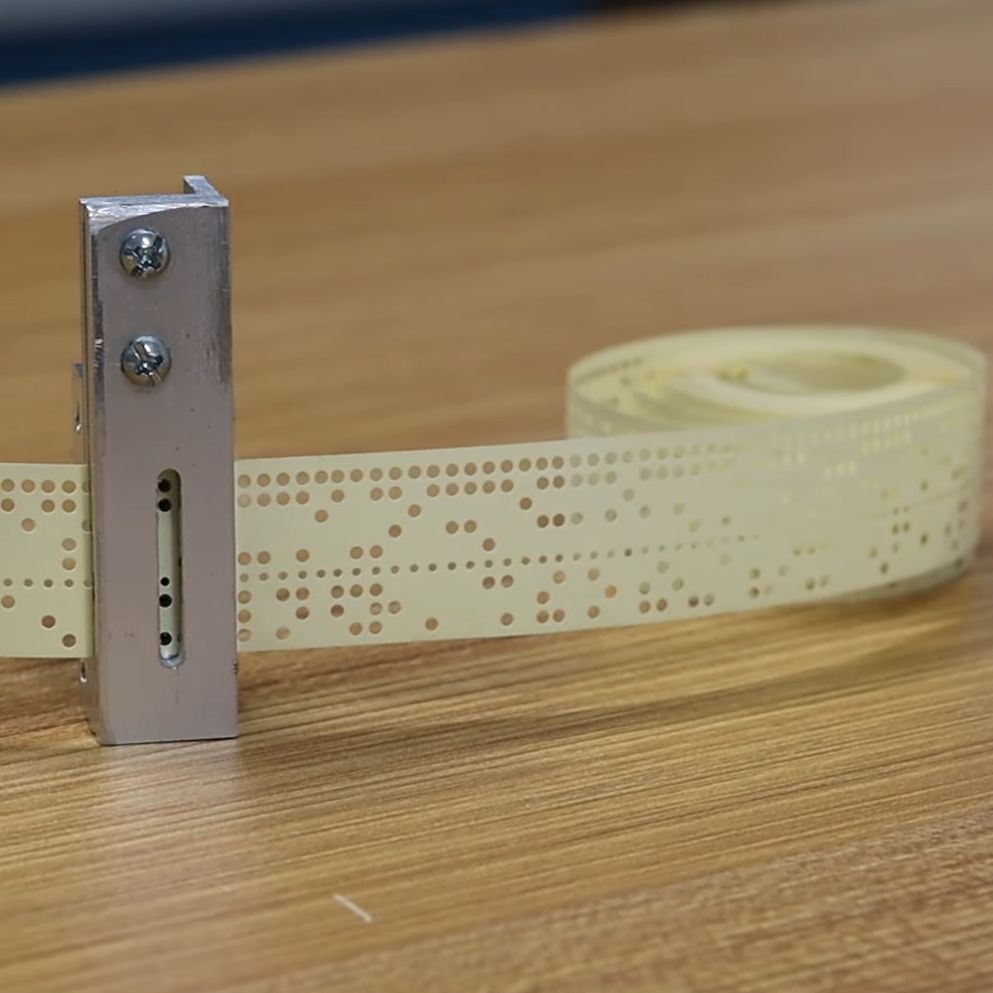
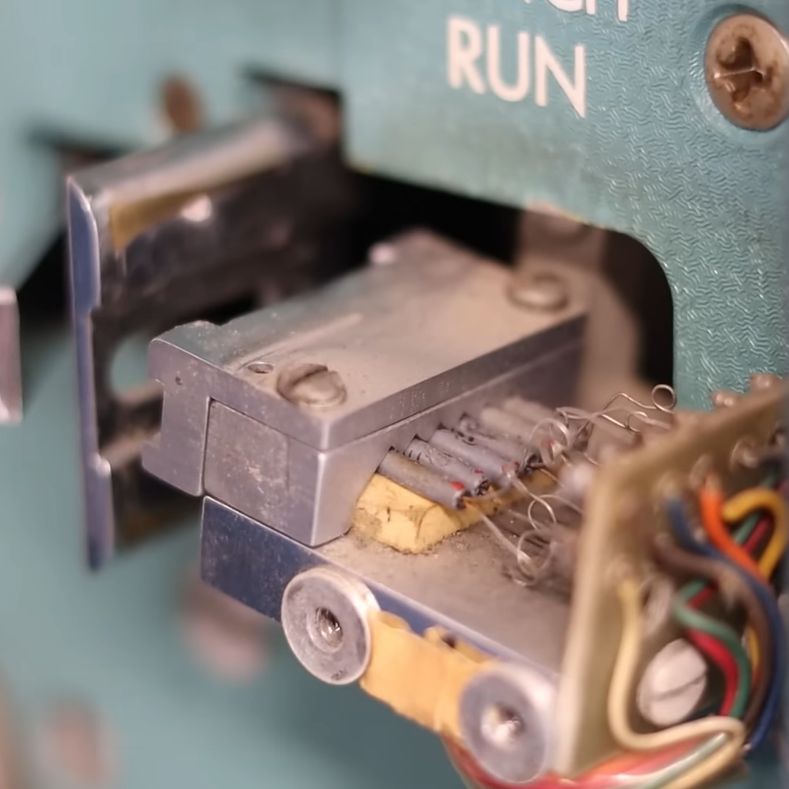
For the motor a slot car motor plus speed-reduction gear was chosen, with a design to hold these then designed in FreeCAD. Courtesy of his brother’s hobby machine shop and a CAD professional’s help, producing these parts was very easy, followed by final assembly. Guides were added for the tape, not unlike with a cassette player, which allowed the tape to be pulled through smoothly. Next up is wiring up the photodiodes, after which theoretically the UE1 can roar into action directly running programs off paper tape.

Continue reading “Building A Motor Feed For The UE1 Vacuum Tube Computer’s Paper Tape Reader”

Usagi Electric’s Paper Tape Reader Is Ready To Hop With The Tube Computer

After previously working out a suitable approach to create a period-correct paper tape reader for his tube-based, MC14500B processor-inspired computer, [David Lovett] over at the Usagi Electric farm is back with a video on how he made a working tape reader.

The assembled paper tape reader as seen from the front with tape inserted. (Credit: David Lovett, Usage Electric, YouTube)

The tape reader’s purpose is to feed data into the tube-based computer, which for this computer system with its lack of storage memory means that the instructions are fed into the system directly, with the tape also providing the clock signal with a constant row of holes in the tape.

Starting the tape reader build, [David] opted to mill the structural part out of aluminum, which is where a lot of machining relearning takes place. Ultimately he got the parts machined to the paper design specs, with v-grooves for the photodiodes to fit into and a piece to clamp them down. On top of this is placed a part with holes that line up with the photodiodes.

Another alignment piece is added to hold the tape down on the reader while letting light through onto the tape via a slot. After a test assembly [David] was dismayed that due to tolerance issues he cracked two photodiodes within the v-groove clamp, which was a hard lesson with these expensive (and rare) photodiodes.

Although tolerances were somewhat off, [David] is confident that this aluminum machined reader will work once he has it mounted up. Feeding the tape is a problem that is still to be solved.  [David] is looking for ideas and suggestions for a good approach within the limitations that he’s working with. At the video’s end, he mentions learning FreeCAD and 3D printing parts in the future.  That would probably not be period-correct in this situation, but might be something he could get away with for some applications within the retrocomputing space.

We covered the first video and the thought process behind picking small (1.8 mm diameter) photodiodes as a period-correct tape hole sensor for a 1950s-era computing system, like the 1950s Bendix G-15 that [David] is currently restoring.

Continue reading “Usagi Electric’s Paper Tape Reader Is Ready To Hop With The Tube Computer”

Building A Paper Tape Reader To Read Bytes

Over at the Usagi Electric farm, [David Lovett]’s custom 1-bit, vacuum tube-based computer (UEVTC for short) has been coming along well the past years, matching and exceeding the Motorola MC14500B 1-bit industrial control unit (ICU) that it is heavily inspired by. What is still missing, however, is a faster way to get data into the computer than manually toggling switches. The obvious choice is to make a (punched) paper tape reader, but how does one go about this, and what options exist here? With a few historical examples as reference and the tape reader on the impressive 1950s Bendix G-15 which [David] happens to have lounging around, [David] takes us in a new video through the spiraling complexity of what at first glance seems like a simple engineering challenge.

Photodiodes in the tape reader of the Bendix G-15. (Credit: David Lovett, Usagi Electric)

Punched paper tape saw significant use alongside punched paper cards and magnetic tape, and despite their low bit density, if acid-free paper (or e.g. mylar) is used, rolls of paper tape should remain readable for many decades. So how to read these perforations in the paper? This can be done mechanically, or optically, with in both case the feedrate an important consideration.

Right off the bat the idea of a mechanical reader was tossed out due to tape wear, with [David] digging into his stack of photodetector tubes. After looking at a few rather clunky approaches involving such tubes, the photodiodes in the Bendix G-15’s tape reader were instead used as inspiration for a design. These are 1.8 mm diameter photodiodes, which aren’t super common, but have the nice property that they align exactly with the holes in the paper tape.

This left building a proof-of-concept on a breadboard with some incandescent bulbs and one of the photodiode to demonstrate that a valid logic signal could be produced. This turned out to be the case, clearing the construction of the actual tape reader, which will feature in upcoming videos.

Continue reading “Building A Paper Tape Reader To Read Bytes”

Homebrew Reader Brings Paper Tape Programs Back To Life

We may be a bit biased, but the storage media of yesteryear has so much more personality than that of today. Yes, it’s a blessing to have terabyte SD cards smaller than your pinky nail and be able to access its data with mind-boggling speed. But there’s a certain charm to a mass storage device that can potentially slice off your finger.

We’re overstating the dangers of the venerable paper tape reader, of course, a mass storage device that [David Hansel] recreated a few years back but we only just became aware of. That seems a bit strange since we’ve featured his Arduino-based Altair 8800 simulator, which is what this tape reader is connected to. Mechanically, the reader is pretty simple — just a wooden frame to hold the LEGO Technic wheels used as tape reels, and some rollers to guide the tape through a read head. That bit is custom-made and uses a pair of PCBs, one for LEDs and one for phototransistors. There are nine of each — eight data bits plus the index hole — and the boards are sandwiched together to guide the paper tape.

The main board has an ATmega328 which reads the parallel input from the read head and controls the tape motor. That part is important thanks to Altair Basic’s requirement for a 100- to 200-ms delay at the end of each typed line. The tape reader, which is just being used as sort of a keyboard wedge, can “type” a lot faster than that, so the motor speed is varied using PWM control as line length changes.

Continue reading “Homebrew Reader Brings Paper Tape Programs Back To Life”

Machine Teaches Morse Code

If you are a ham radio operator of a certain age, you probably remember ads for “The Instructograph,” a mechanical device for learning Morse code. [Our Own Devices] has an ancient specimen of the machine and shows us how it works in the video below. The machine is a model of simplicity. You wind up a spring-driven motor like you would for an old record player or music box. A slider sets the playback rate, and paper tape starts to spin.

The paper tape looks like computer tape, but since it only has literal long and short notches, it has two distinct sides. When you learned one set of messages, you could flip the tape over and get more practice that way. How did the machine read the paper tape? With a mechanical contact. Literally, if the paper had a hole in it, you made the circuit. If it didn’t, the circuit was broken. A buzzer and batteries or some other kind of sounder was all you needed.

The company was in business for 50 years. The newer versions had more electronics, but they always used the paper tape mechanism to store the code practice sessions. A 1962 ad noted that the machine could play back the tapes from three words a minute up to 40. You could buy or rent the machine, and we always assumed it was pretty pricey for its day. Around 1965, a new unit would cost $53 but did not include a headset or a key. So that was actually more reasonable than we expected. In 1965, a brand-name clock radio cost about $50, so it wasn’t any more than that.

Everyone has their own favorite method for learning code, especially [Ludwig Koch]. At least you don’t have to learn Alex-style.

Continue reading “Machine Teaches Morse Code”

Paper Punching Machine Looks Like Cute Piece Of Computer History Past

Computing used to run on punch cards. Great stacks of cards would run middling programs, with data output onto more punched cards in turn. [Nii] has built a machine in this vein, capable of punching binary into paper tape. 

The machine is run by a stepper motor, which is charged with feeding the paper tape through the machine in steady steps. A series of vertically-actuated solenoids punch holes in the paper tape as directed. The machine buzzes and clicks away like the best electromechanical computing devices of the mid-century era.

To what end, we couldn’t possibly say. One user noted the machine was punching seemingly random binary into the paper tape, and [Nii] has not provided any explanation as to the machine’s higher purpose. Regardless, whatever it is doing, it looks like it’s doing it well. Feel free to speculate in the comments.

Impressively, the petite device will be demonstrated at MF-TOKYO, the 7th Annual Metal Forming Fair in Tokyo this year. We’re sure the clickity-clack will be muchly appreciated in person.  Video after the break.

Continue reading “Paper Punching Machine Looks Like Cute Piece Of Computer History Past”

Let’s Listen To A Tape — Paper Tape

These days, data is as likely as not to be “in the cloud.” Otherwise, it’s probably on a USB flash drive or SD card. But in the old days, paper tape was a widespread way to store and retrieve data. A common way to start the day at the office was to toggle in a few dozen bytes of bootloader code, thread a bigger bootloader tape into your TeleType paper tape reader, and then get your coffee while the more capable bootloader clunked its way into memory. Then you could finish your brew while loading the tape with your compiler or whatever you wanted. [Scott Baker] has a Heathkit H8 and decided using a paper tape machine with it and some of his other gear would be fun.

Instead of a TeleType, [Scott] picked up a used paper tape machine from FANUC intended for the CNC industry. They are widely available on the surplus market, although a working machine might run you $500. [Scott] paid $200, so he had some work to do to make the unit operational.

Paper tape had a few varieties. For computer work, you usually had a tape that could hold eight holes across, one for each bit in a byte. However, there are also 6-bit and 5-bit tapes for special purposes or different encodings (old TeleTypes used 5-bit characters in Baudot). The paper choice varied too. You could get plain paper, oiled paper, which maybe didn’t jam as often, and Mylar, which is less likely to shred up when it does jam.

To make things even more difficult, the machines all worked a little differently as well. Sure, punches almost all use solenoids. But the tape transport was sometimes a pinch roller and sometimes a sprocket-style drive. Reading the holes could be done with mechanical contacts or optically. Some punches left little “hanging chads” on the tape, so you didn’t have to empty a confetti box to throw away the chad.

The repair job was interesting. Inside the machine is an 8051 microcontroller. There was no clock, and the circuit used two custom modules. One was simply a crystal, and the other was an oscillator. Removing both allowed a modern can oscillator to replace both modules. The next problem was a fried serial output driver. Replacing that got things working except for random resets due to a faulty brown-out reset circuit. That was easy to fix, too.

Of course, if you are really cheap, it is easy to make a paper tape reader from 8 phototransistors, and pulling tape through by hand isn’t unheard of. It can even talk USB. We’ve even seen a conference badge that can read tapes.

Continue reading “Let’s Listen To A Tape — Paper Tape”