We see a lot of video game tech coming out of the three console giants (Microsoft, Sony, and Nintendo). With one look we can usually predict what is going to be a flop. Case and point is the Wii U whose sales have been less than extraordinary and Sony Move which is motion control directed as hardcore games who we believe are perfectly happy with the current evolution of their dual shock controllers. But this time around we think Microsoft has it nailed. They’re showing off technology they call IllumiRoom which uses a projector to bring your entire gaming room into the experience.
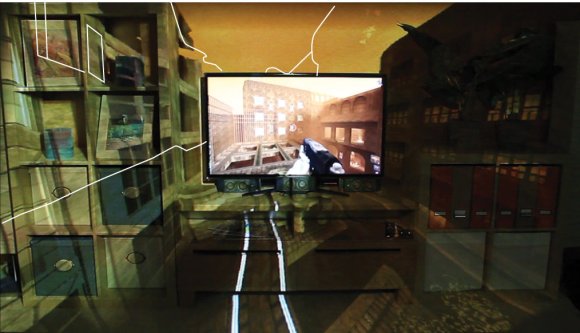
The image above is not doctored. This is a picture of IllumiRoom in action. A projector on the coffee table automatically calibrates to the room (using Kinect 3D data for mapping) in order to show realistic graphic rendering on the non-flat projection surfaces. In our mind, this comes straight out of Kinect hacking projects like the Hadouken projector. With this in place, the game designers are given free rein to come up with all kinds of different ways to use the feature. Stick with us after the break to see what they’ve developed.
Continue reading “Microsoft IllumiRoom Breaks Your Video Game Out Of Its Television Prison”