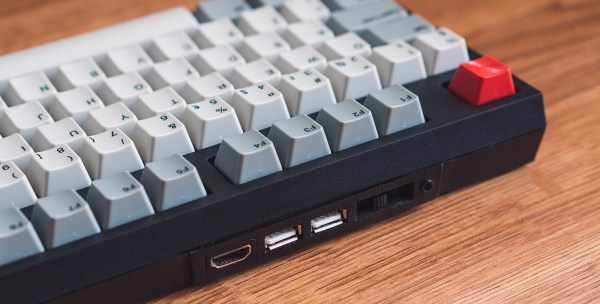
[b10nik] wrote in to tell us about a pretty sweet project that he just finished up. It’s a mechanical keyboard with an integrated Raspberry Pi 2 Model B inside.
[b10nik] purchased a new Filco Ninja Majestouch-2 keyboard just for this project. Although it may make some people cringe, the keyboard was immediately taken apart in order to find an open cavity for the Raspberry Pi. Luckily there was space available towards the left rear of the keyboard case.
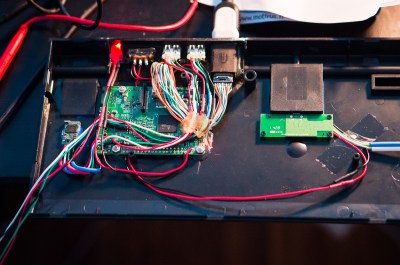 If you are familiar with the Raspberry Pi 2 Model B, you know that all of the connections are not on the same side of the board. The USB, audio, HDMI and Ethernet jacks were removed from the PCB. The Ethernet port is not needed since this hack uses WiFi, but those those other ports were extended and terminated in a custom 3D printed I/O panel . The stock keyboard case had to be cut to fit the new panel which results in a very clean finished look.
There’s one more trick up this keyboard’s sleeve, it can be used with the internal Raspberry Pi or be used as a standard keyboard. This is done by way of a FSUSB30MUX USB switch IC that completely disconnects the Raspberry Pi from the keyboard’s USB output.
For another RaspPi/Keyboard solution, check out this concept from a few years ago using a Cherry G80-3000 mechanical keyboard.

 Like most hardware builds for Kerbal Space Program, [lawnmowerlatte] is using a few user-made plugins for
  [Gabriel]