Hacking A Flatbed Scanner To Scan Very Large Documents

lds

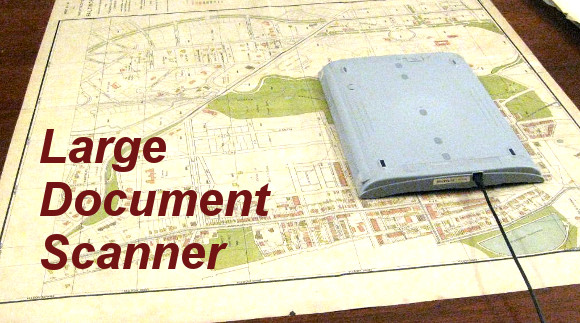
When you need to scan really large documents, camera setups can get pretty expensive. There are professionals that do it, but they are fairly pricey too. What if you need to do it on the cheap? A flatbed scanner would be perfect, but the lip on the edge of most flatbed scanners keeps the document from touching the platen properly. [Matthew] decided to hack his Canon LiDE 90 scanner to use it in a face-down format. By removing the top of the case, and making a couple extra tweaks, the scanner can now lay flat and simply be moved in a grid.

Once you have the images, you’ll need a way to stitch them together. [Matthew] points to this tutorial, but he awesomely decided to write a little Python script to make it all happen automatically. We imagine that script might be useful for more than just this project.

We’ve seen some other scanners recently, but this one is probably the easiest for the majority of hobbyists to achieve with parts on hand.

Scratch-built Gigapixel Scanner

scratch-built-gigapixel-scanner

The presence of a camera in this image may be a bit confusing since we’re calling it a scanner. What’s actually going on is that macro-images this piece of art are being captured automatically. The multiple shots will later be assembled into one fascinatingly high-resolution image. The CNC scanner rig is [Charlie Romer’s] summer project.

Unfortunately [Charlie] hasn’t yet collected all the information on the project into one place. After the break you’ll find more images, as well as a few demo videos. The best place to start is probably his proof-of-concept from this Spring. He shows a single-axis CNC mount for the camera. It takes an entire row of images. The assembled photo from that test is shown below. We believe the faint yellow dots in the macro part of the example are fingerprints purposefully left by the printer called printer stenography to help prevent forgery.

The larger rig uses movement on two axes. The idea is that the artwork will be perfectly positioned so that manual focus set at one point will work along all points in the capture routine. He’s using a lamp for a light source but we’re sure he will upgrade so something like a ring light as the project continues.

Continue reading “Scratch-built Gigapixel Scanner”

3D Scanner With Remarkable Resolution

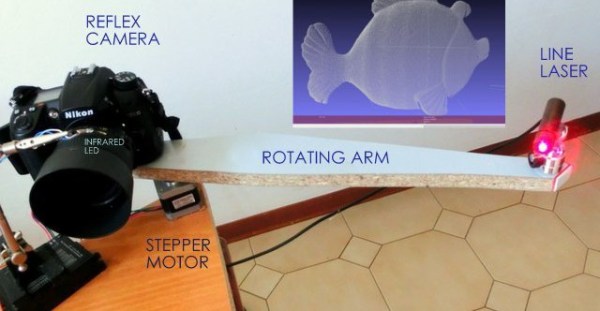
Modeling simple objects in 3D can take some time. Modeling complex items… well you can get your college degree in that sort of thing. This method side-steps the artistic skill necessary to make the real virtual by using a laser and camera to map a three-dimensional object.

[Alessandro Grossi] is breaking the rules by using a 100mW laser for the project. He thinks that the Italian government prohibits anything over 5mW, but also mentions that the lens used to turn the laser dot into a vertical line drops the power dramatically. The beefy diode does still pay off, providing an incredibly intense line of light on the subject being mapped. The high-end DSLR camera mounted on the same arm as the laser captures a detailed image, which can be processed to dump everything other than the laser line itself. Because the two are mounted on different axes, the image provides plenty of perspective.  That translates to the 3D coordinates used in the captured model shown in the inlaid image.

We’ve seen 3D scanners that move the subject; they usually rotate it to map every side. This method only captures one side, but the stepper motor moves in such small increments that the final resolution is astounding. See for yourself in the video after the break.

Continue reading “3D Scanner With Remarkable Resolution”

Everything You Need To Know To Make A Laser Engraver From Scrap

make-a-laser-engraver-from-scrap

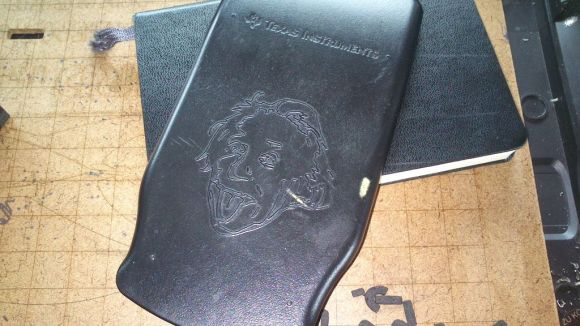
Check out the Einstein head which [Sebastian Müller] etched on the cover of his calculator using a laser engraver he made from scratch. We think he did a great job with the build, but we’re even more impressed with the work he put into sharing the techniques he used to salvage and repurpose all the components. It’s a perfect resource that should be pretty easy to adapt to different model/manufacturer source hardware.

He used an old scanner and an old printer for the bulk of the parts. These both originally included stepper-motor actuated gantries, which pull together to form the x and y axes in his Frankenstein Laser Engraver. As the parts came together he started in on the control electronics which include a couple of EasyDriver stepper motor boards and an Arduino.

At this point he took the machine for a test-run, attaching a marker to the carriage to use it as a pen plotter. After putting in a solid performance at this [Sebastian] moved on to adding in the laser diode. He covers how to drive the diode, as well as focal point alignment in great detail. It seems like his webpage post has the same content as the Instructable linked above but we wanted to leave the link just in case.

Scratch-built 3D Printer Shows Rock-solid Performance

scratch-built-3d-printer

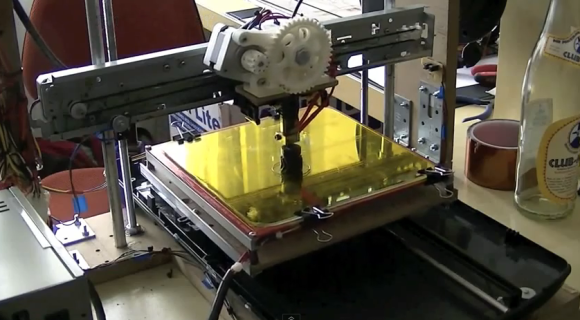
These days it’s super-easy (not super-cheap) to go out and buy a 3D printer. But if you’ve got the mad skills like [Mario Lukas] maybe you can build a 3D print using a bunch of scavenged parts (translated). He’s published six posts on the build, and put together an overview video which you can watch after the break.

A pile of salvaged parts were found in a scanner and four different printers. He’s also powering the thing with an old PC PSU. The hot bed and extruder are brand new, which is a wise investment. We’re not sure about the threaded rod and bearings but we’d bet those are new as well. When it came time to work on the electronics he chose an Arduino board as the go-between for the printer and computer. It uses four stepper motor driver boards to drive the axes. Connections can be a bit complicated and he actually ‘smoked’ one of the boards during the development phase.

One of the mechanical build posts shows a belt routed in a T-shape. We wonder if it’s function is similar to what this H-bot style printer uses?

Continue reading “Scratch-built 3D Printer Shows Rock-solid Performance”

SDR As A Police And Fire Radio Scanner

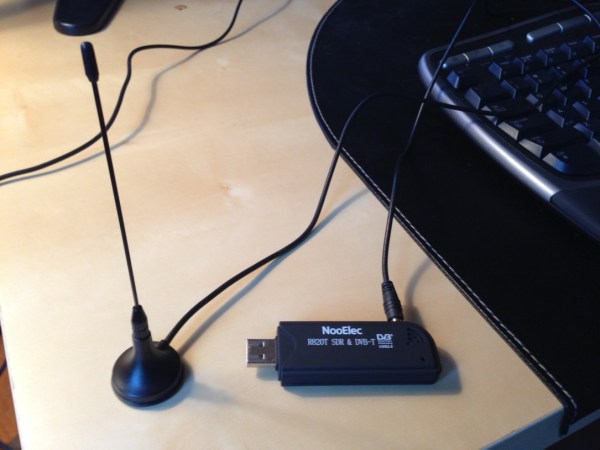
If you’ve lost interest in that DVB dongle you bought to give software defined radio a try you should bust it back out. [Harrison Sand] just finished a guide on how to use SDR to listen in on Police and Fire radio bands.

The project, which results in the crystal clear audio reception heard after the break, uses a whole lists of packages on a Windows box to access the emergency bands. SDRSharp, which has been popular with other DVB dongle hacks, handles the hardware work. In this case the dongle is a Newsky TV28T v2 module that he picked up for a few bucks. He’s also using some support programs including the Digital Speech Decoder which turns the data into audio.

We wonder how many areas this will work for. It was our understanding that law enforcement was moving to encrypted communications systems. But all we really know about it is that you can jam the system with a children’s toy.

Continue reading “SDR As A Police And Fire Radio Scanner”

Makerbot Shows Off 3D Scanner

scan

We’ve said our piece over Makerbot and their interpretation of what Open Source means, but the fact remains if you’re sourcing a 3D printer for a high school shop class or a hackerspace, you really can’t do much better than a Makerbot Replicator. Apparently Makerbot is looking to expand their 3D design and fabrication portfolio; they just announced an upcoming 3D scanner at SXSW. It’s called the Makerbot Digitizer, and it takes real, 3D objects and turns them into CAD files.

Since Makerbot and [Bre Pettis] didn’t give out much information about the 3D scanner they’re working on, the best information comes from Techcrunch. The Makerbot Digitizer uses two lasers to scan real objects and turns them into 3D CAD files. The hardware isn’t finalized, and the prototype is made of a few pieces of laser cut plywood. No details are available on how much the Digitizer will cost, when it will be available, or what its resolution is.

Of course 3D scanning of real objects to translate them into CAD files is nothing new for Hackaday readers. We’ve seen our fair share of desktop 3D scanners, including one that was built in a day out of junk. Even the Kickstarter crew has gotten into the action with a few desktop 3D scanners, some of which scan in full color.